This guide will show you how you can integrate Apploye with Jira.
Step One: Application URL
Application URL: Copy the URL from your Atlassian application (e.g., https://yourcompany.atlassian.net) and paste it here.
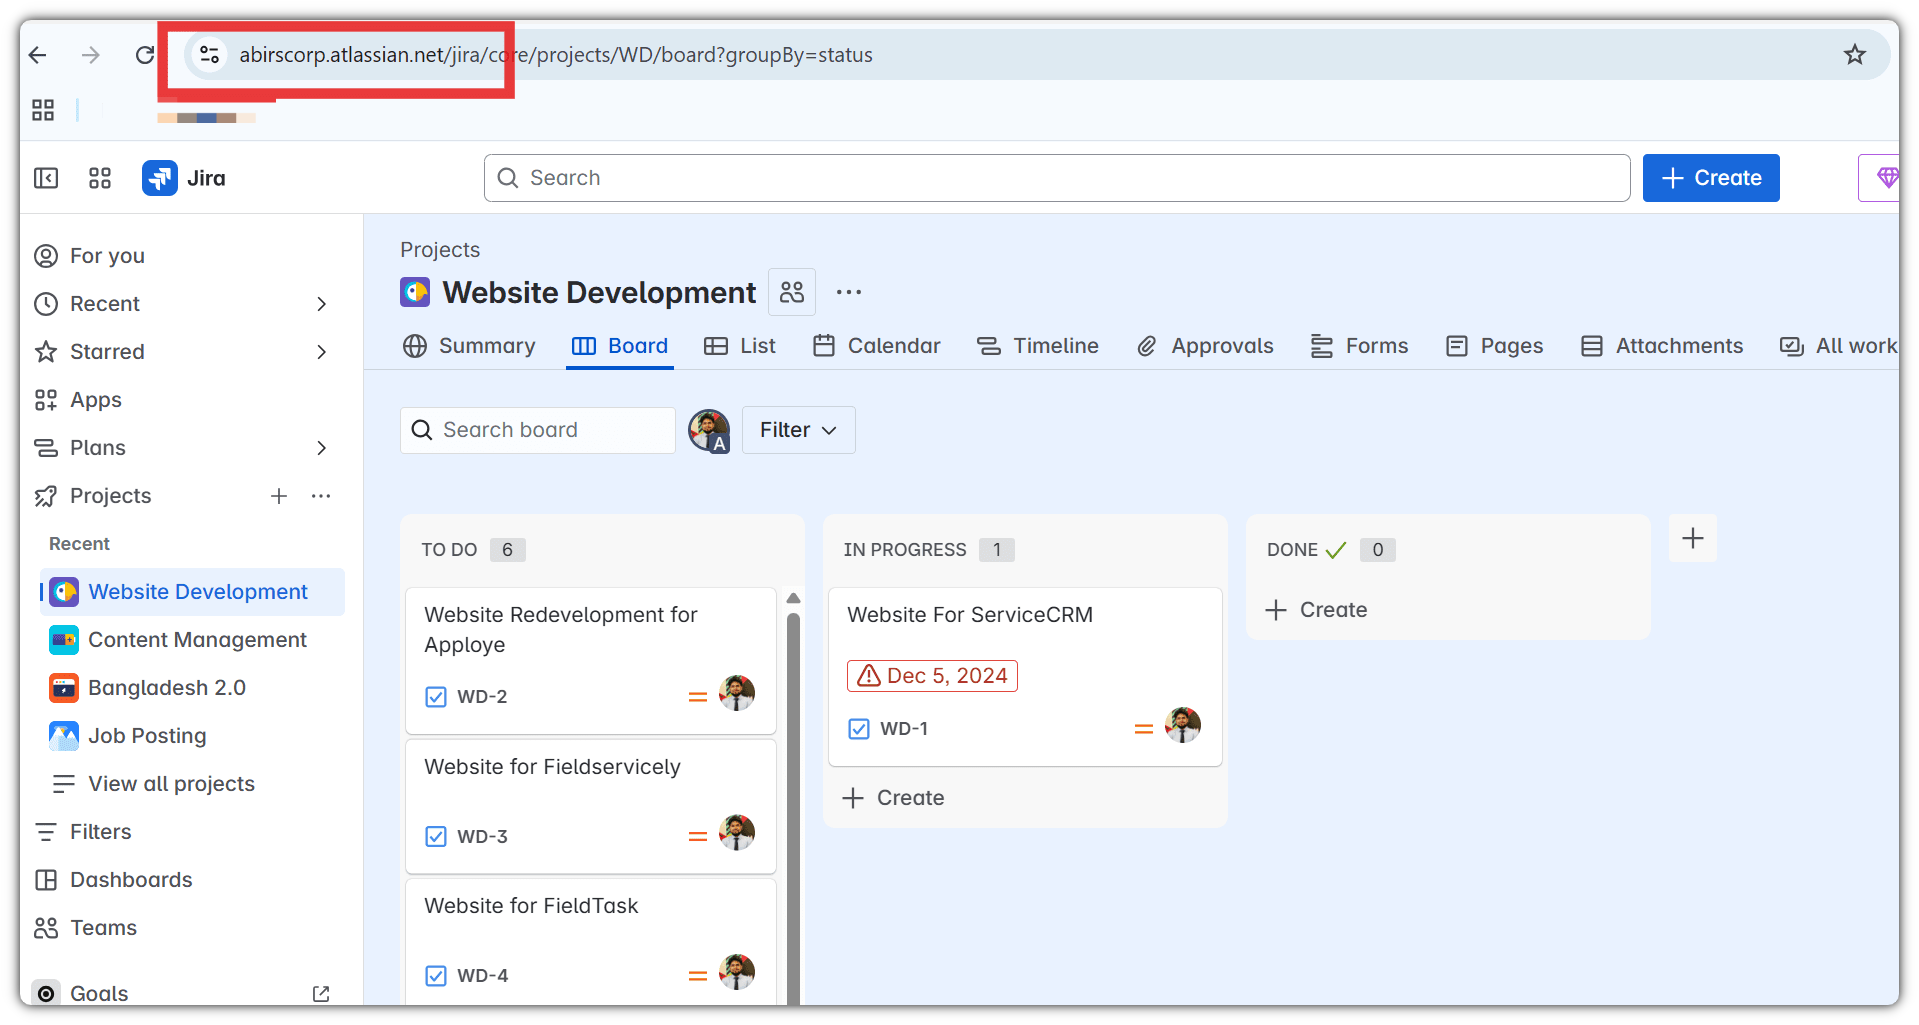
👉 After copying the URL, paste it here:
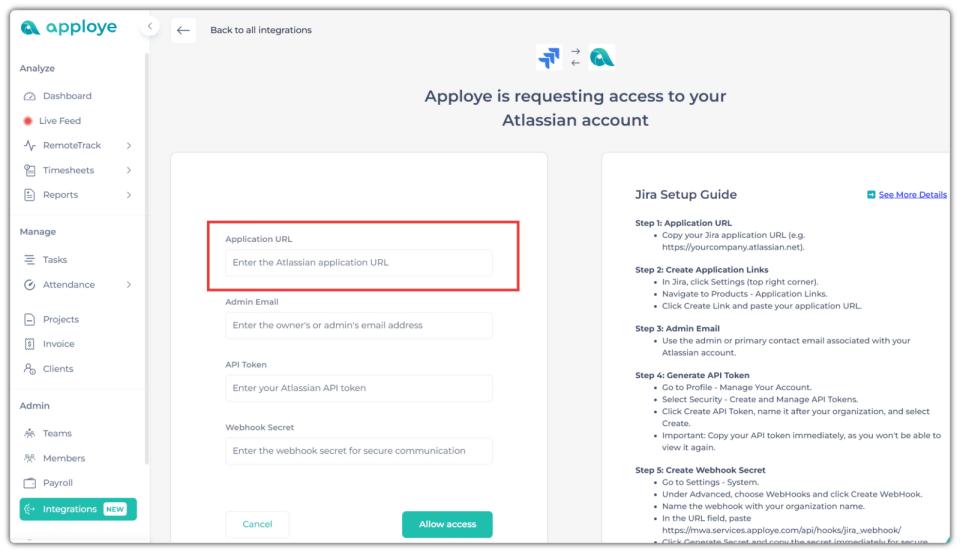
Step Two: Admin
Please use the email address of the account owner or administrator, which is usually the primary contact for your Jira setup.
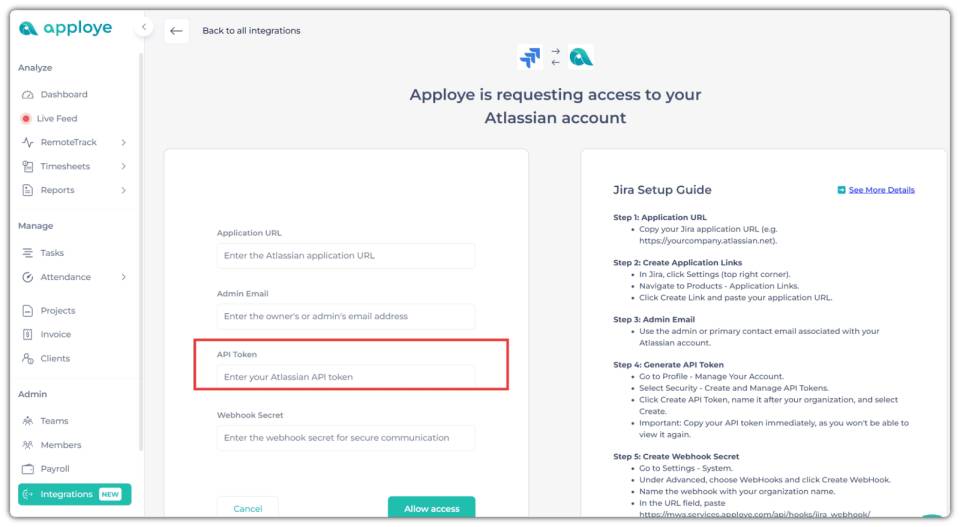
Step Three: API Token
Generate an API token from Atlassian API Tokens with these steps:
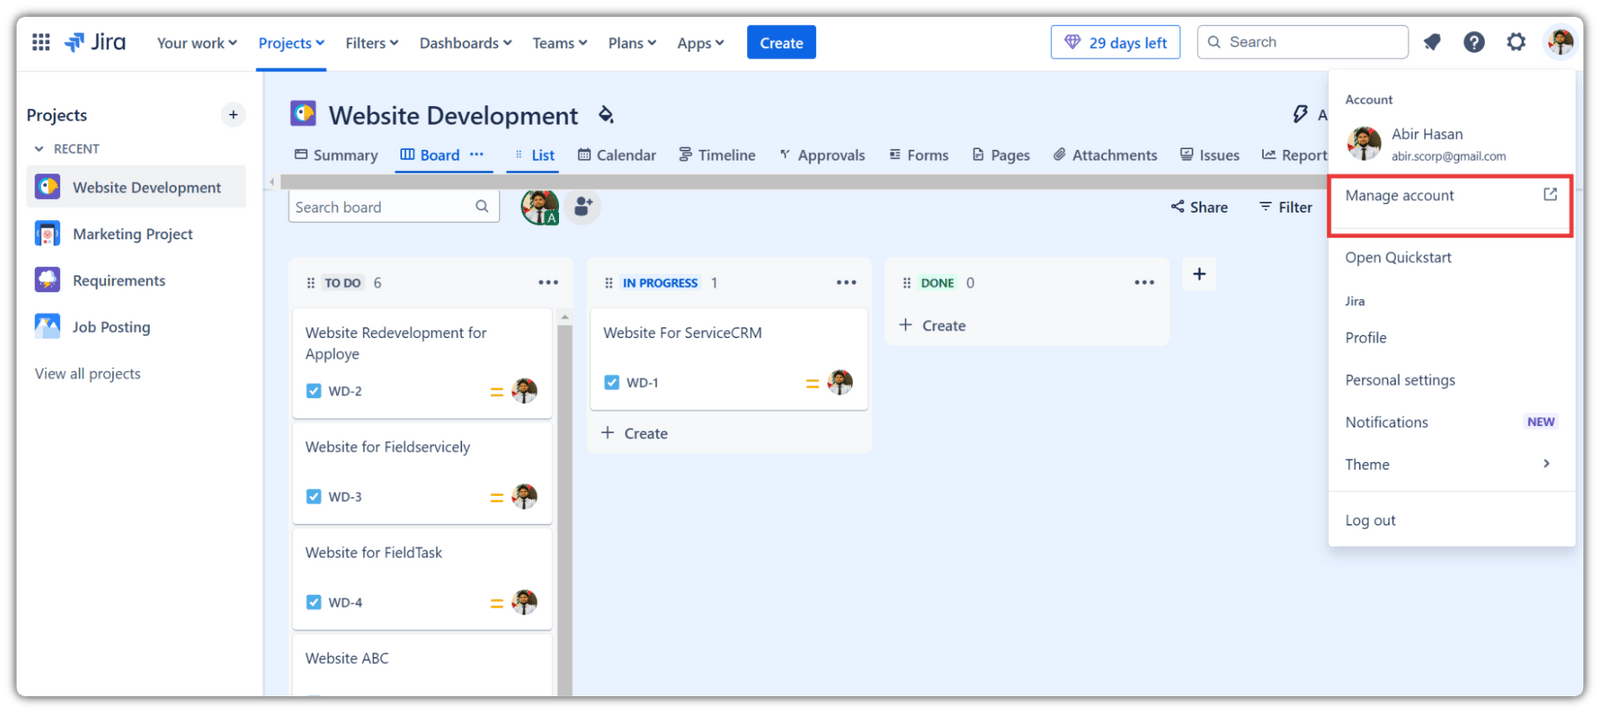
- Go to Profile > Manage your account.
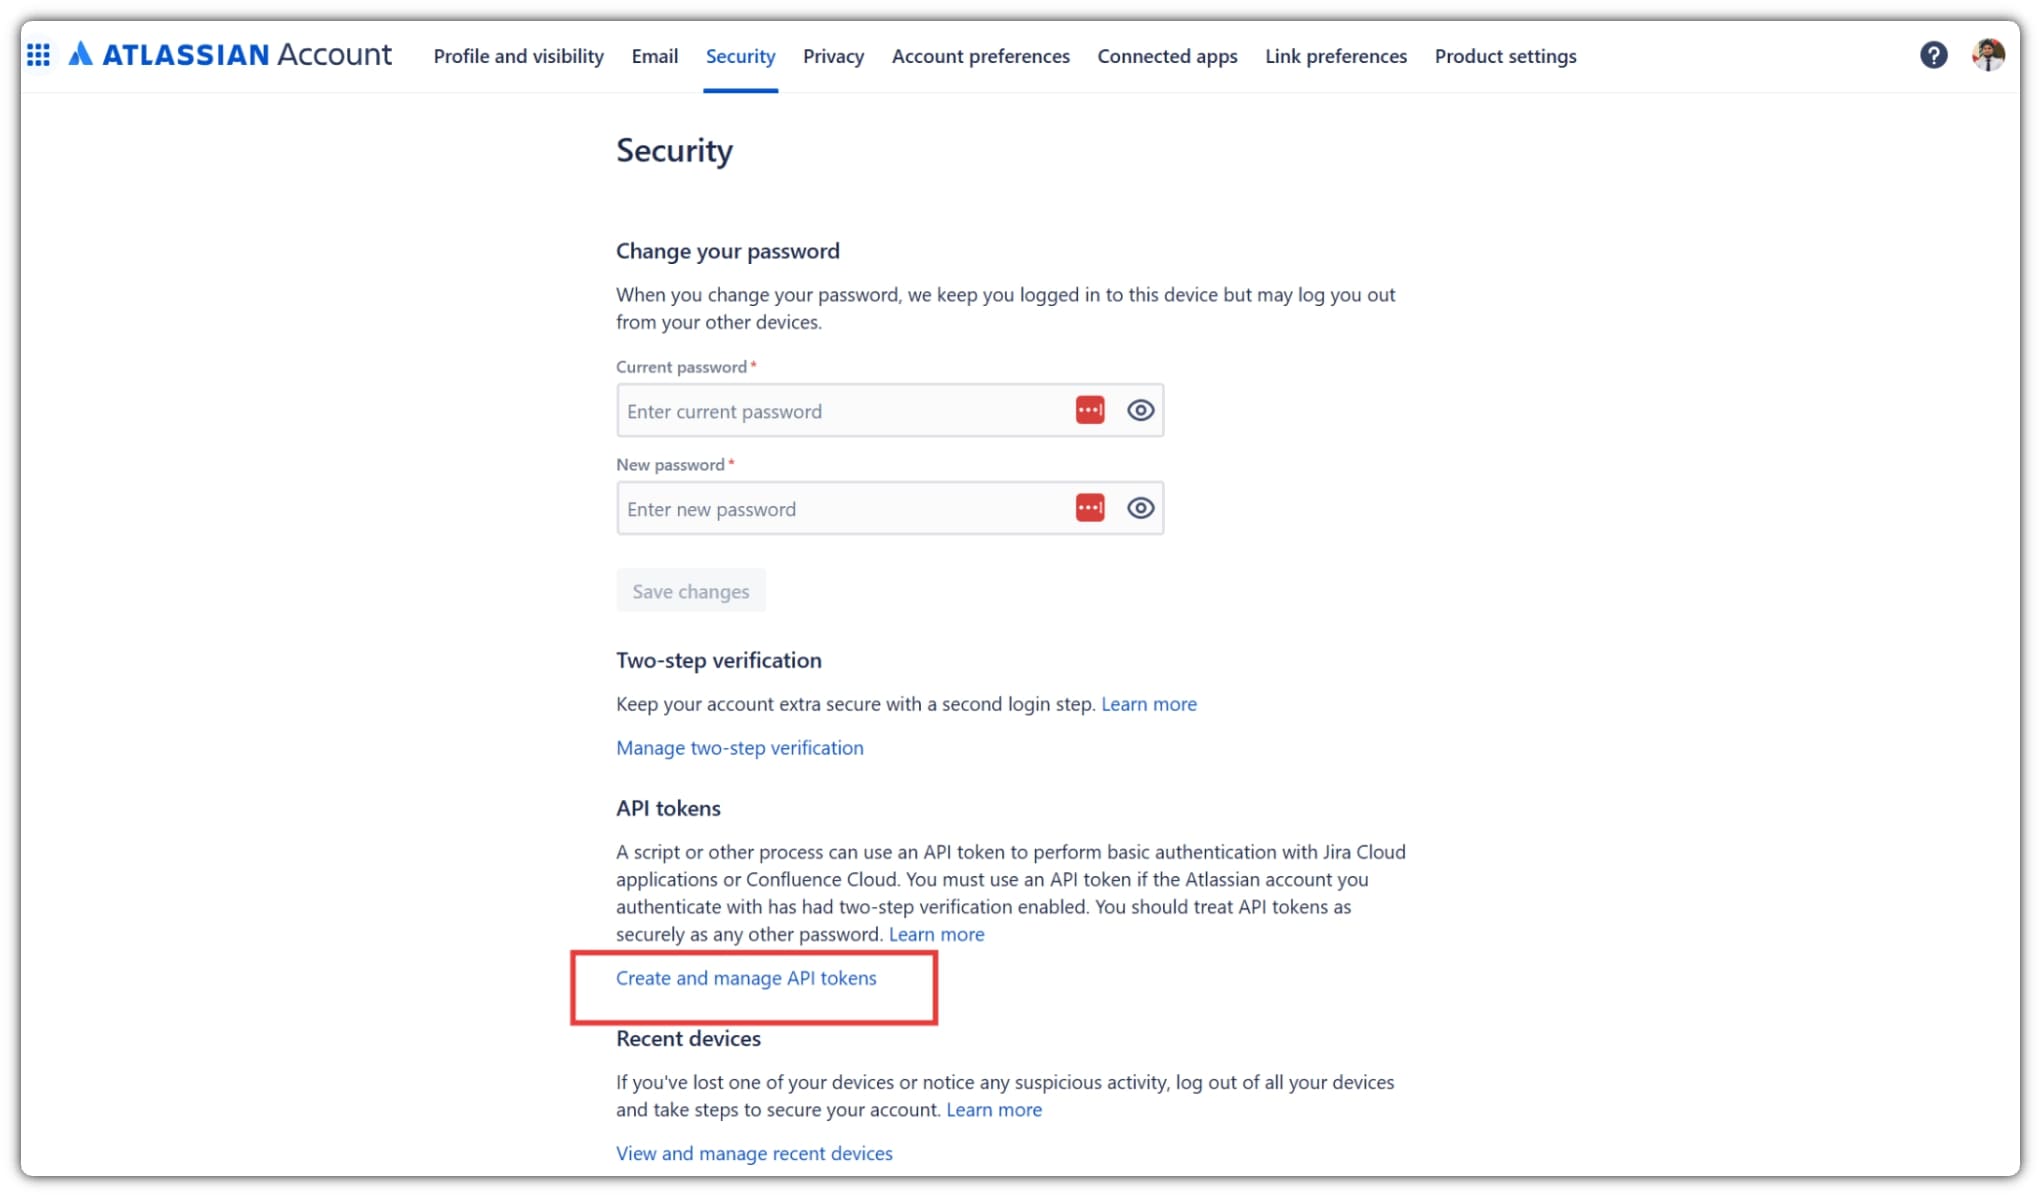
- Select Security > Create and manage API tokens.
- Click Create API token. After clicking on Create, type your organization name.
1. Go to Profile > Manage your account.
2. Security > Create and manage API tokens.
3. Click Create API token.
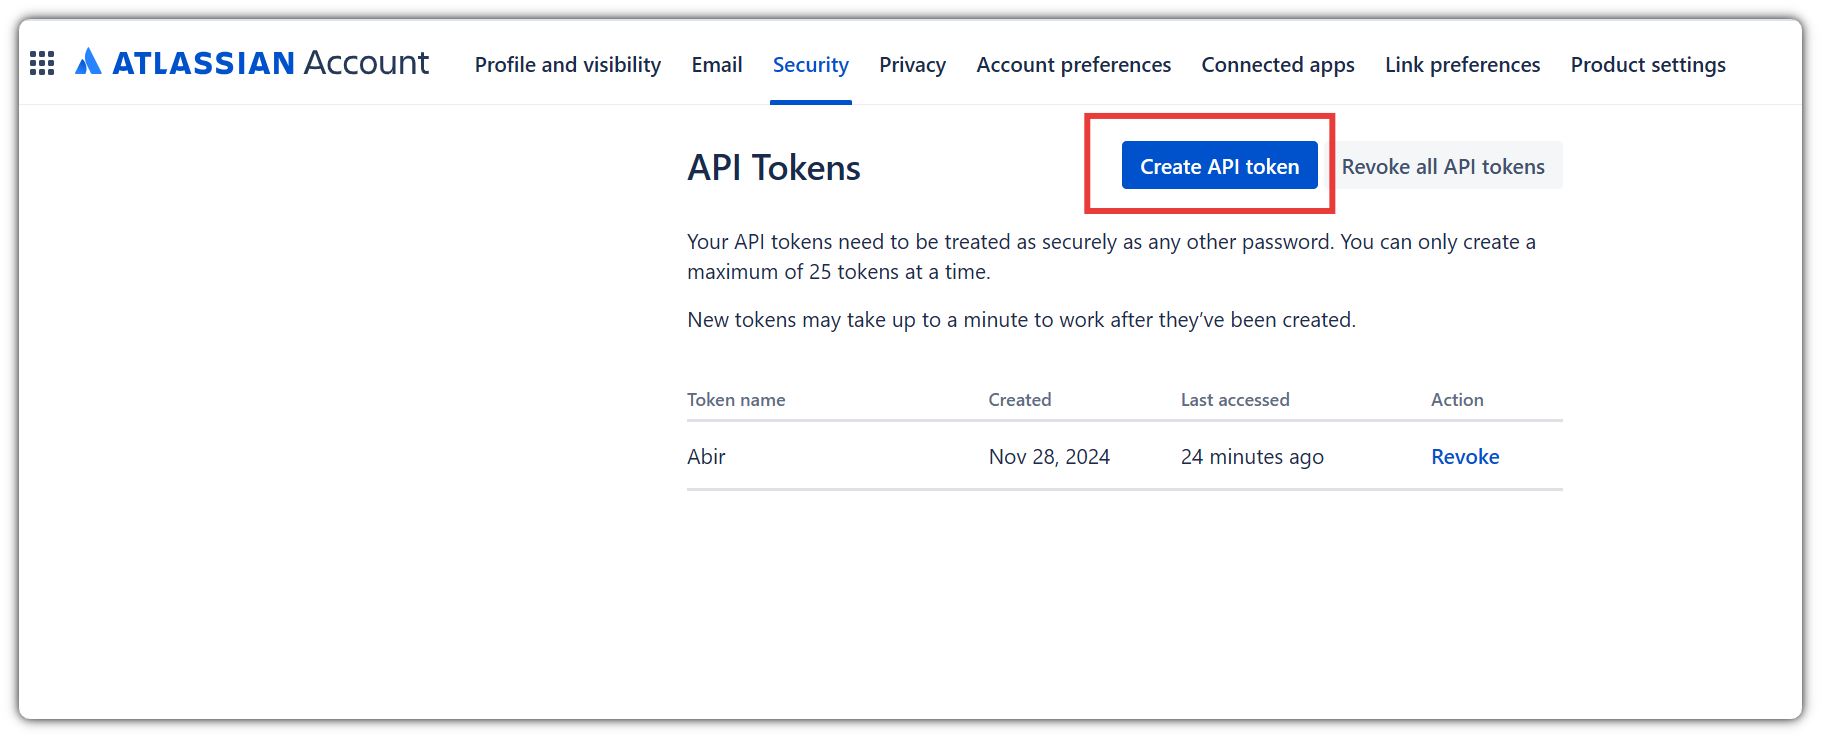
4. After creating the API token, copy the API token and paste it into the Apploye Jira integration page.
Step Three: Webhook Secret
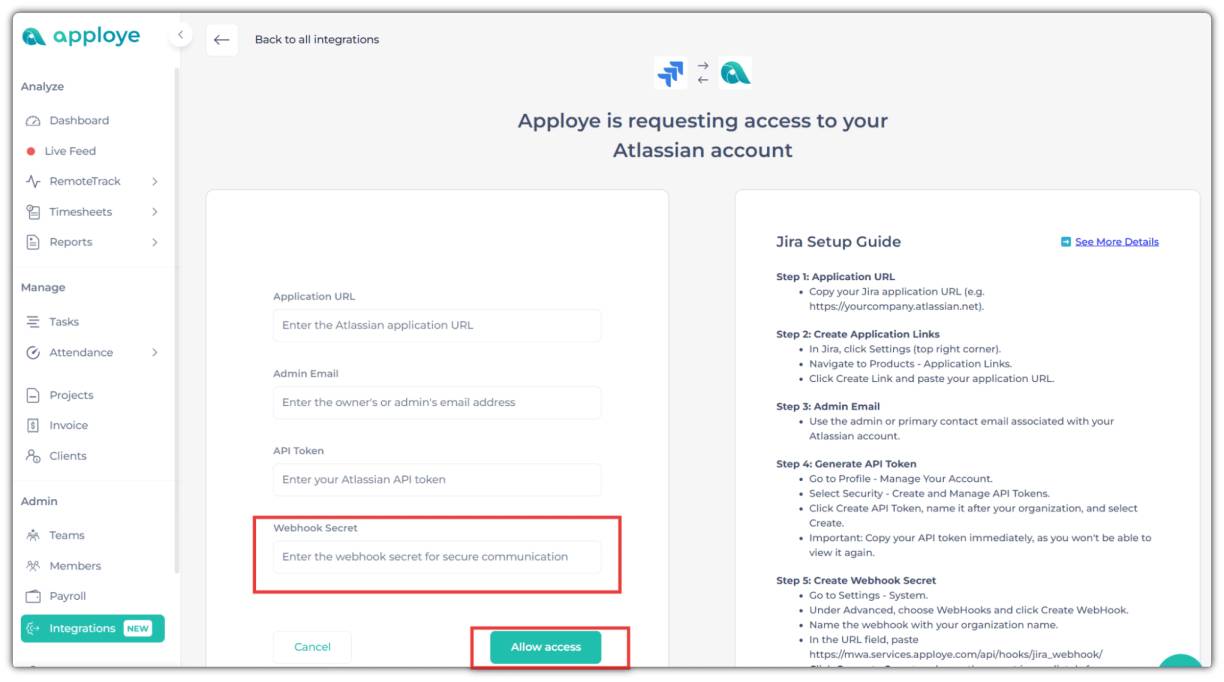
Enter the webhook secret here. This secret is used to verify secure communications and is generated in the webhook settings.
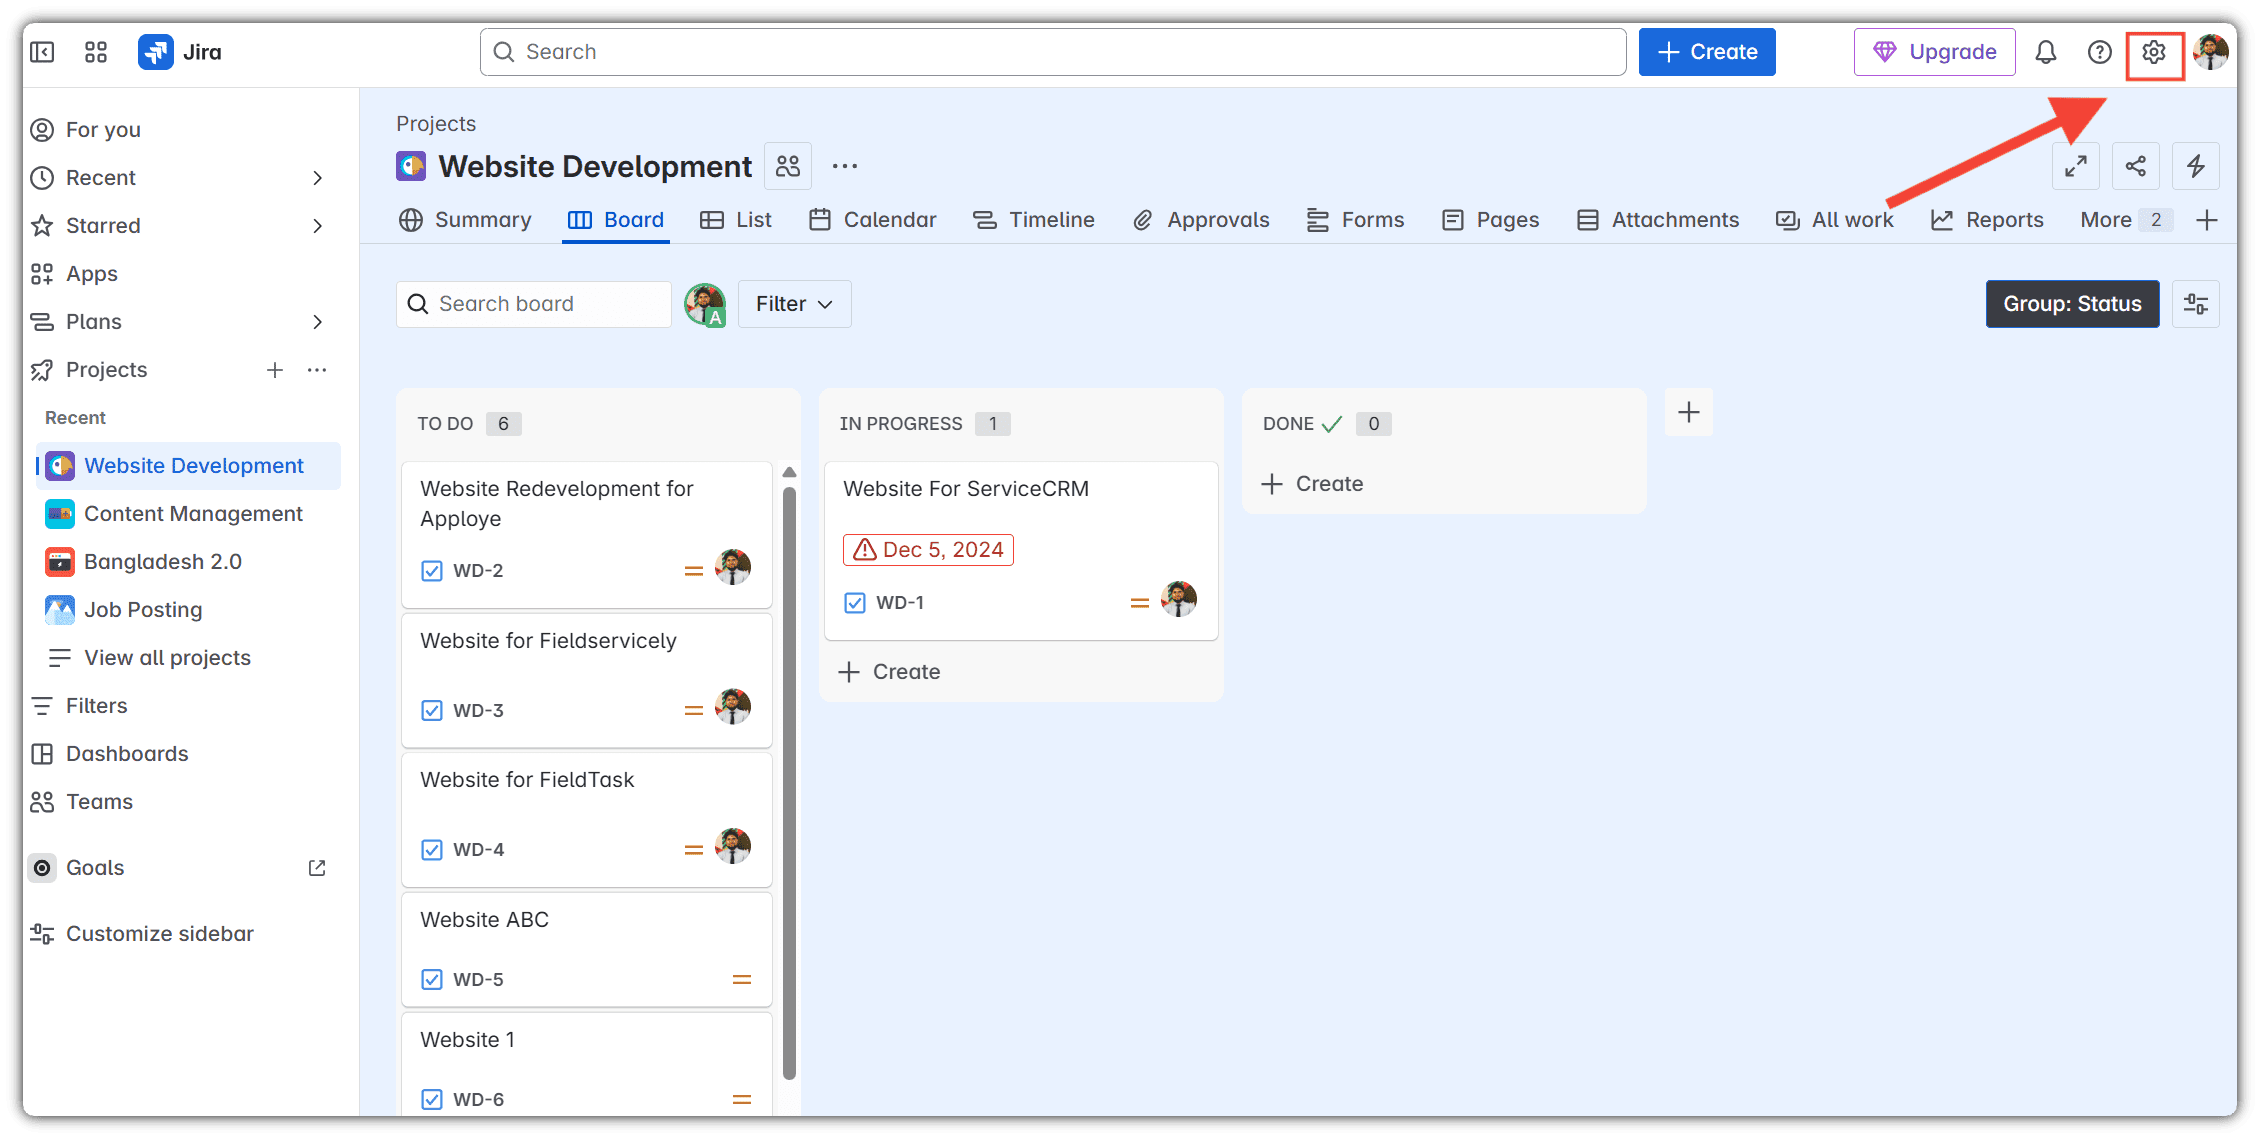
- Go to Settings > System.
- Under Advanced, select WebHooks.
- Click Create WebHook and type your organization name.
- In the URL field, paste https://mwa.services.apploye.com/api/hooks/jira_webhook/
- Click Generate secret.
- Go to Settings > System.
2. Under Advanced, select WebHooks.
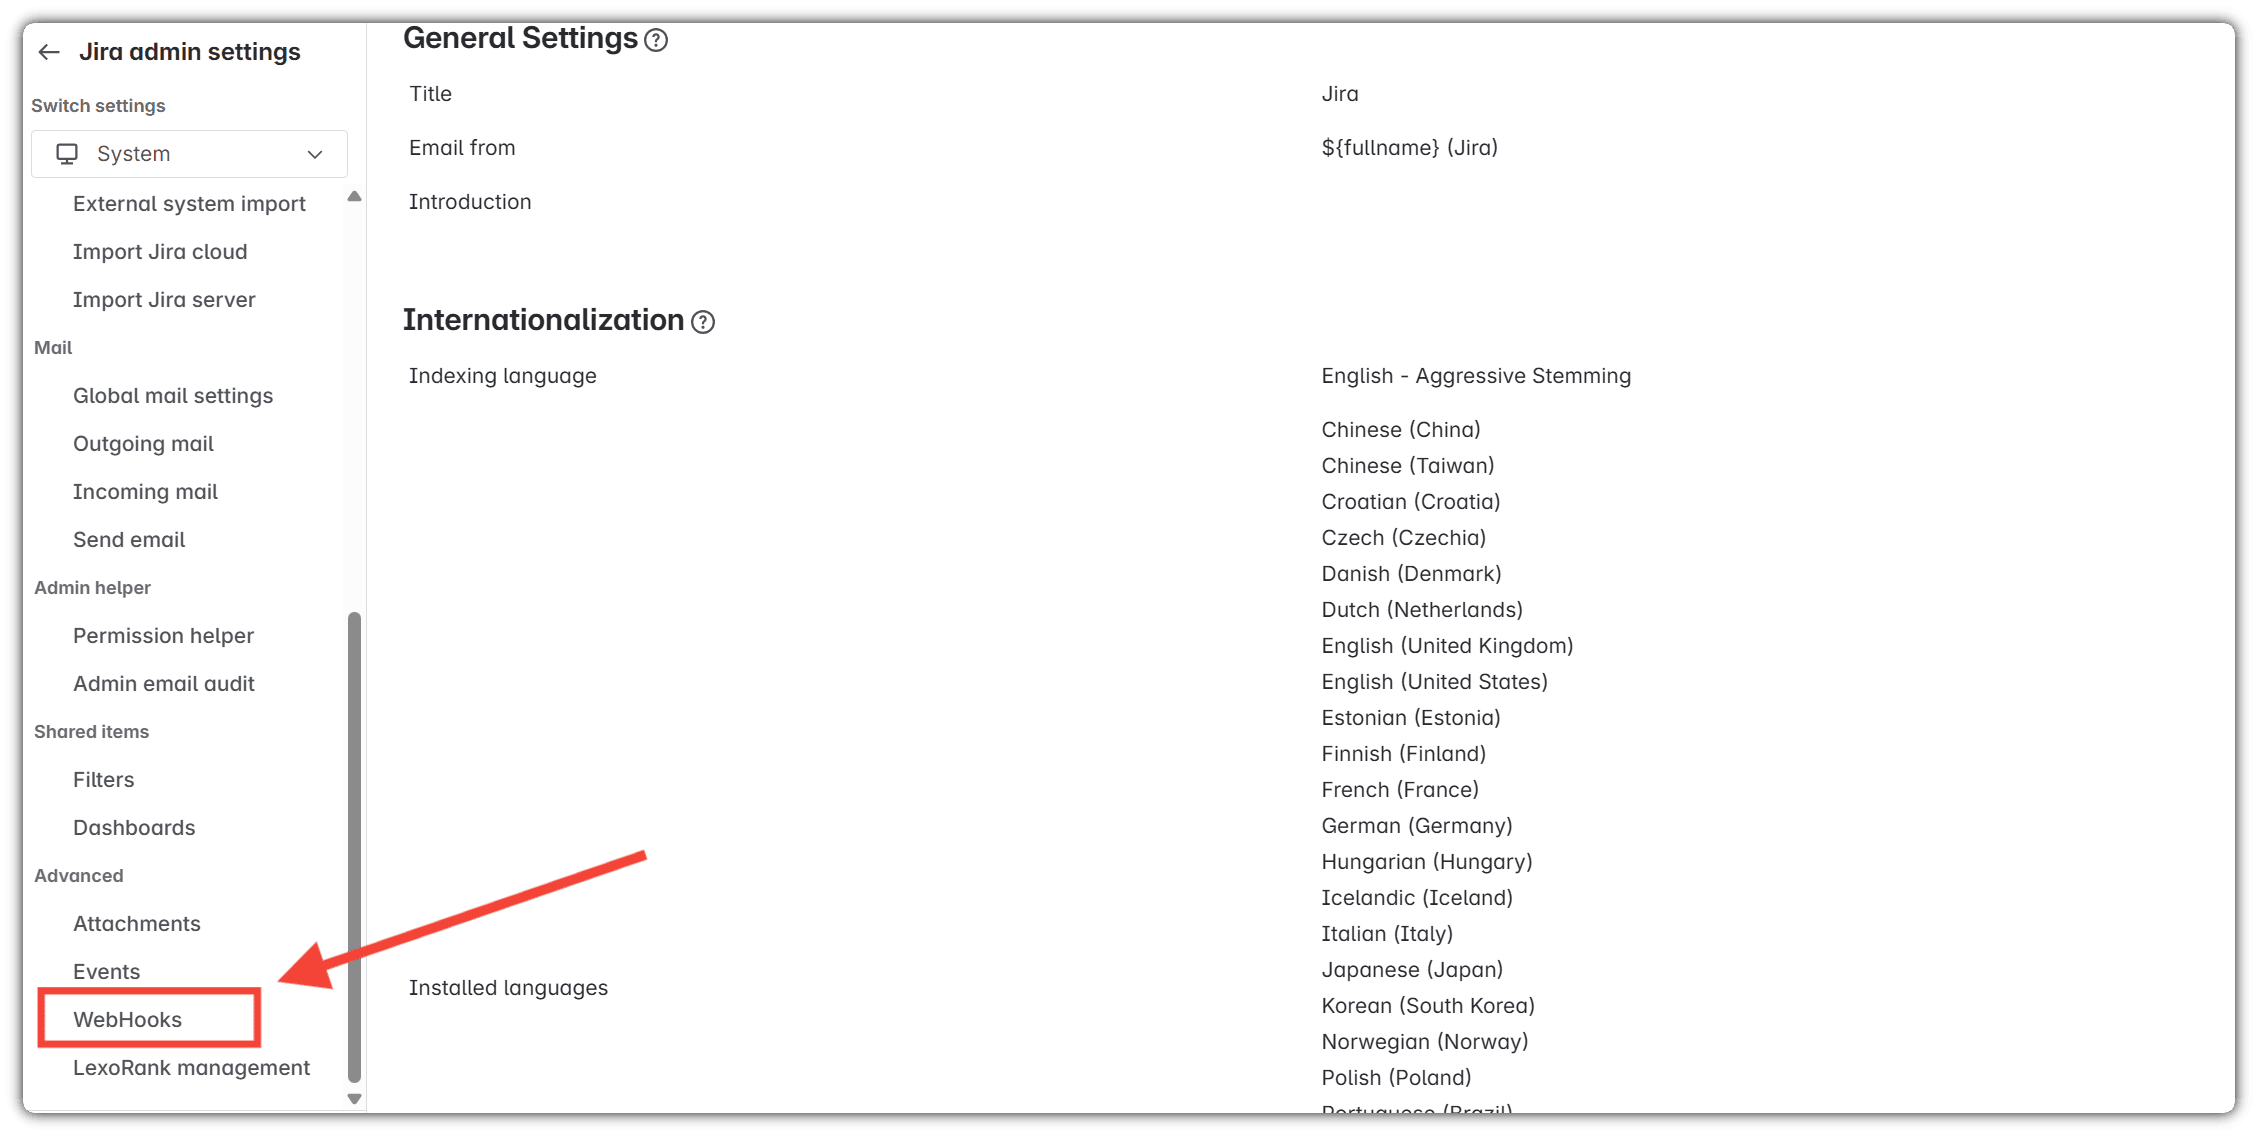
3. Click Create WebHook.
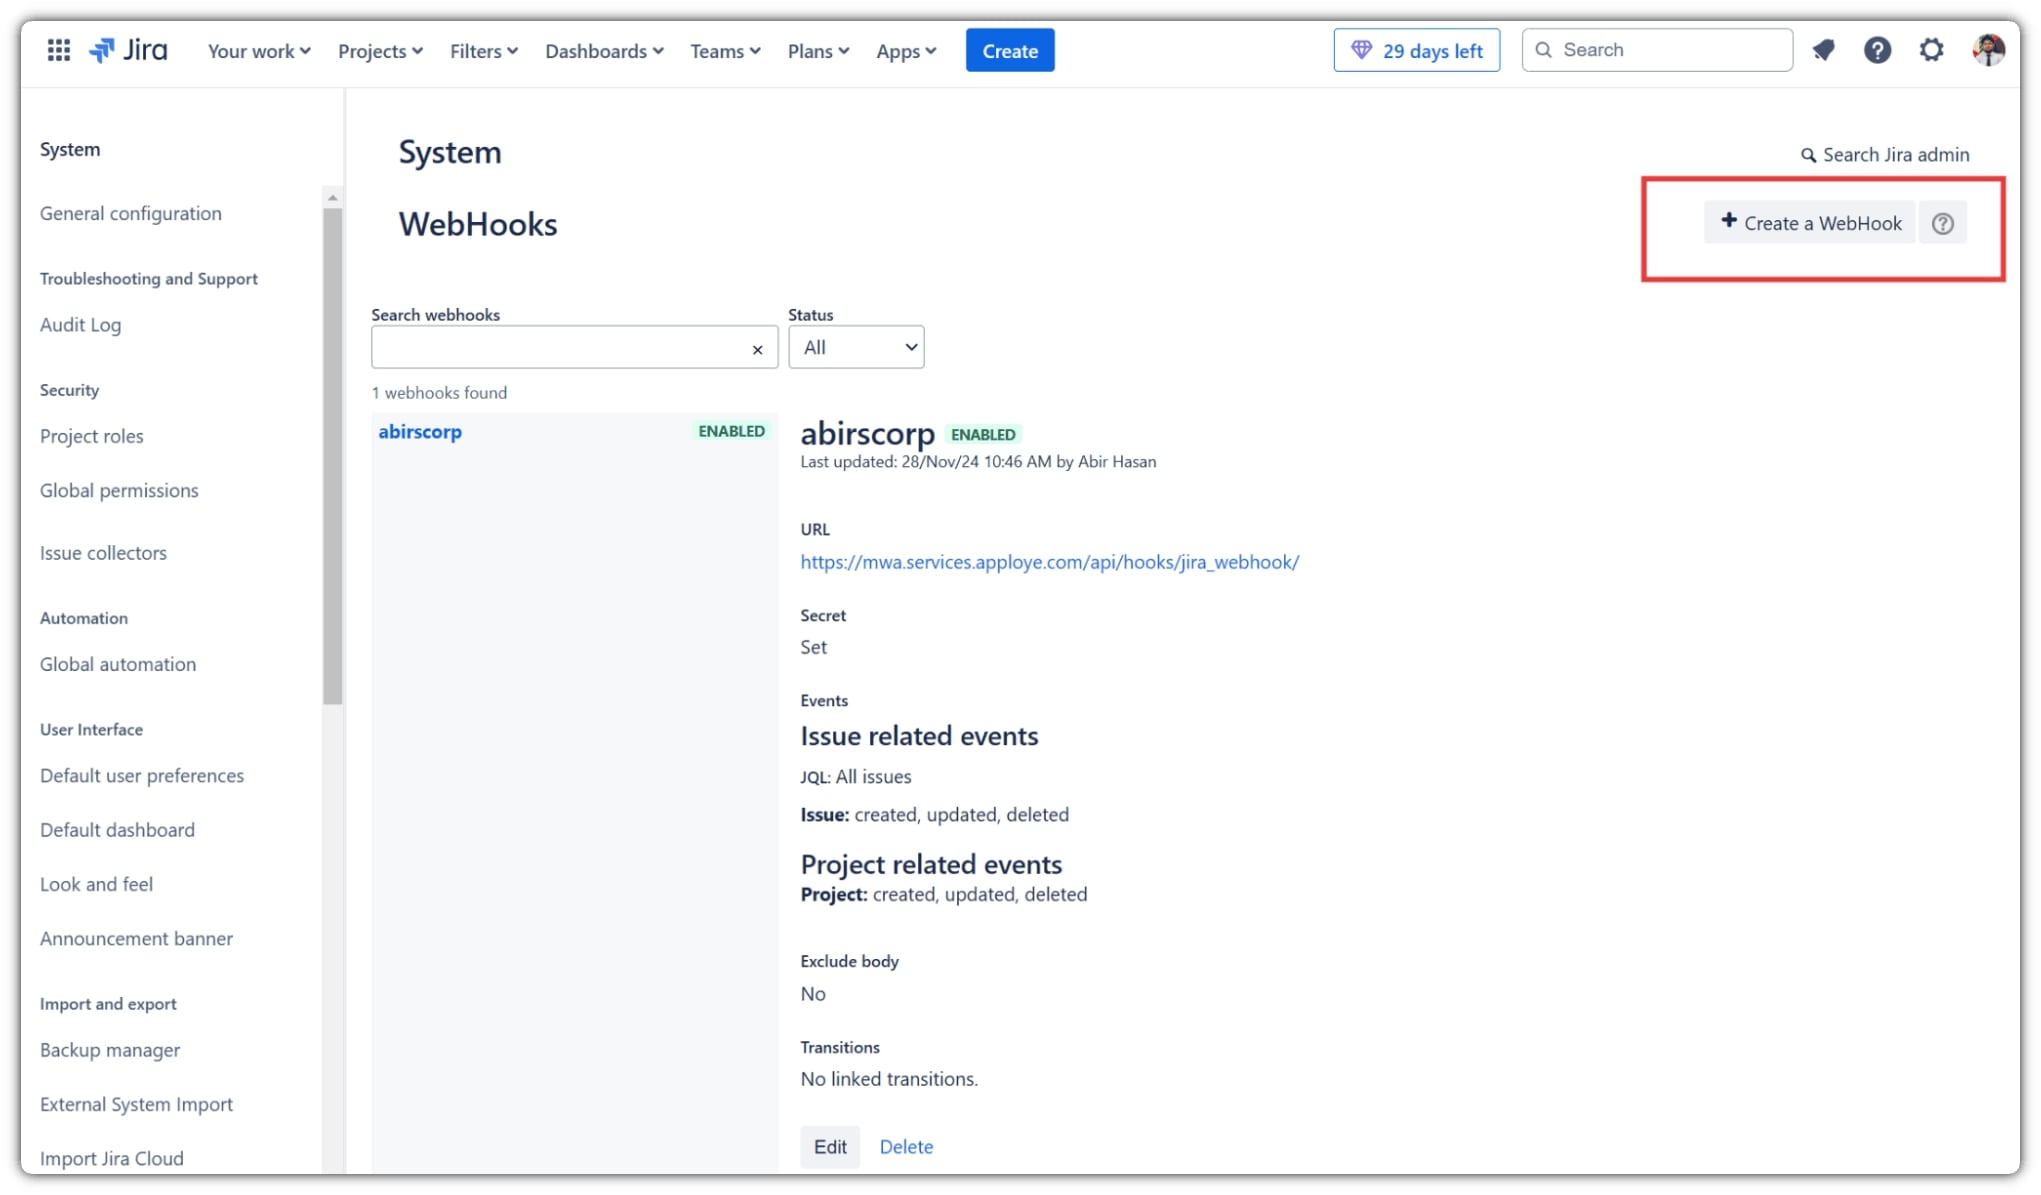
4. First, in the name field, type your organization name, and in the URL field, copy this URL (https://mwa.services.apploye.com/api/hooks/jira_webhook/)and paste it.
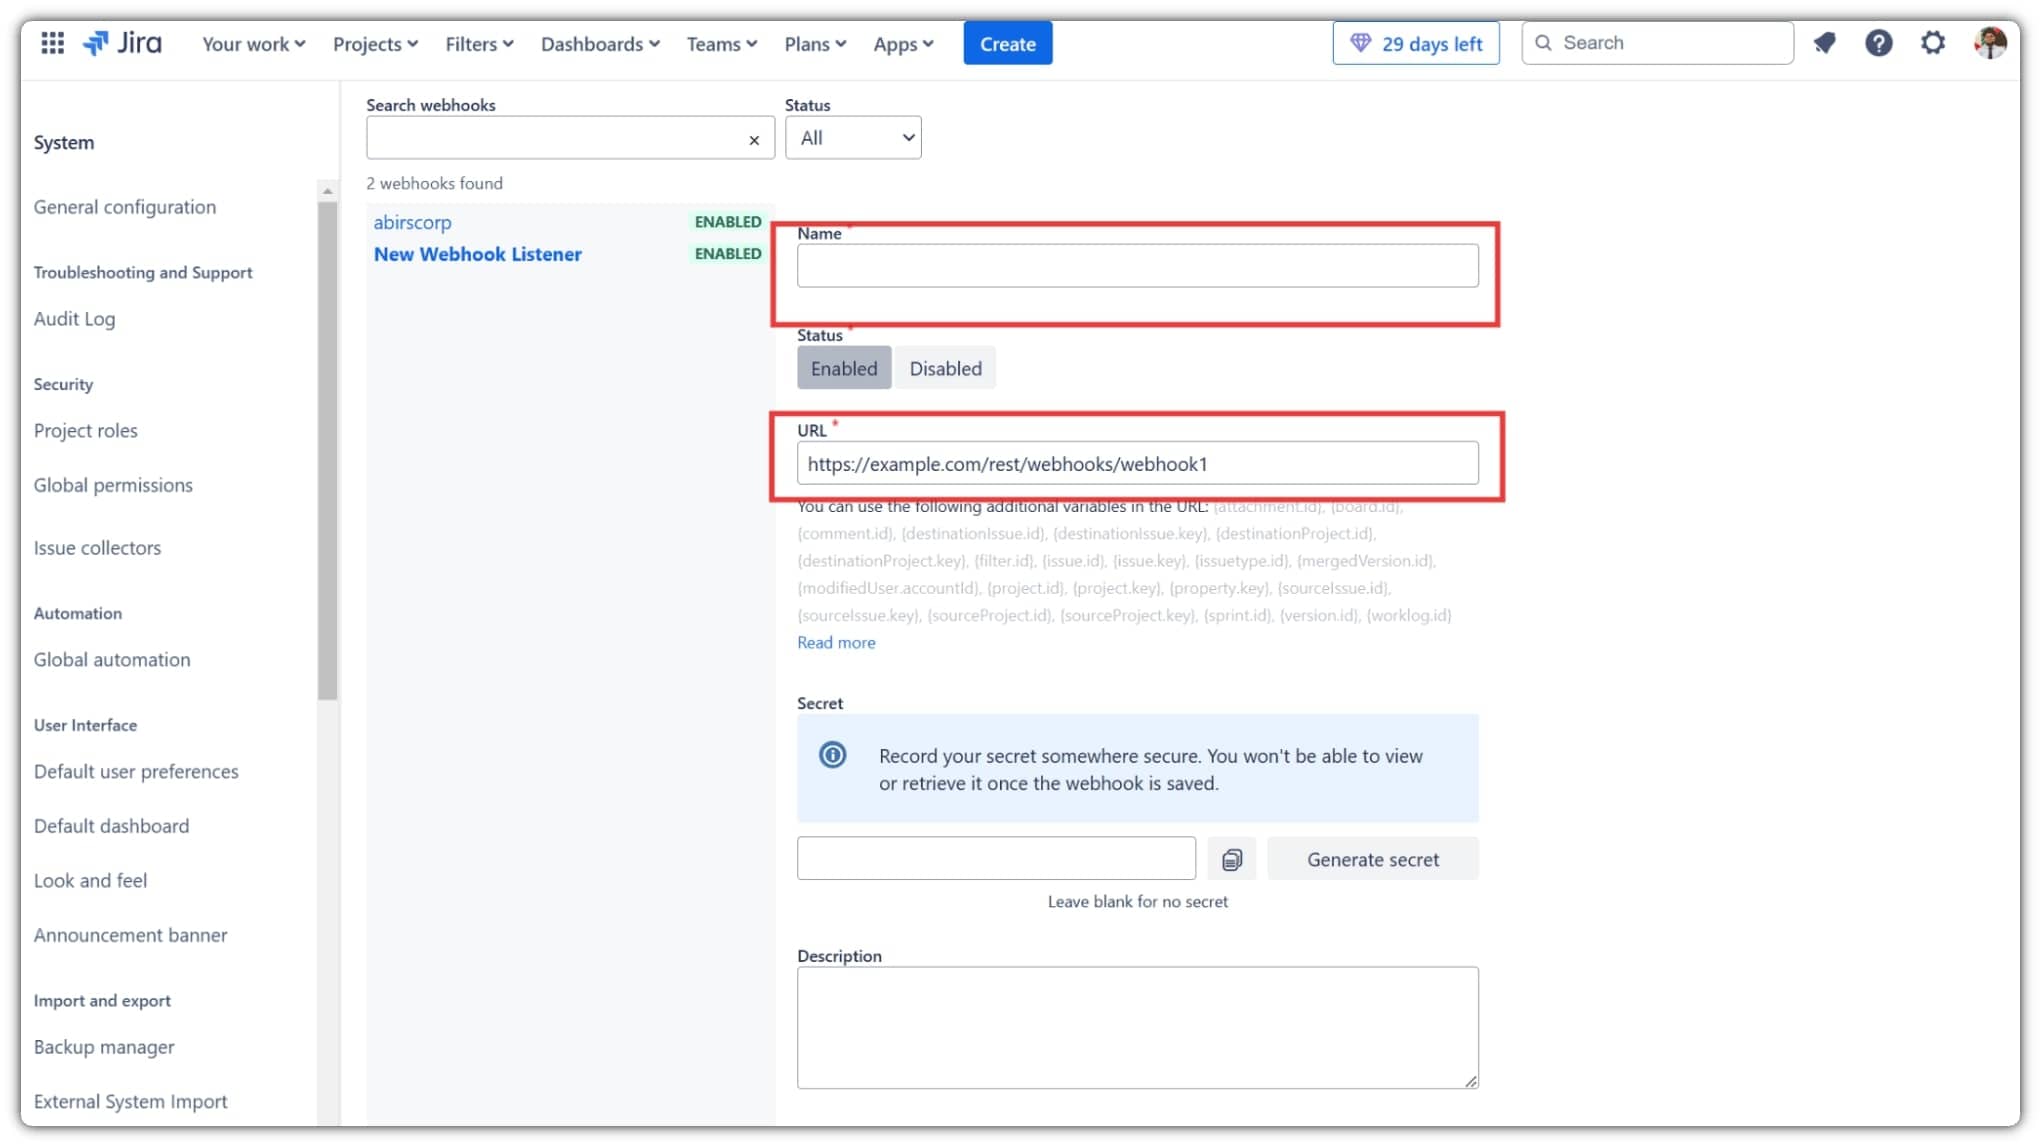
5. After that, click Generate secret.

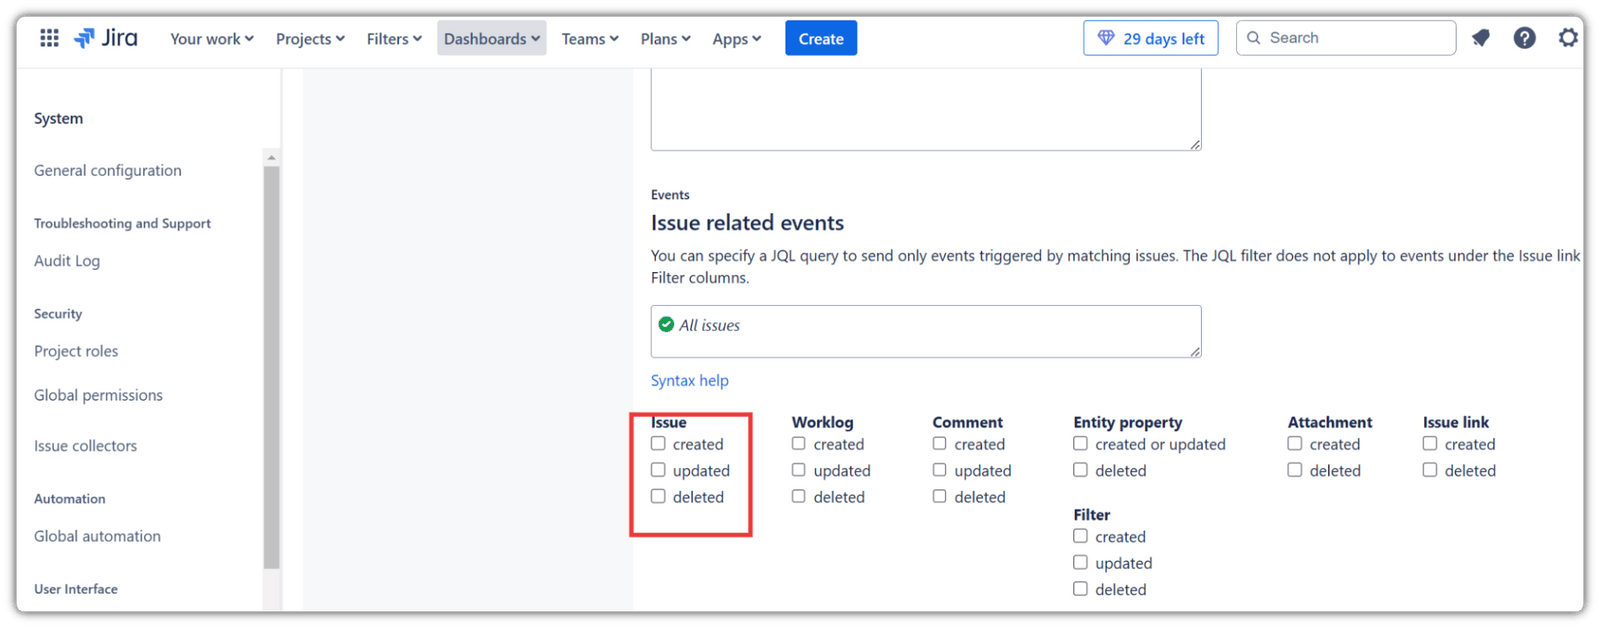
👉 For the webhook to respond to specific events, ensure the following events are selected:
Issue-Related Events
- Issue Created
- Issue Updated
- Issue Deleted
Project-Related Events
- Project Created
- Project Updated
- Project Deleted

👉 After generating the secret, copy this and paste it.
For the General Members:
To allow others to invite you as a member, please enable your email visibility for "Anyone."
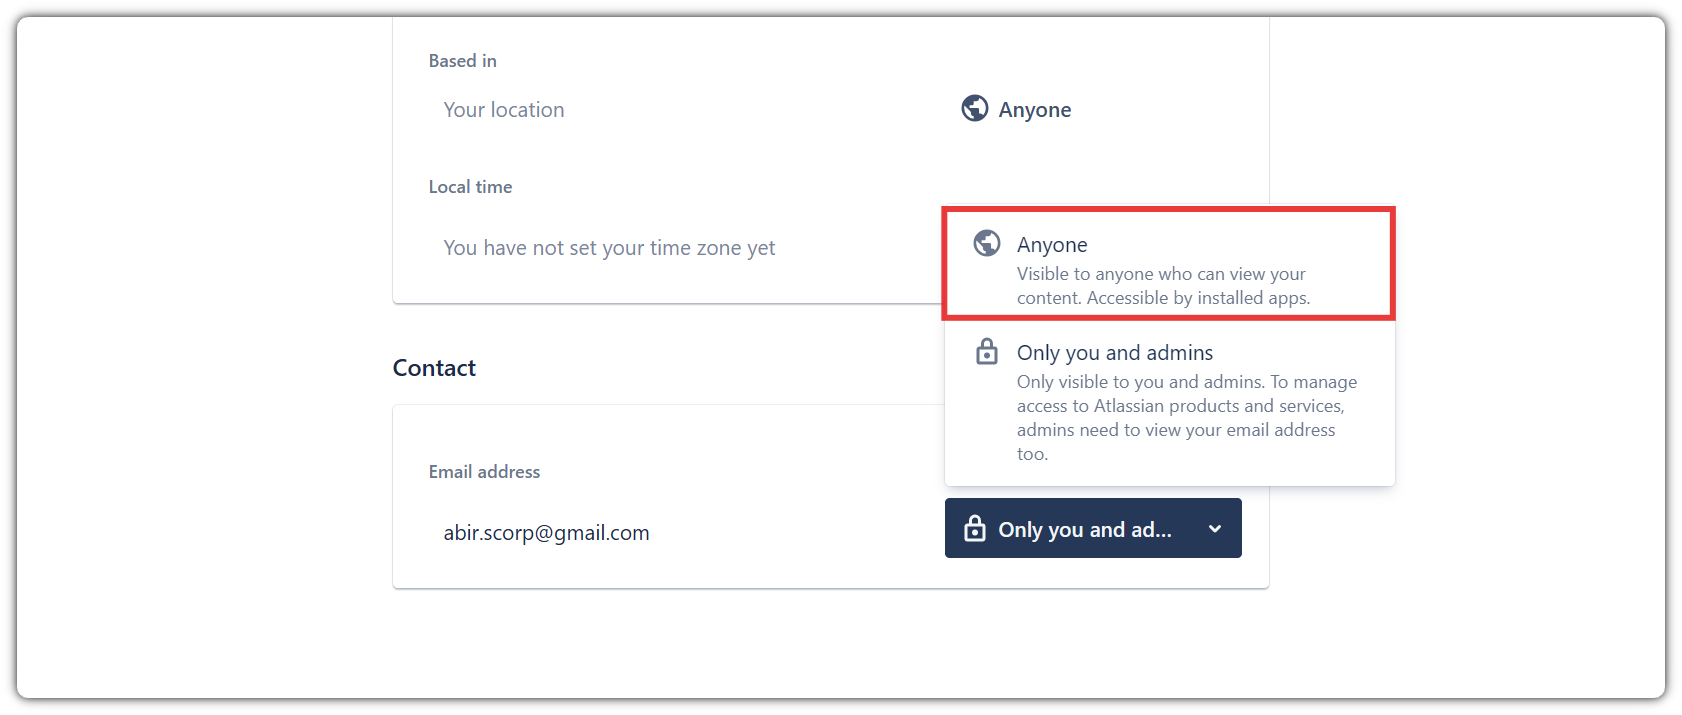
Follow these steps:
- Access Your Profile
- Click on your profile icon, typically located in the top-right corner of the screen.
- Select "Manage Profile" or click here to access your profile directly.
- Navigate to Visibility Settings
- In the profile management section, locate the "Profile and Visibility" options.
- Adjust Email Visibility
- Find the setting for Email Visibility.
- Change the setting to "Anyone" to allow everyone to view your email address.
To Enable Time Tracking in Jira:
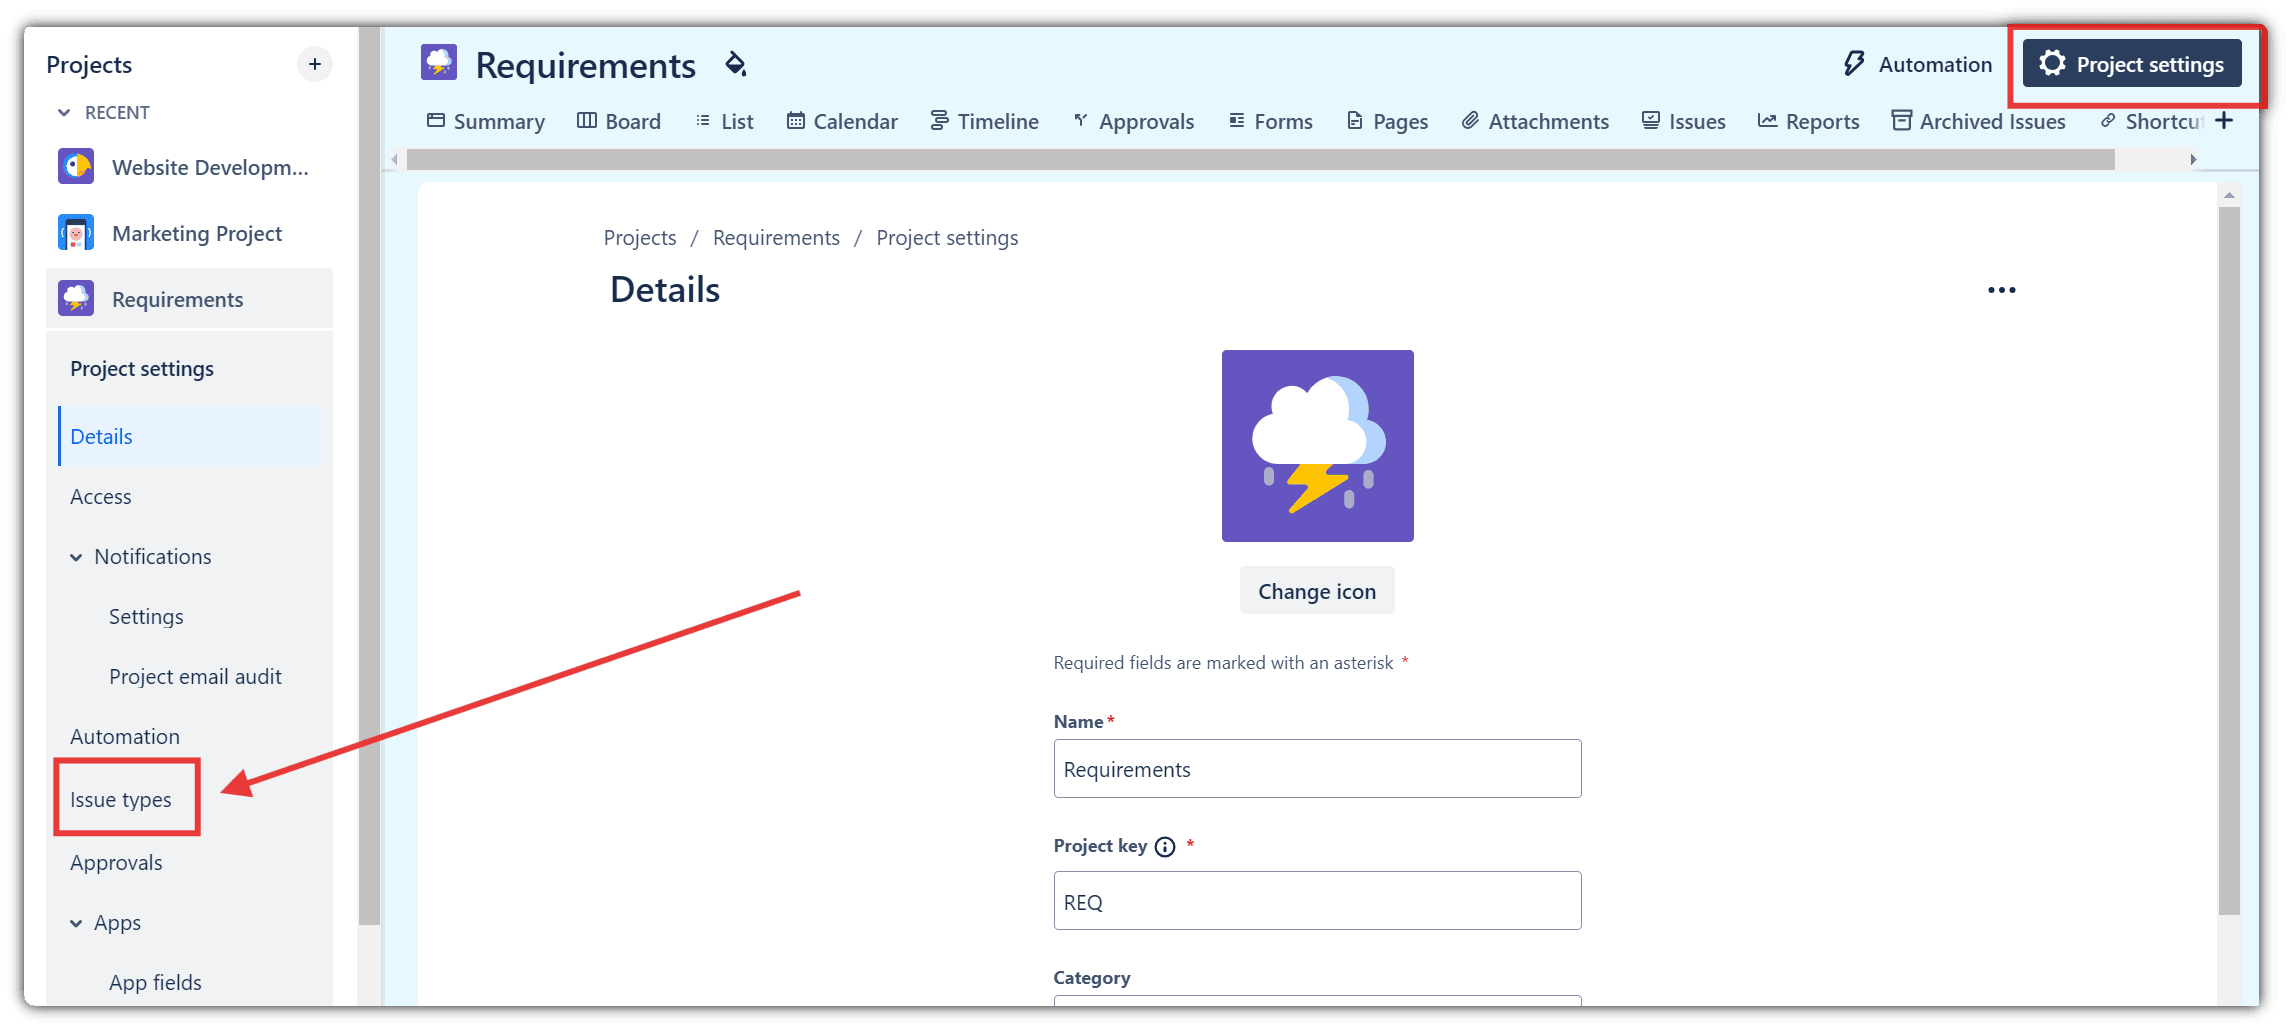
Follow these steps to enable time tracking in Jira. After that, you will be able to see the timesheet in your Jira dashboard.
- Go to Project Settings.
- Select Issue Types.
- In the Search all fields, type "Time tracking" and add it.
- Click Save Changes.
Once you have entered all the required information, click on Allow Access. After clicking on Allow Access, a success message will appear. At this point, all the projects and tasks will be successfully synchronized from Jira to Apploye.
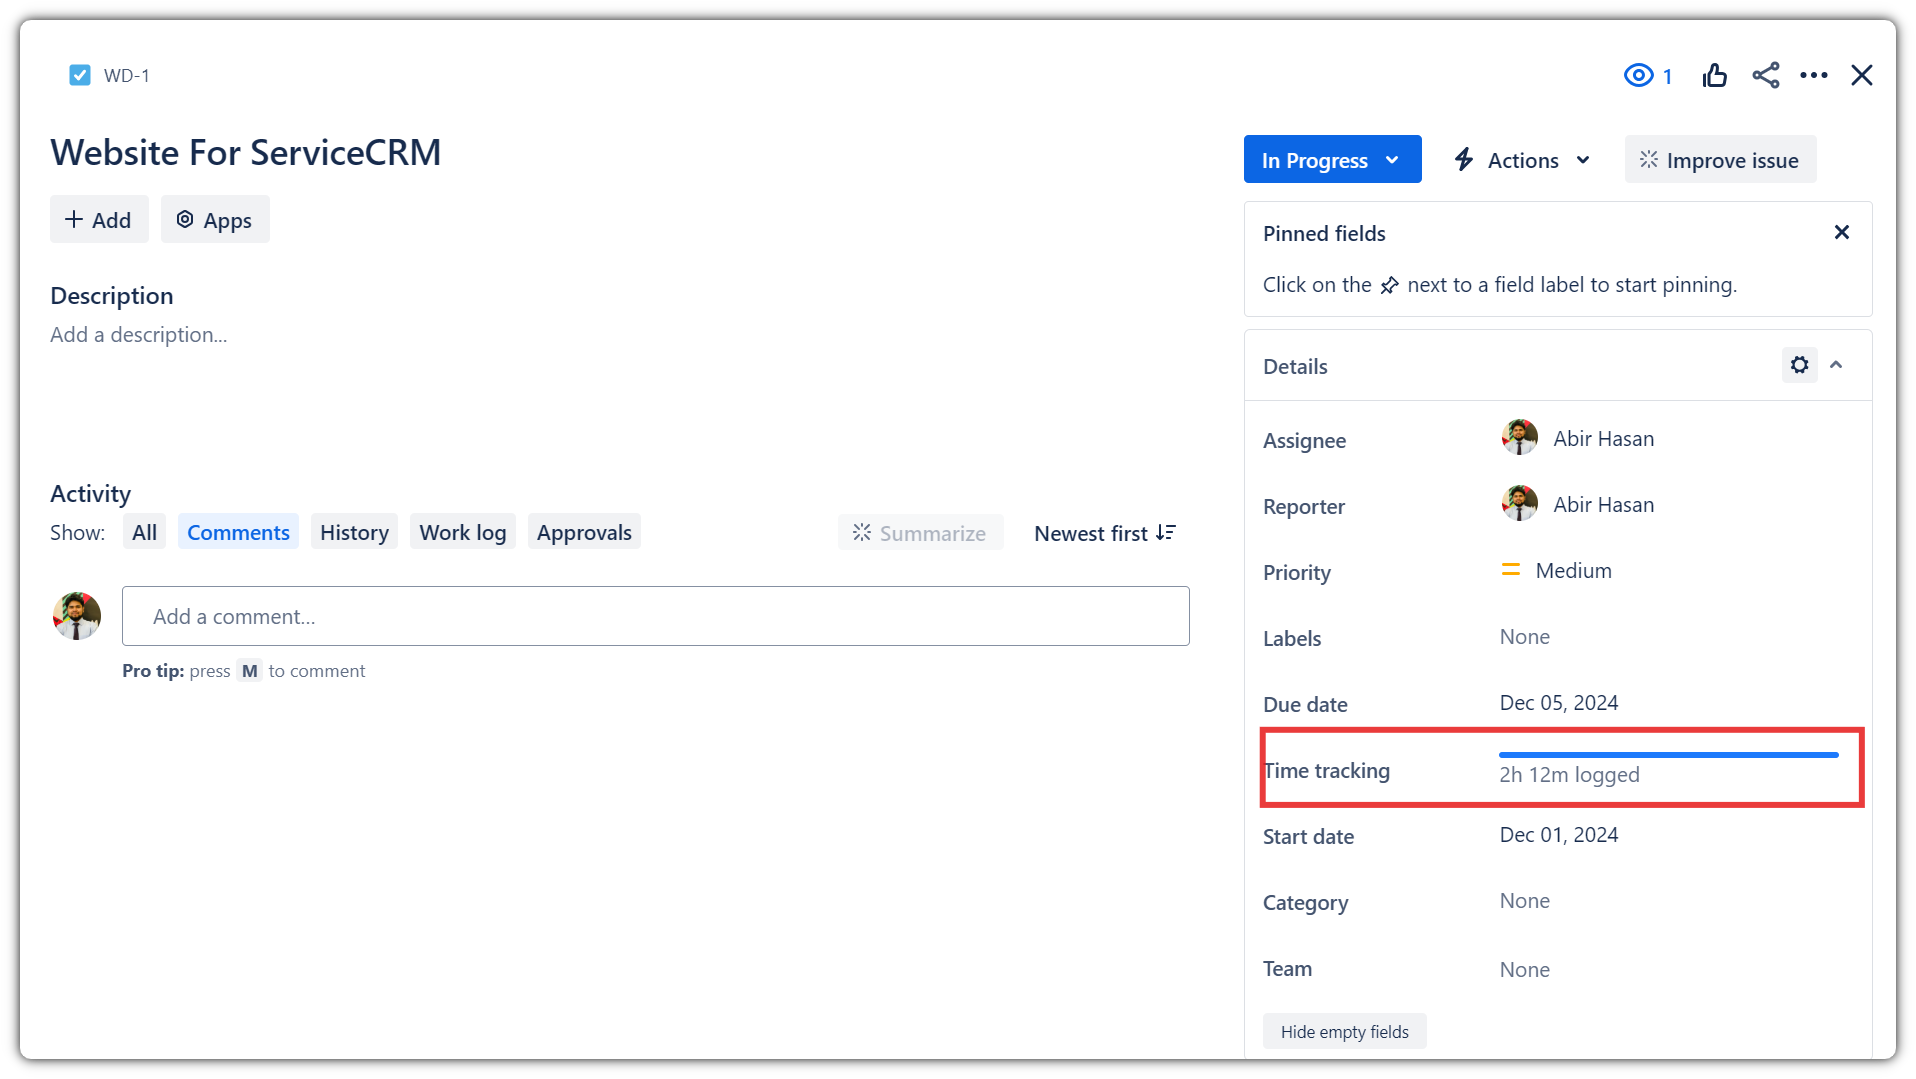
Your employees can then start tracking time using the Apploye desktop app or mobile app. Timesheet data will be synchronized from Apploye to Jira every hour.
You can view the time your employees have spent completing tasks on both the Apploye and Jira dashboards.
Happy Journey with Apploye!
If you need assistance from us, please contact Apploye live support or email at (support@apploye.com).

