

This guide explains how to integrate Apploye with Zoho Projects. Follow the steps below to complete the integration successfully.
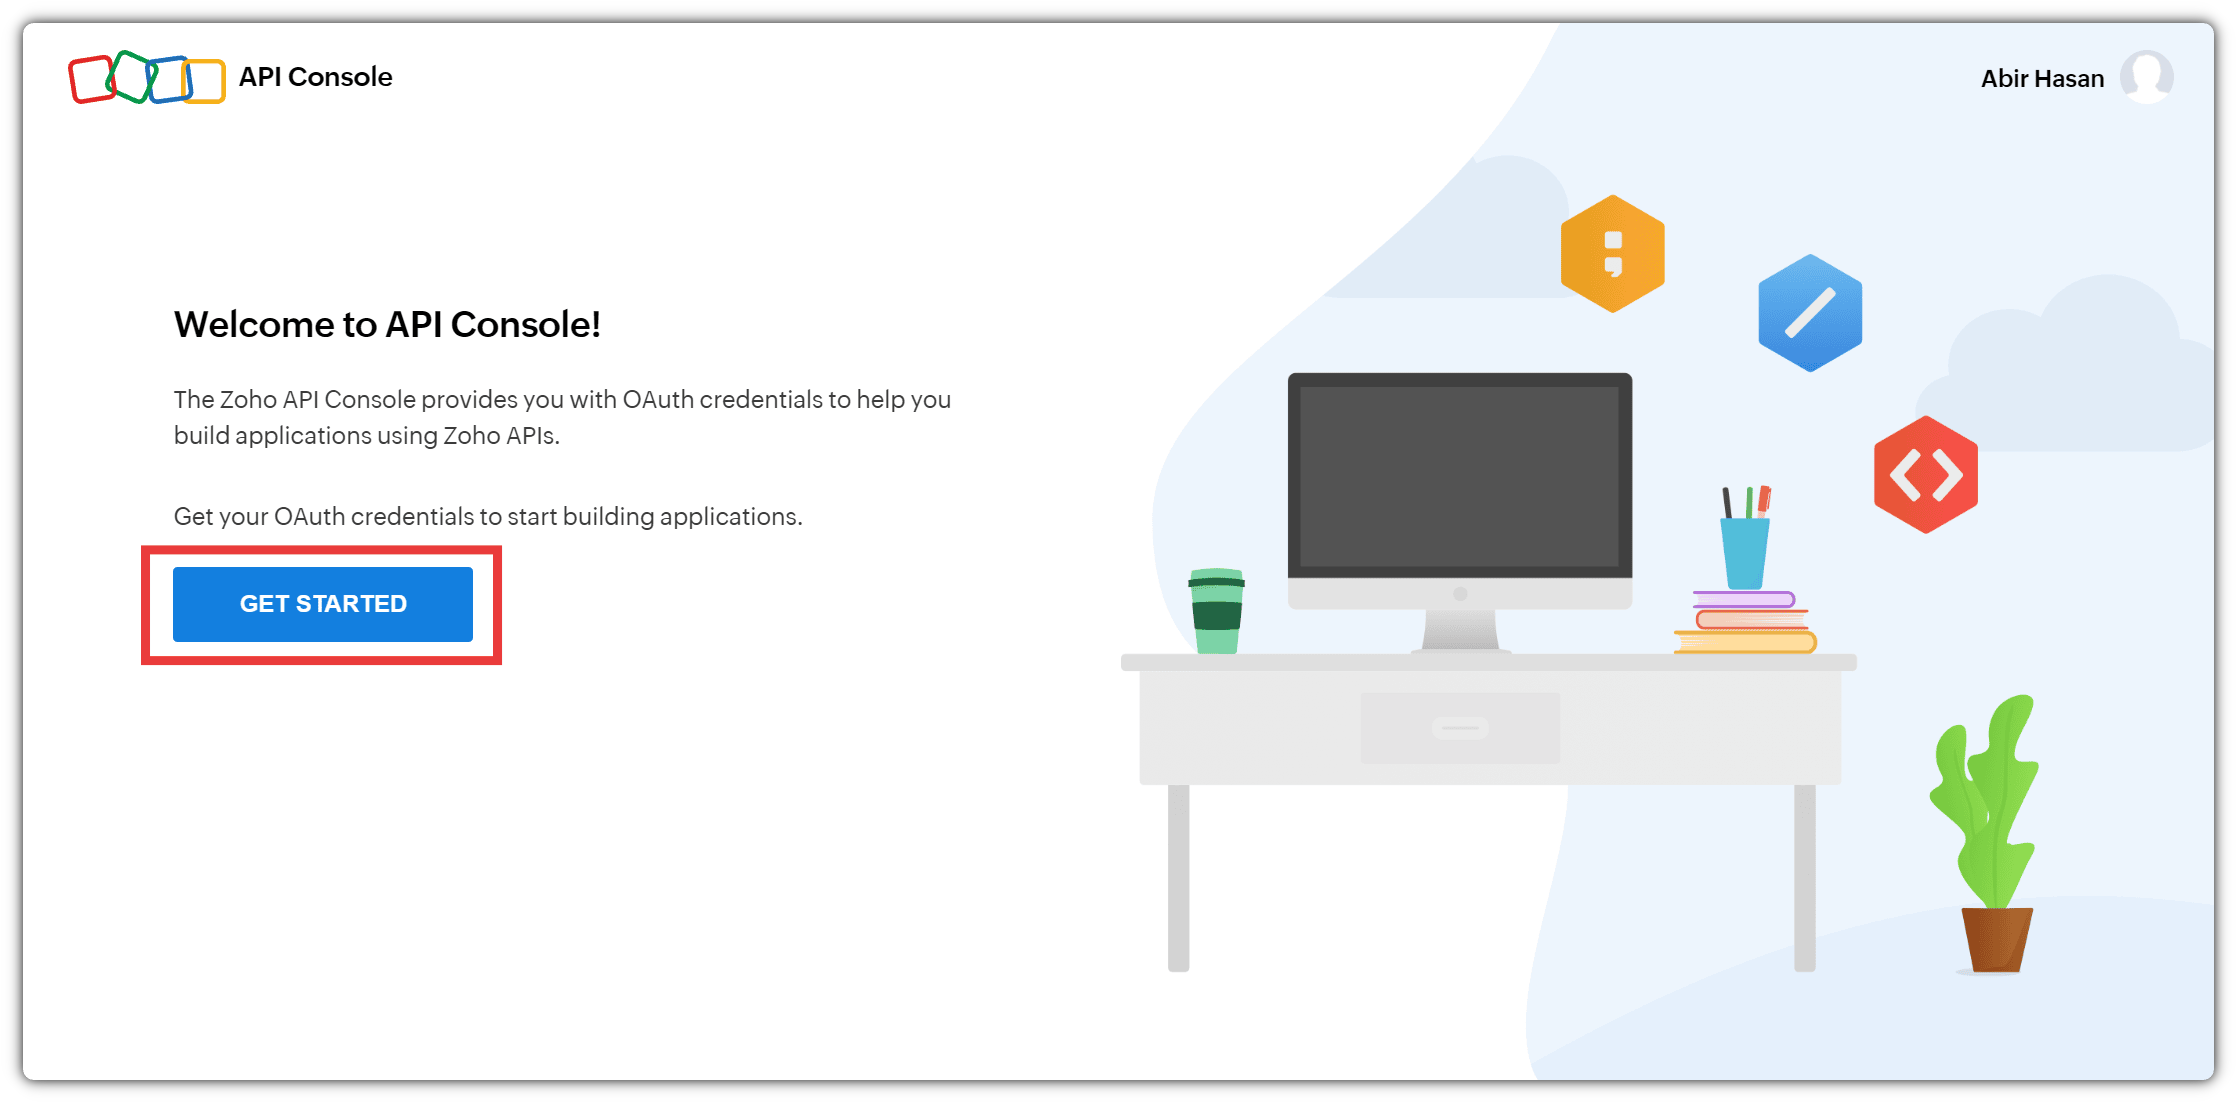
Step 1: Register Your Application
Log in to your Zoho Projects account. Then, navigate to the Zoho Developer Console and click Get Started to begin registering your application.
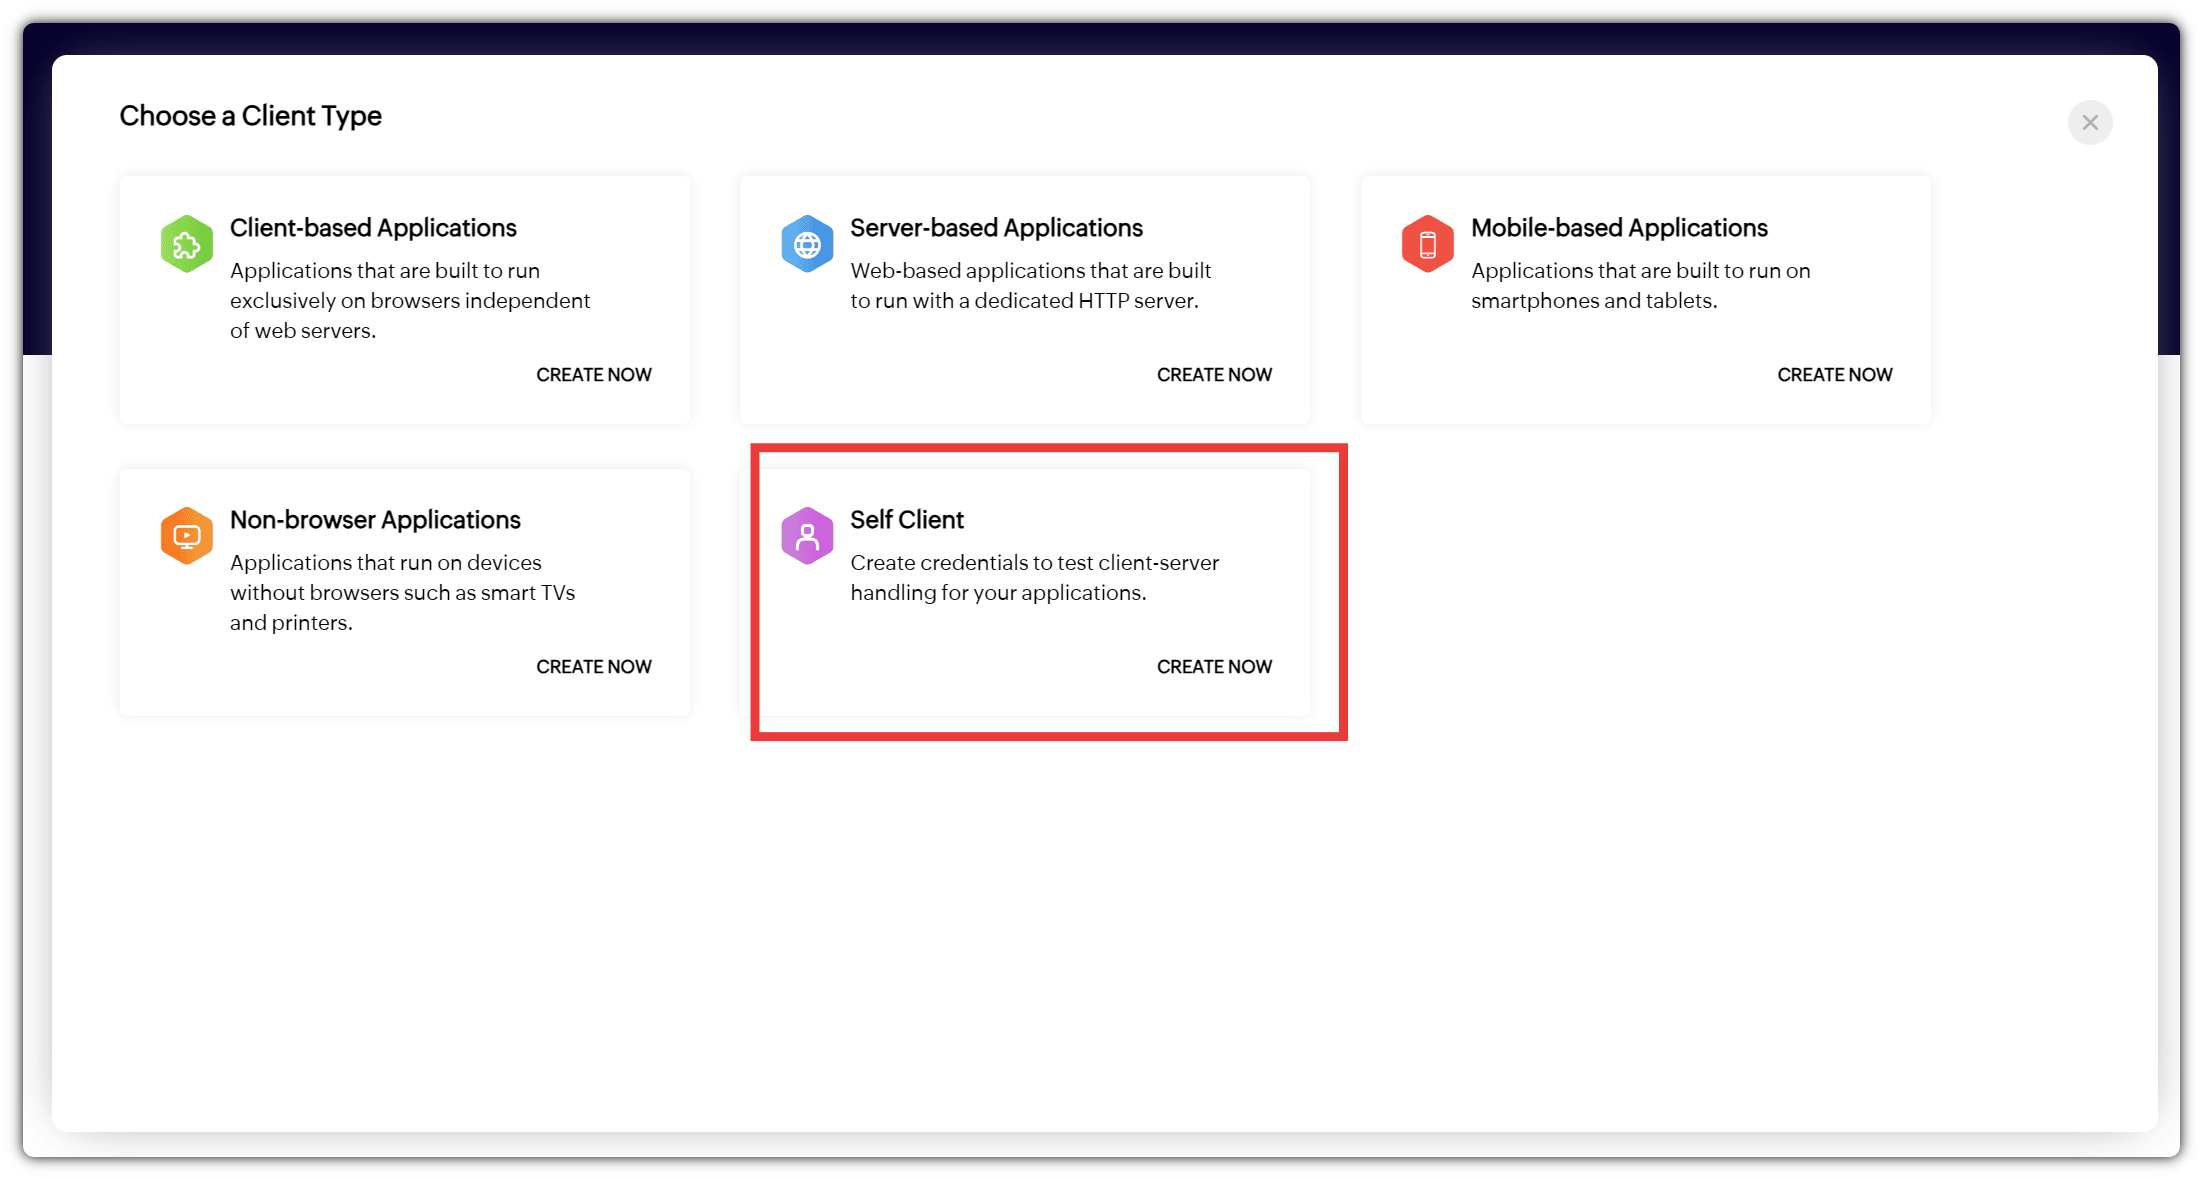
After that, you will see the option to create a new client application. Select Self-Client and click Create Now to proceed.
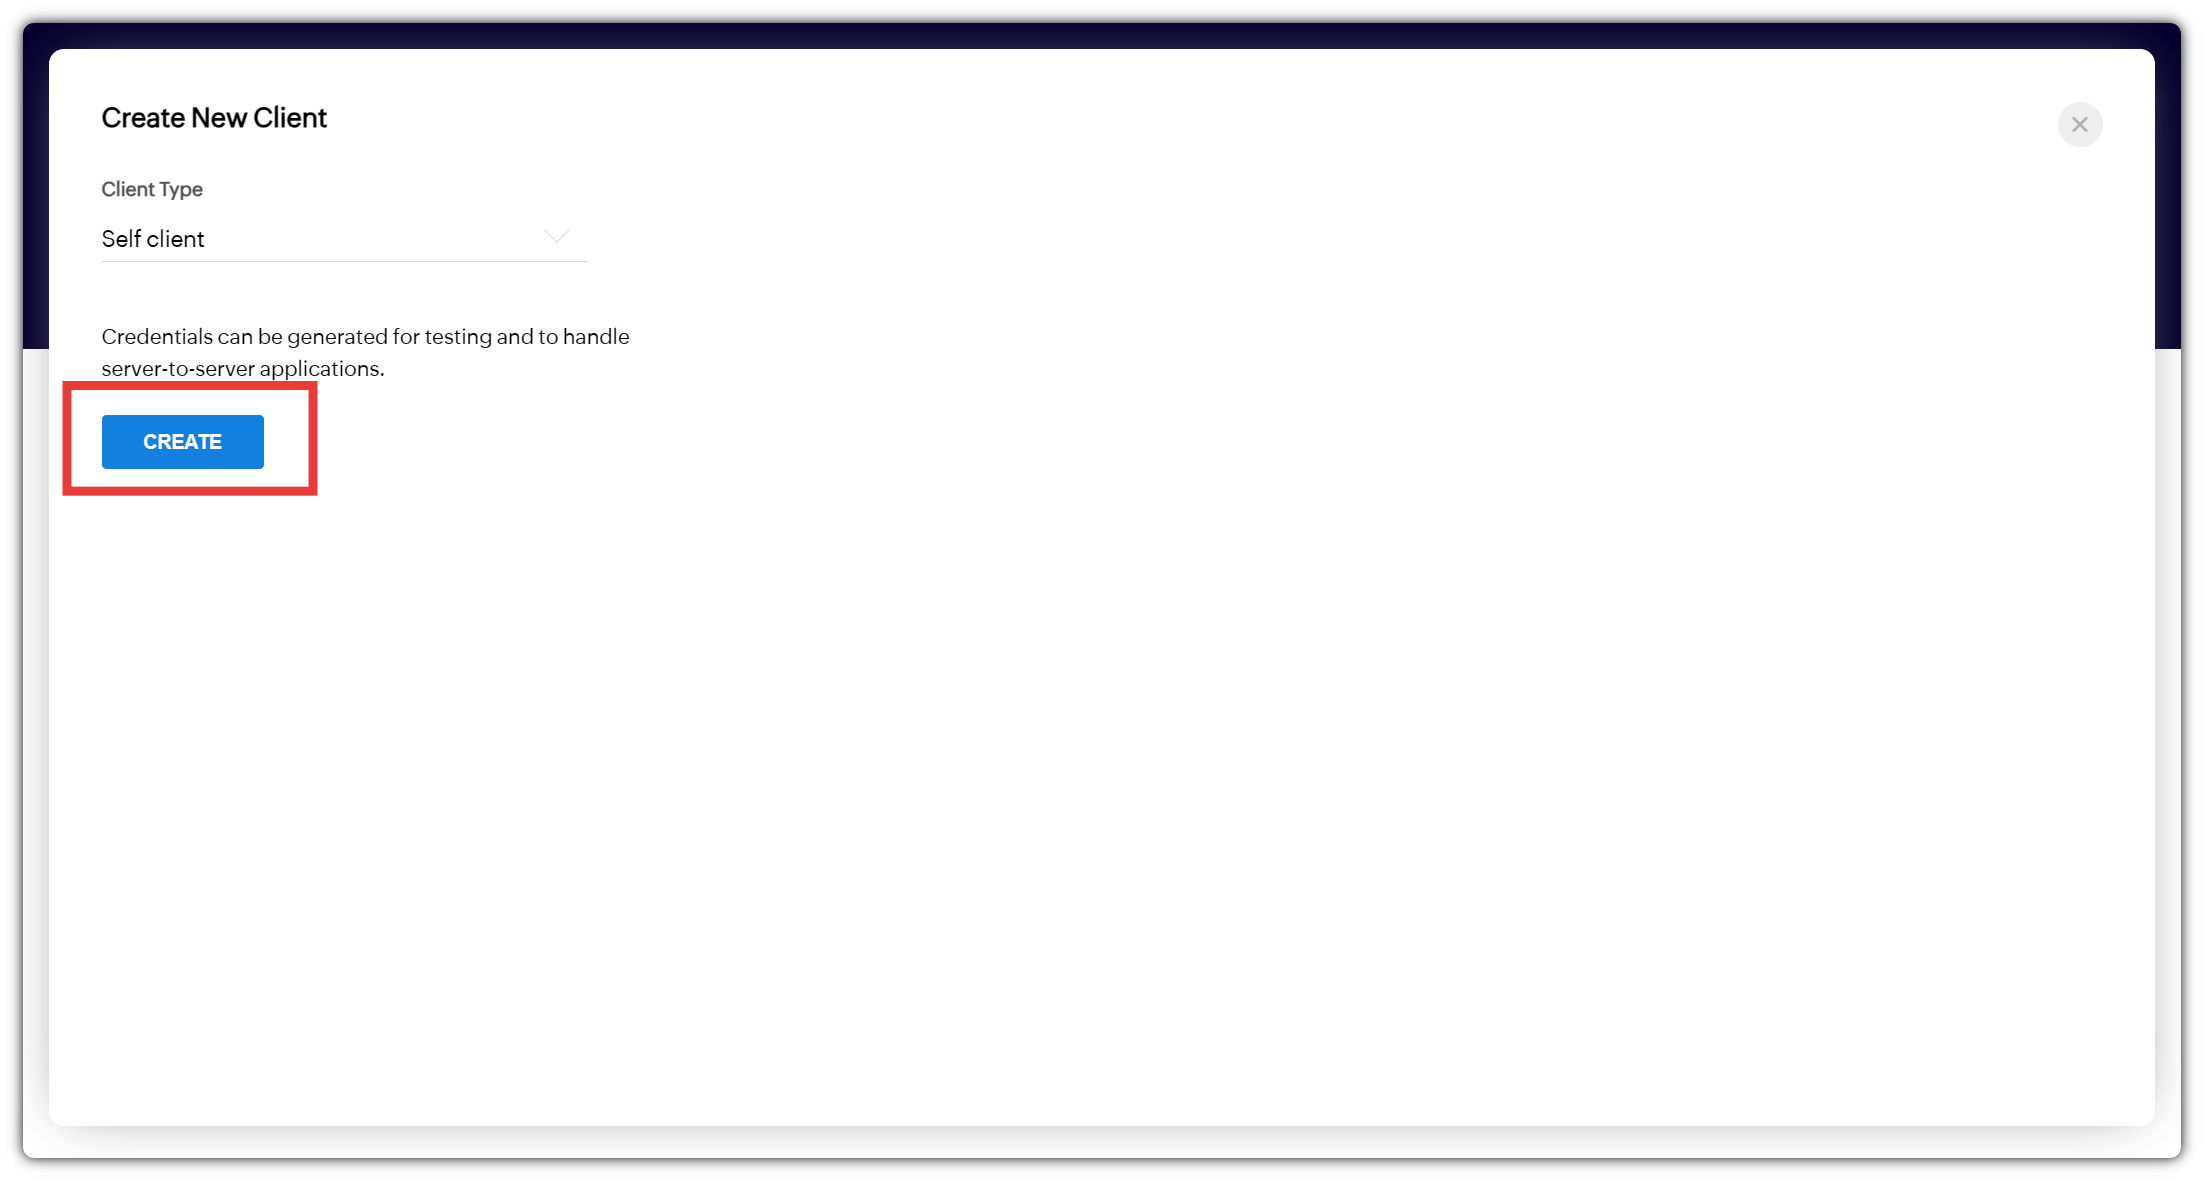
Next, click Create to continue.
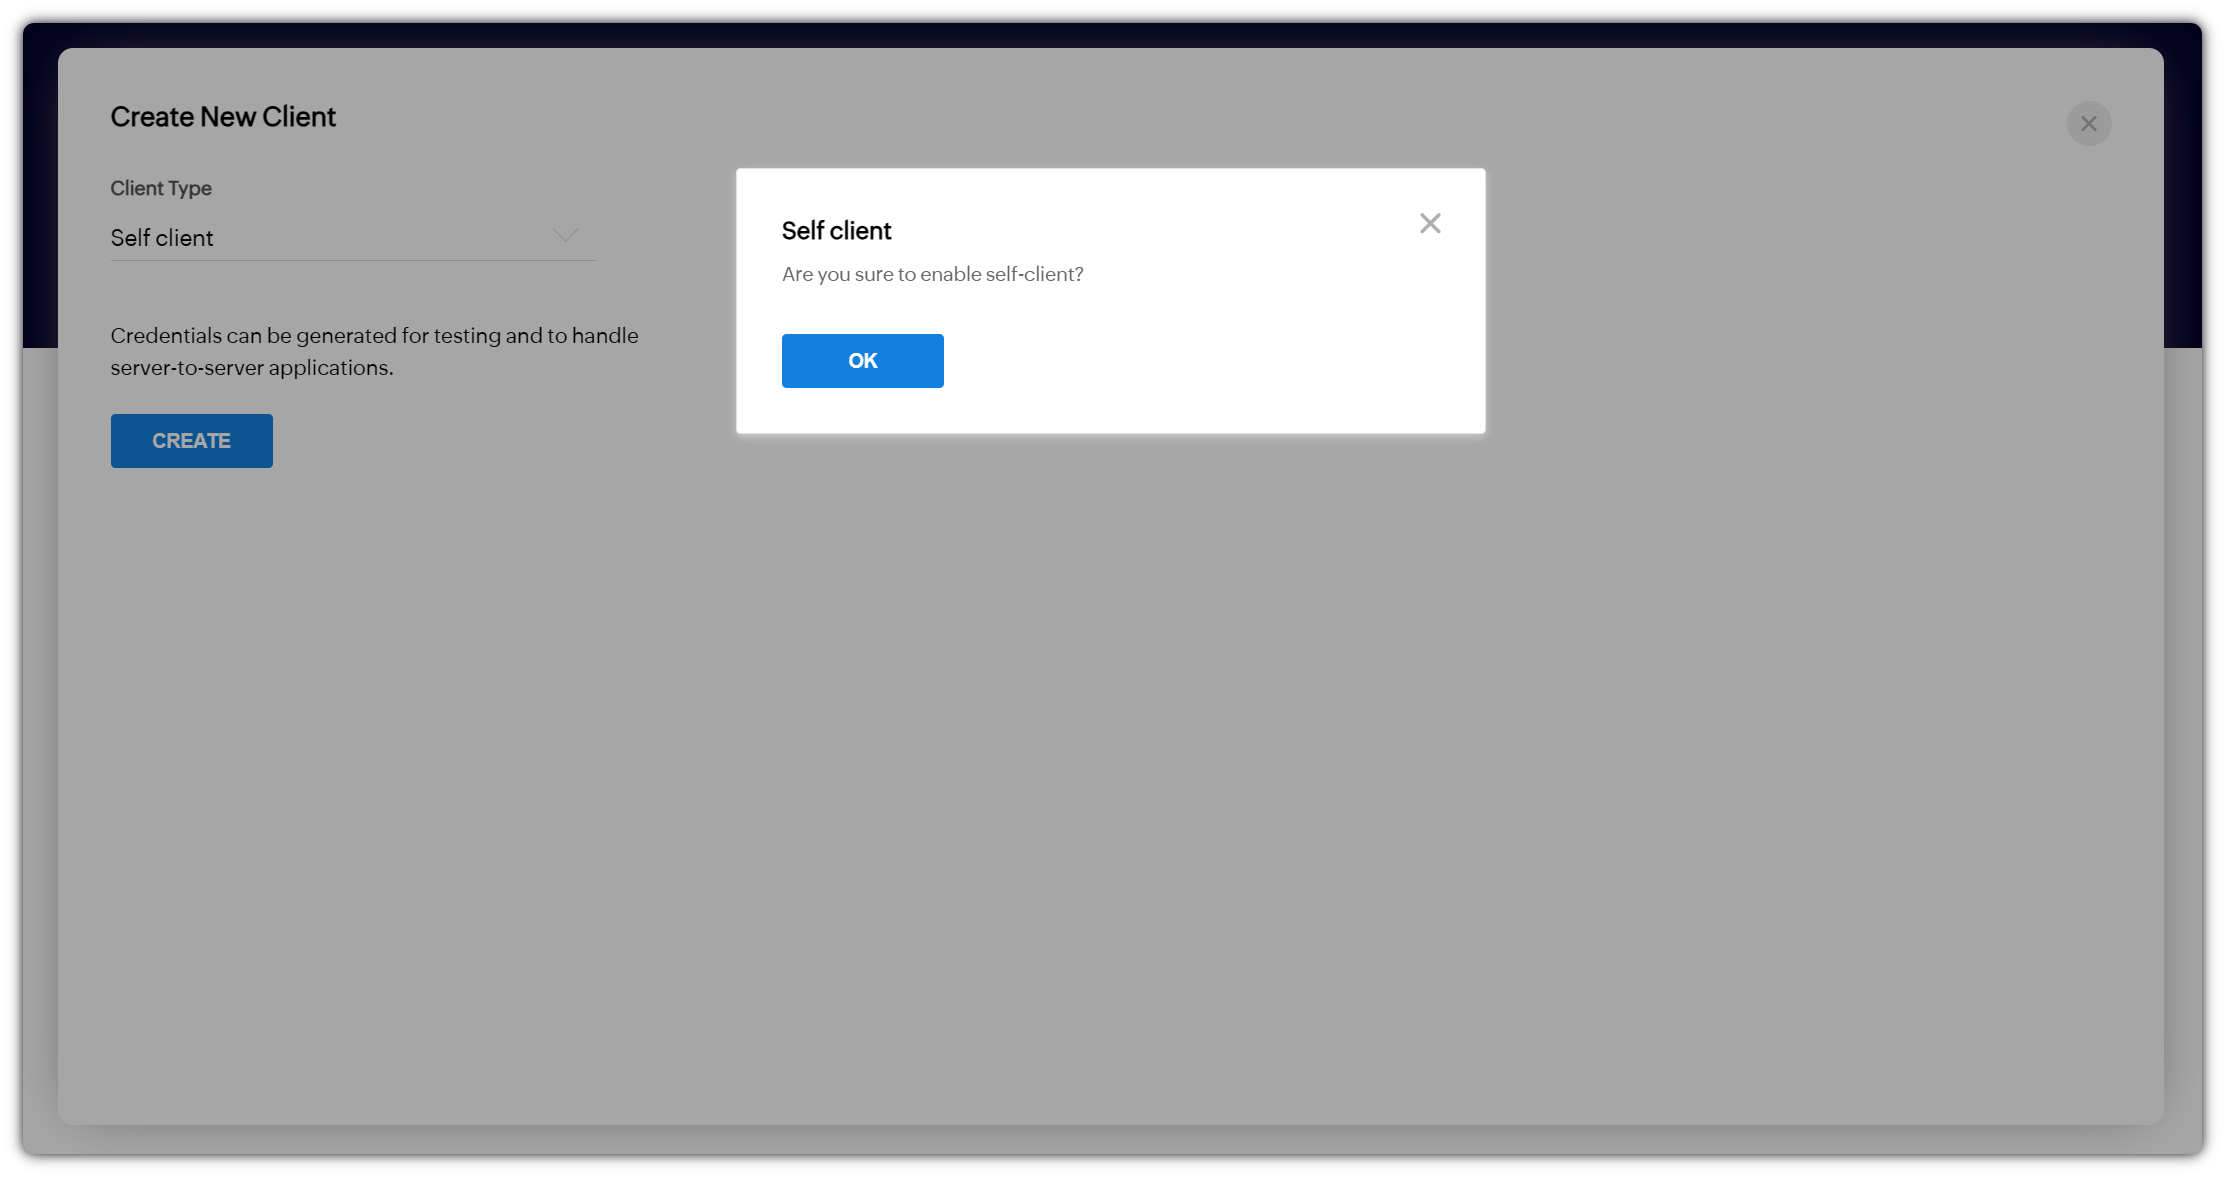
After that, you will be prompted to grant permission. Click OK to proceed.
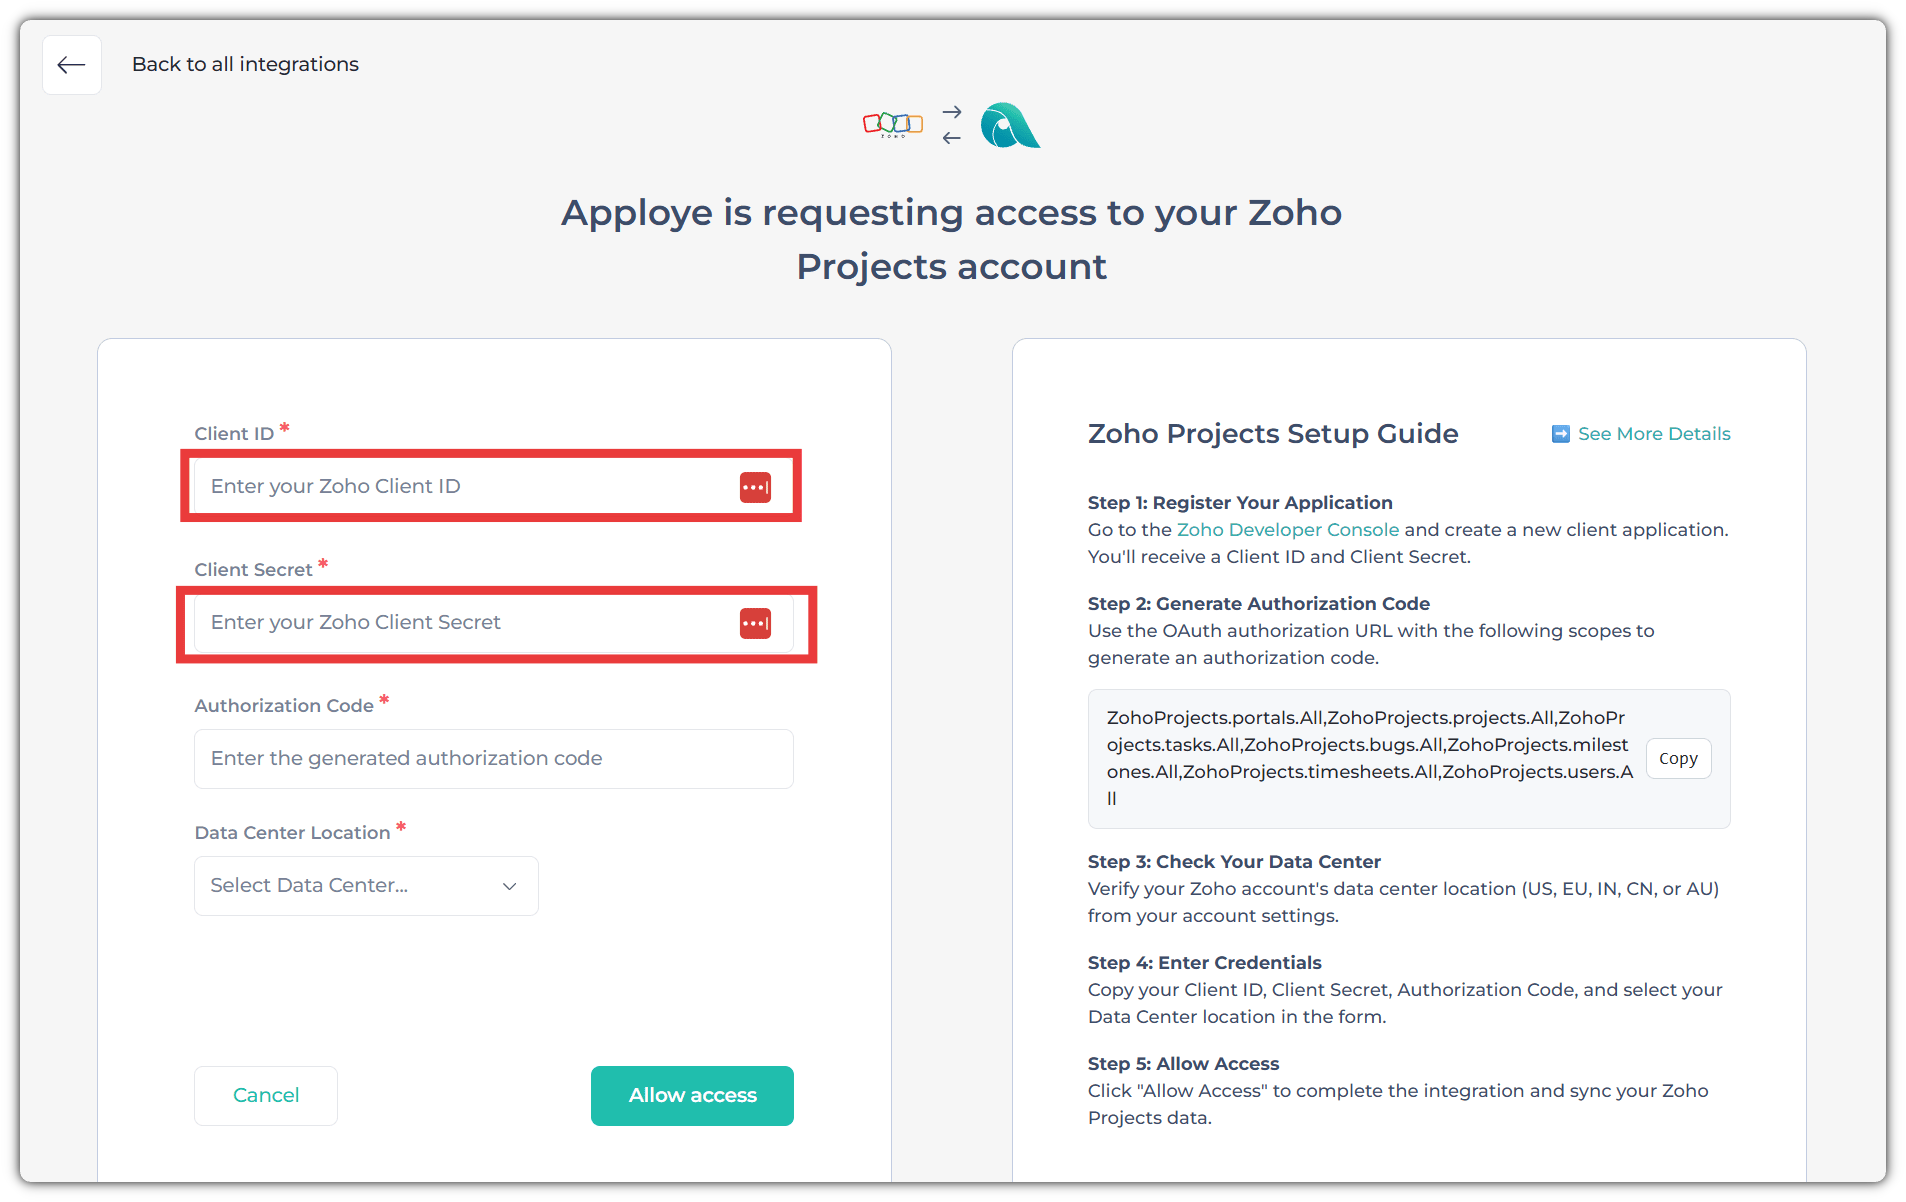
You will then receive a Client ID and Client Secret. Copy both credentials and paste them into the corresponding fields in the Apploye Zoho Projects integration section.
Step 2: Generate Authorization Code
Next, you need to generate an Authorization Code. Navigate to the Generate Code tab, then copy the scope below and paste it into the Scope field.
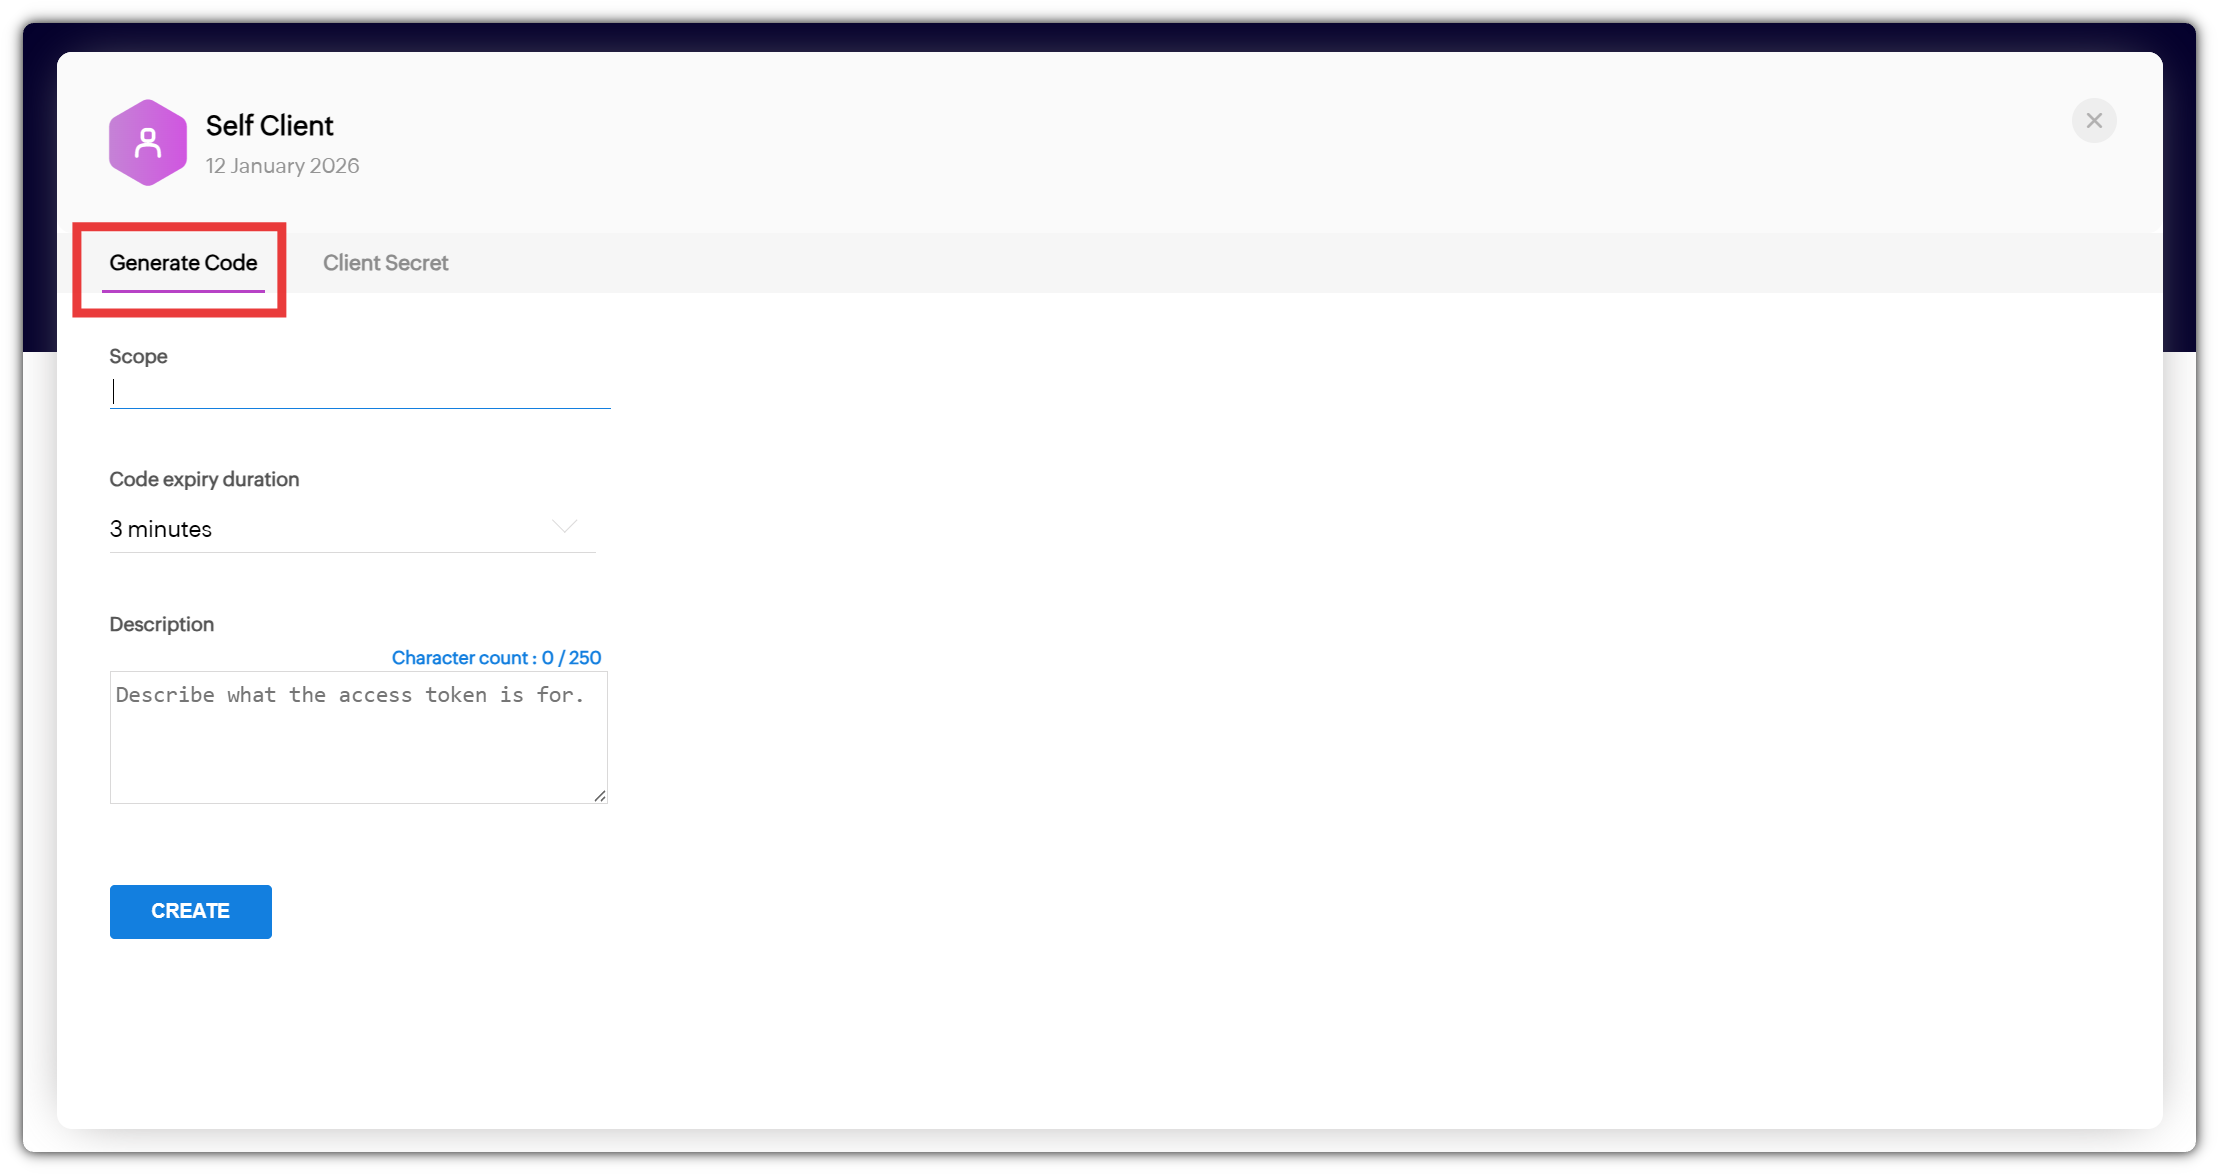
Here is the scope:
ZohoProjects.portals.All,ZohoProjects.projects.All,ZohoProjects.tasks.All,ZohoProjects.bugs.All,ZohoProjects.milestones.All,ZohoProjects.timesheets.All,ZohoProjects.users.All
Set the code expiry duration and provide an appropriate description. The description can be any text of your choice.
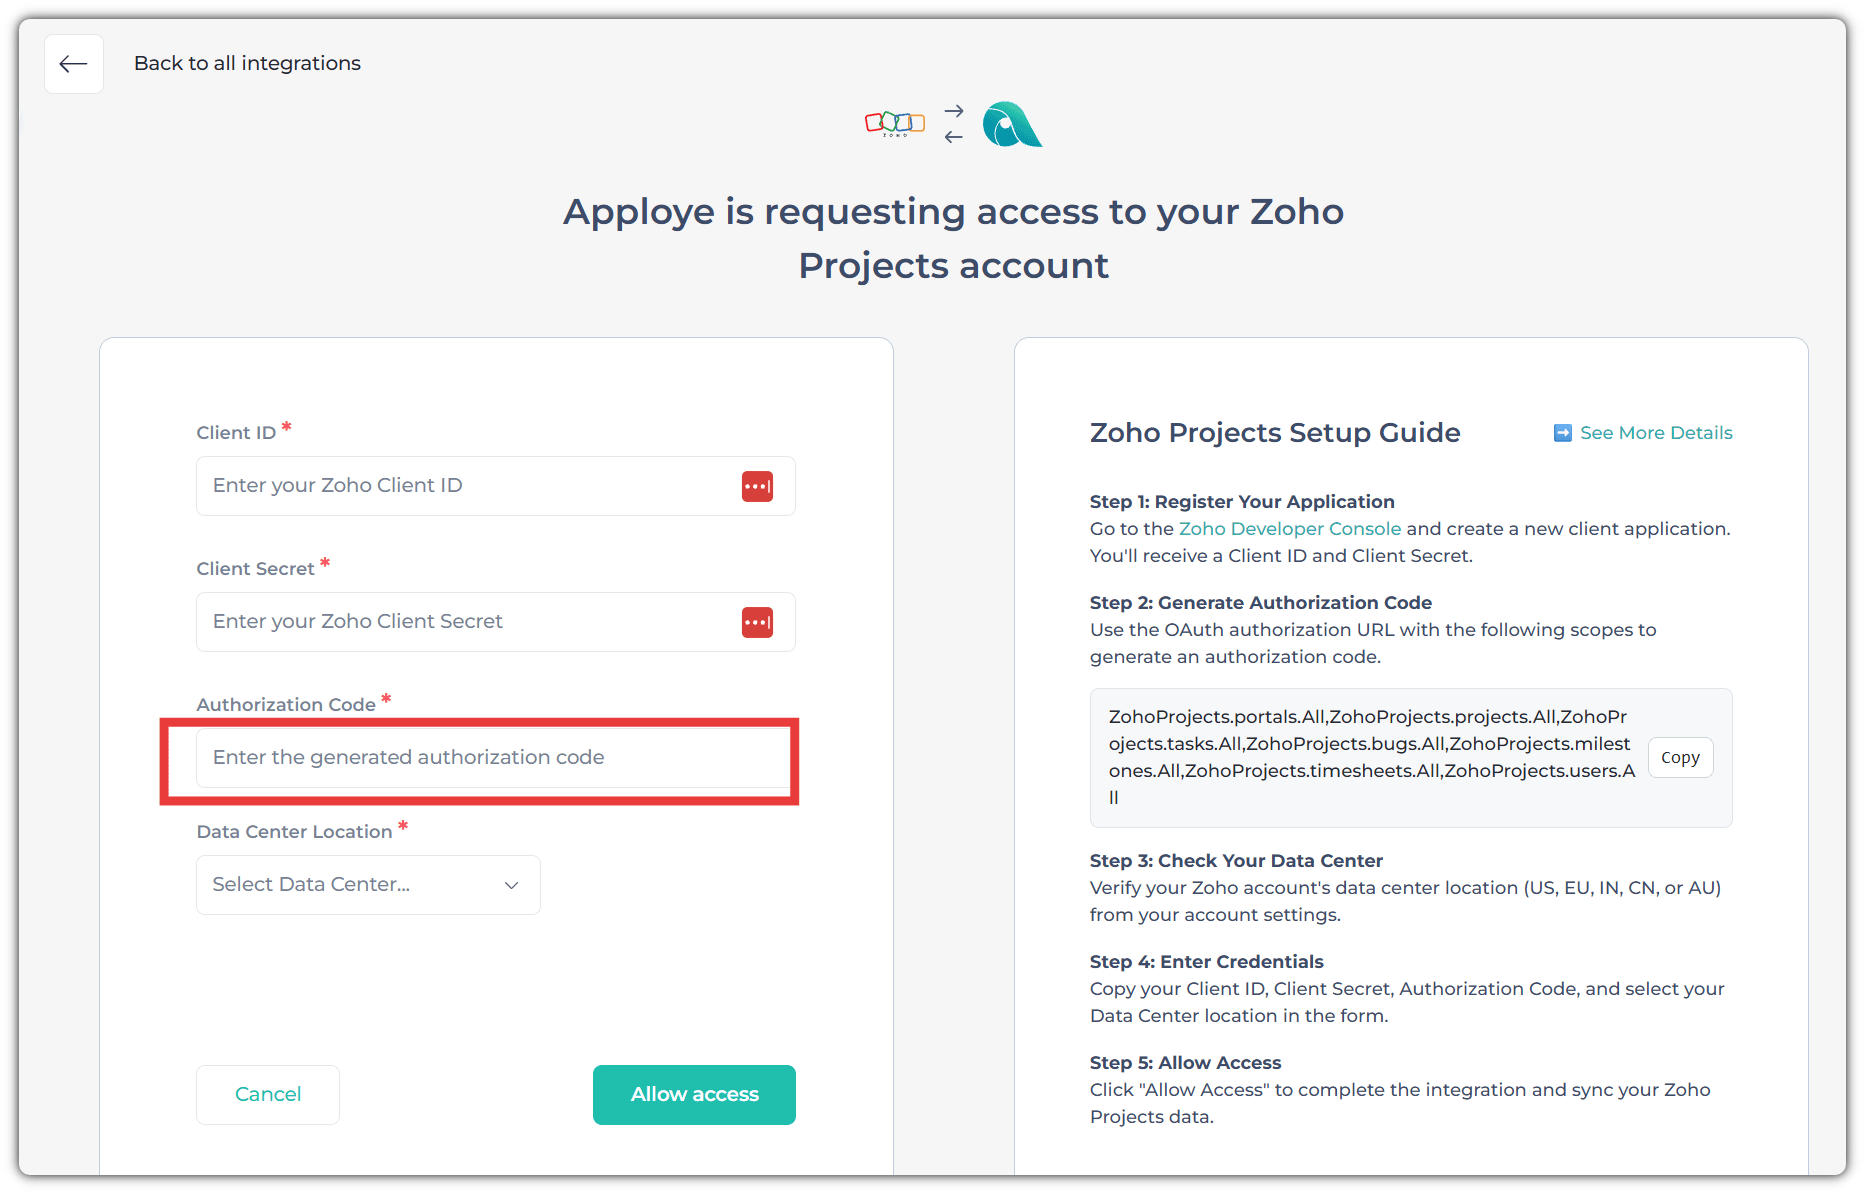
After clicking the Create button, an Authorization Code will be generated. Copy this code, then go to Apploye and paste it into the Authorization Code field.
Step 3: Check Your Data Center
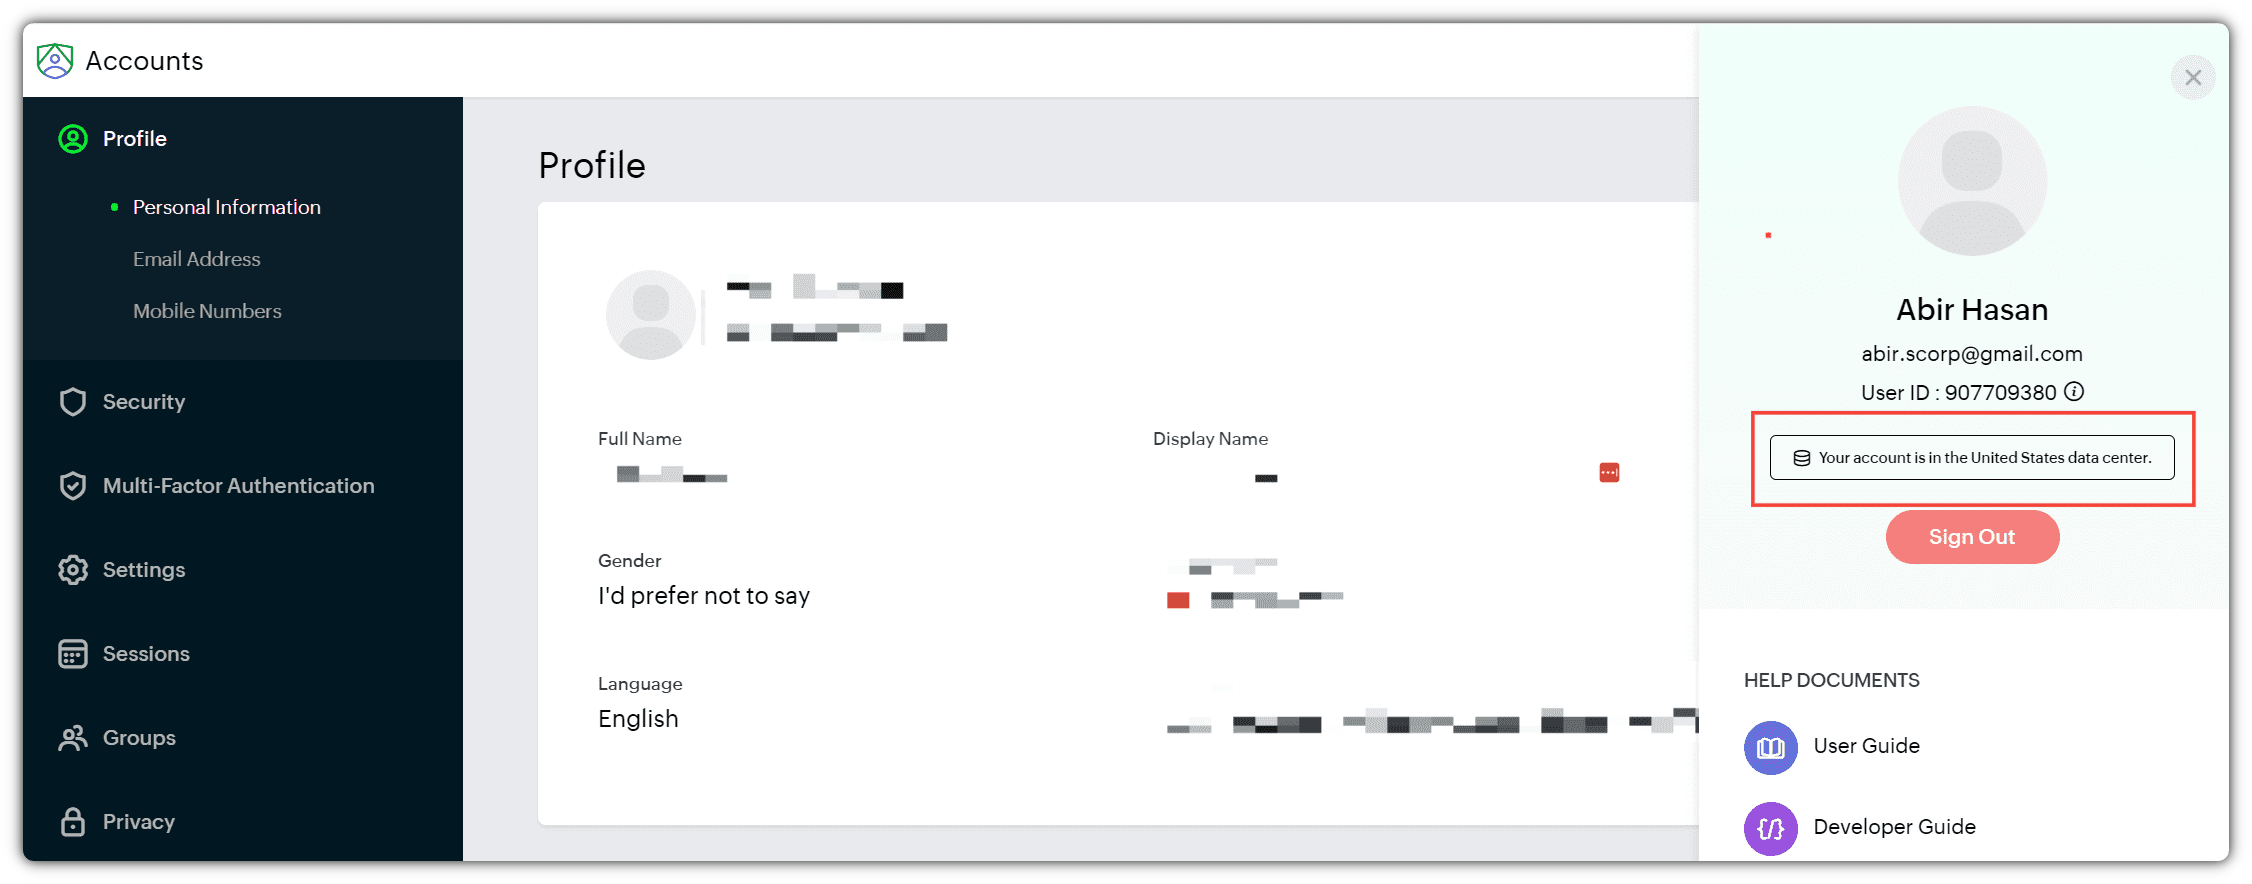
Verify your Zoho account’s data center location (US, EU, IN, CN, or AU) from your account settings.
To check your data center, go to accounts.zoho.com and click on your profile icon. Your account details, including the data center location, will be displayed there.
Now, select your data center in Apploye.
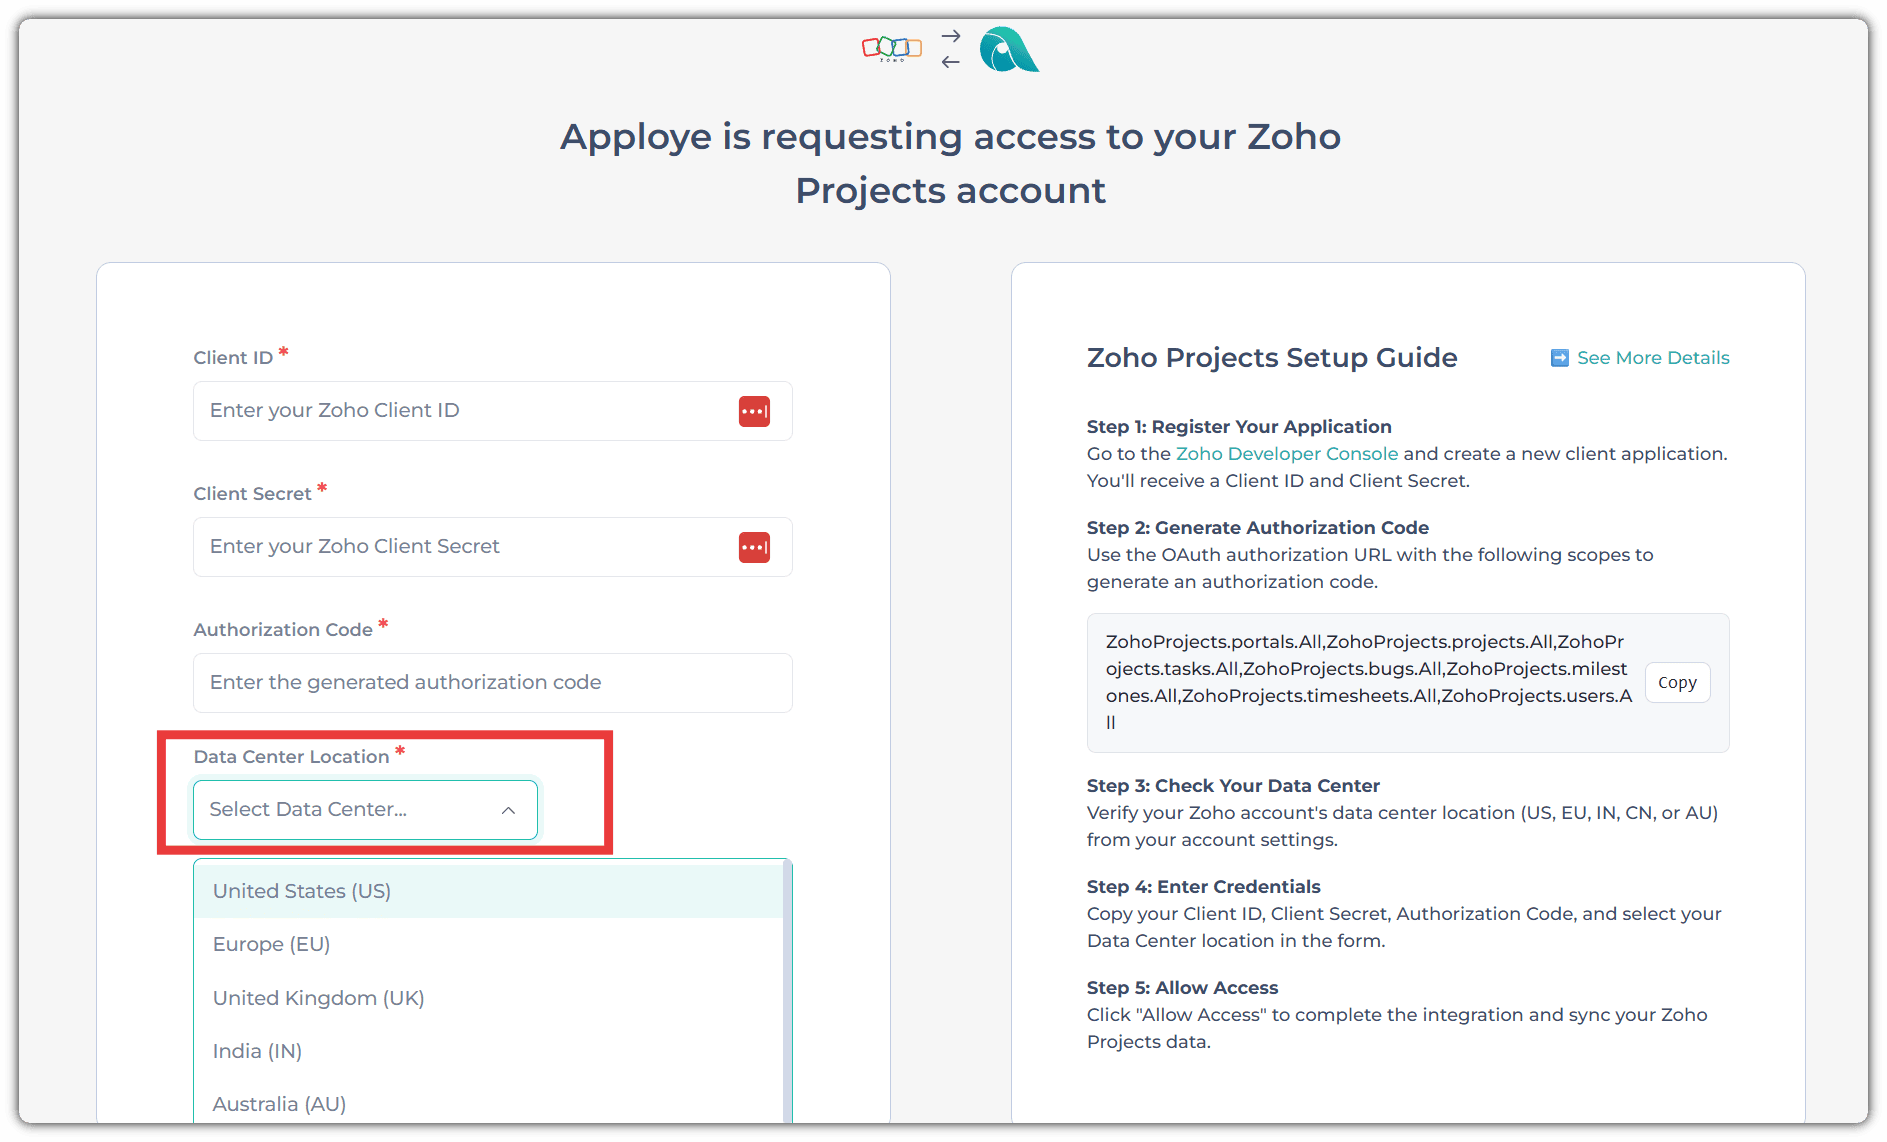
After that, click Allow Access. Once access is granted, all your projects and tasks from Zoho Projects will be synced to Apploye.
Note: The initial synchronization may take 10–15 minutes, depending on the number of projects and tasks.
If you need any assistance, please contact our support team at support@apploye.com
