
On the Clients page, you can add new clients by clicking the '+ Add Client' button. Once a client is added, you can grant them access to view data related to the employees assigned to them.
How to add clients in Apploye?
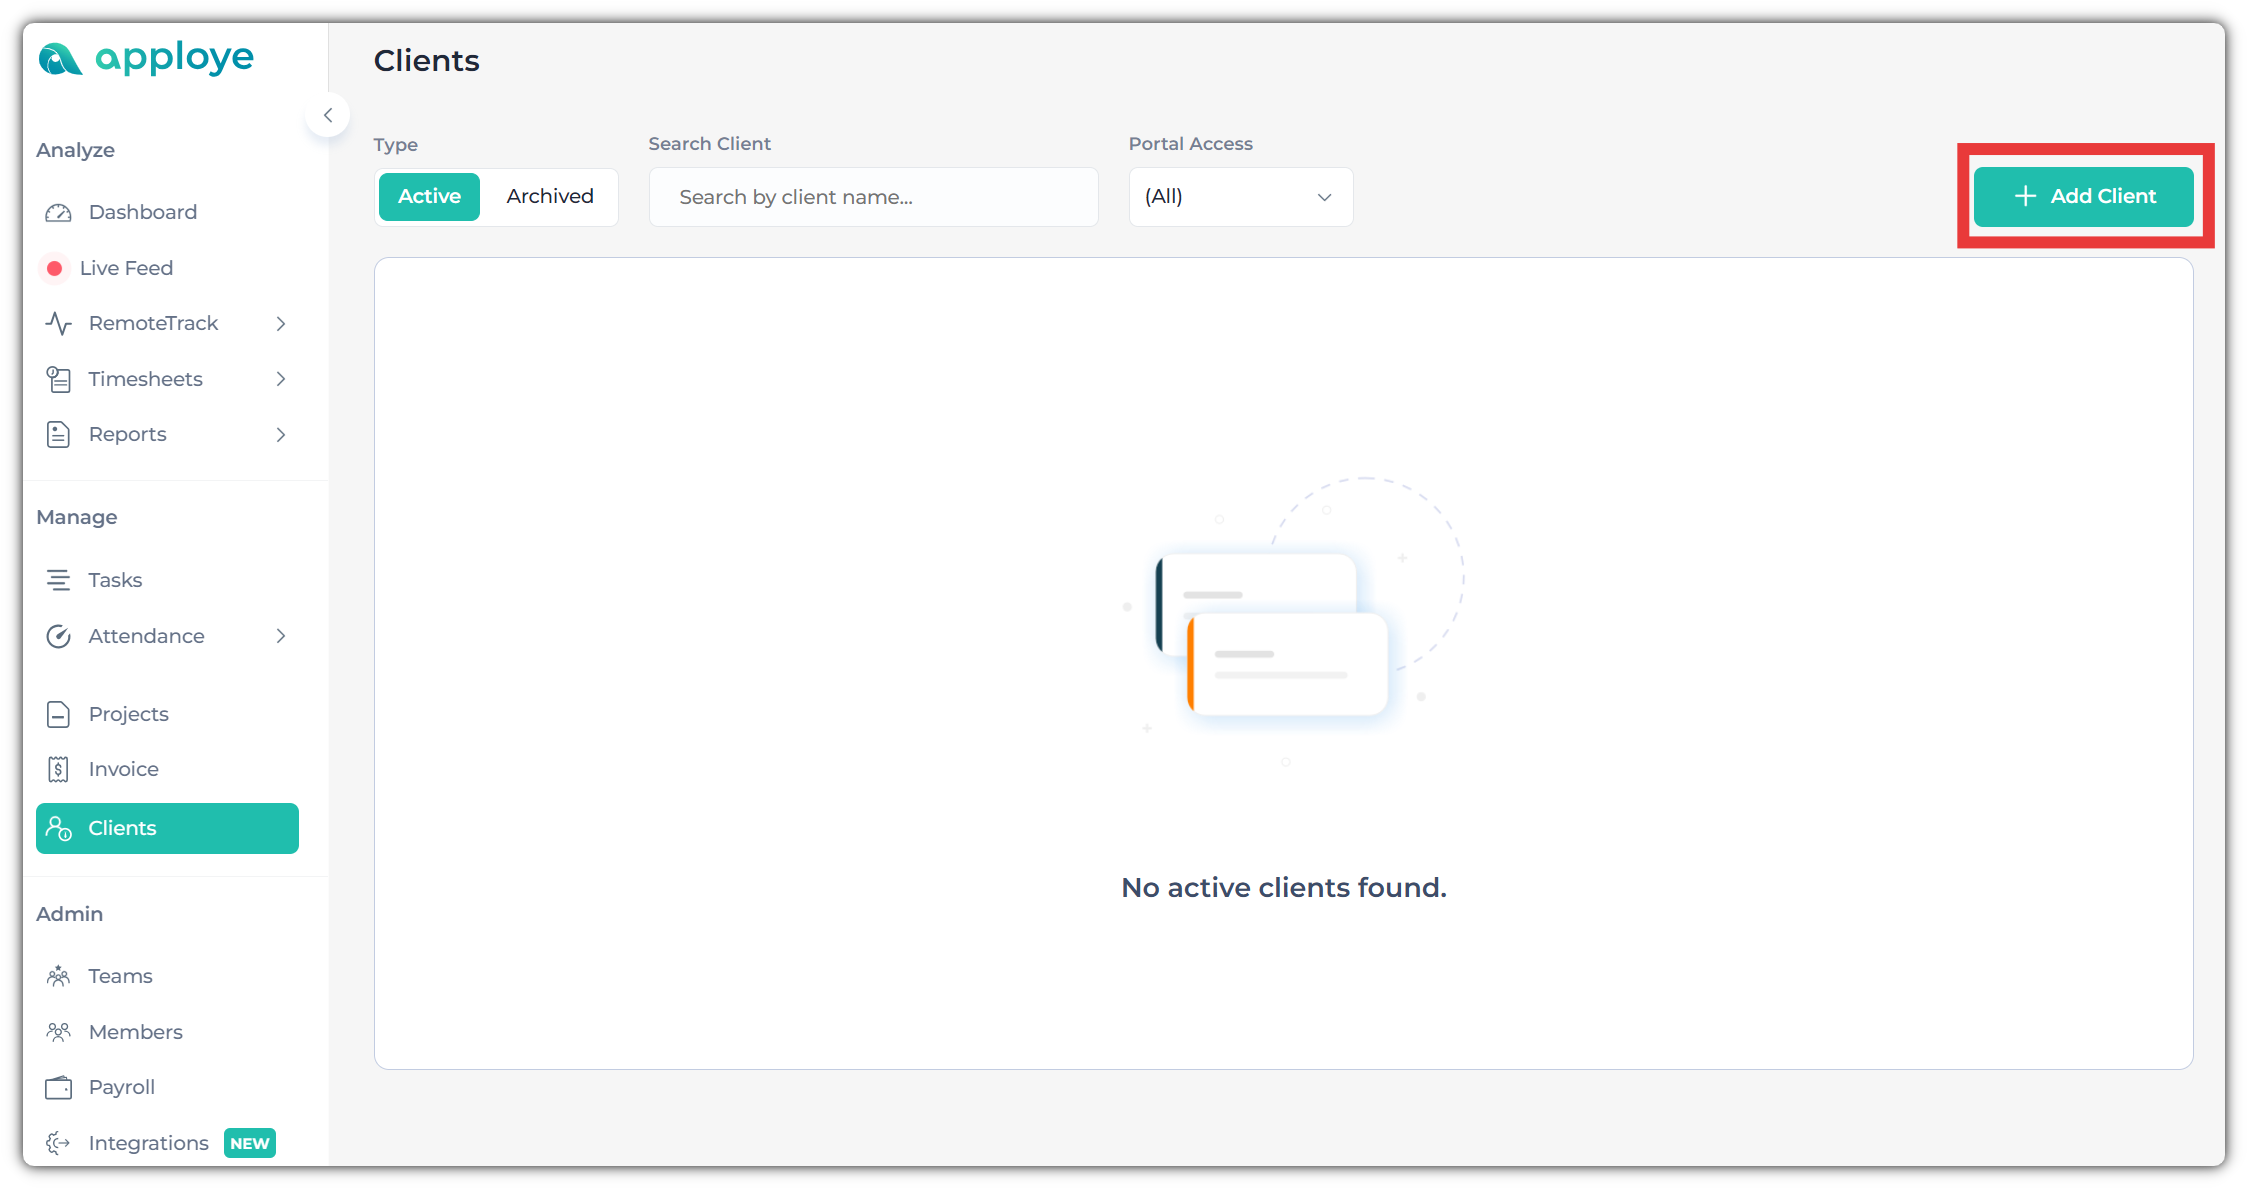
In order to add clients to your organization, you must first go to the “Client Section” located in the left sidebar. From there, please click on “+Add Client”.
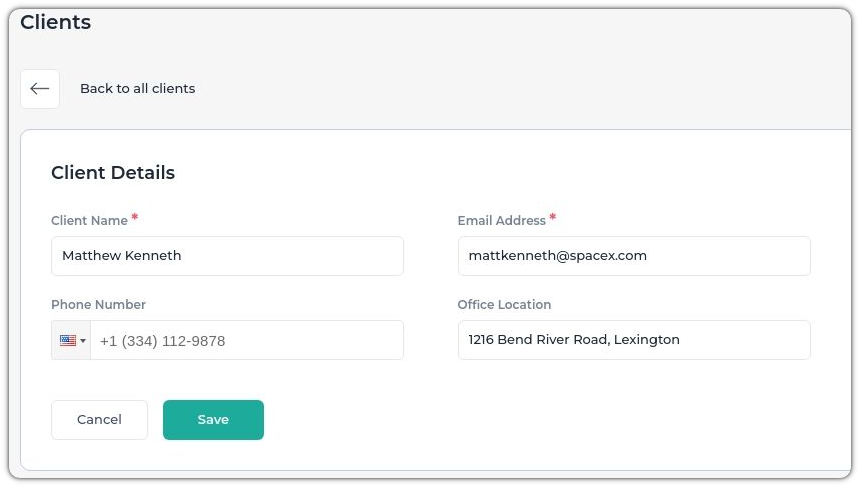
Second, after clicking on the "+Add Client" button, give the client's name and email address. Additionally, you may also add the client's mobile number and address (optional).
👉 After adding your client's details, click on "Save".
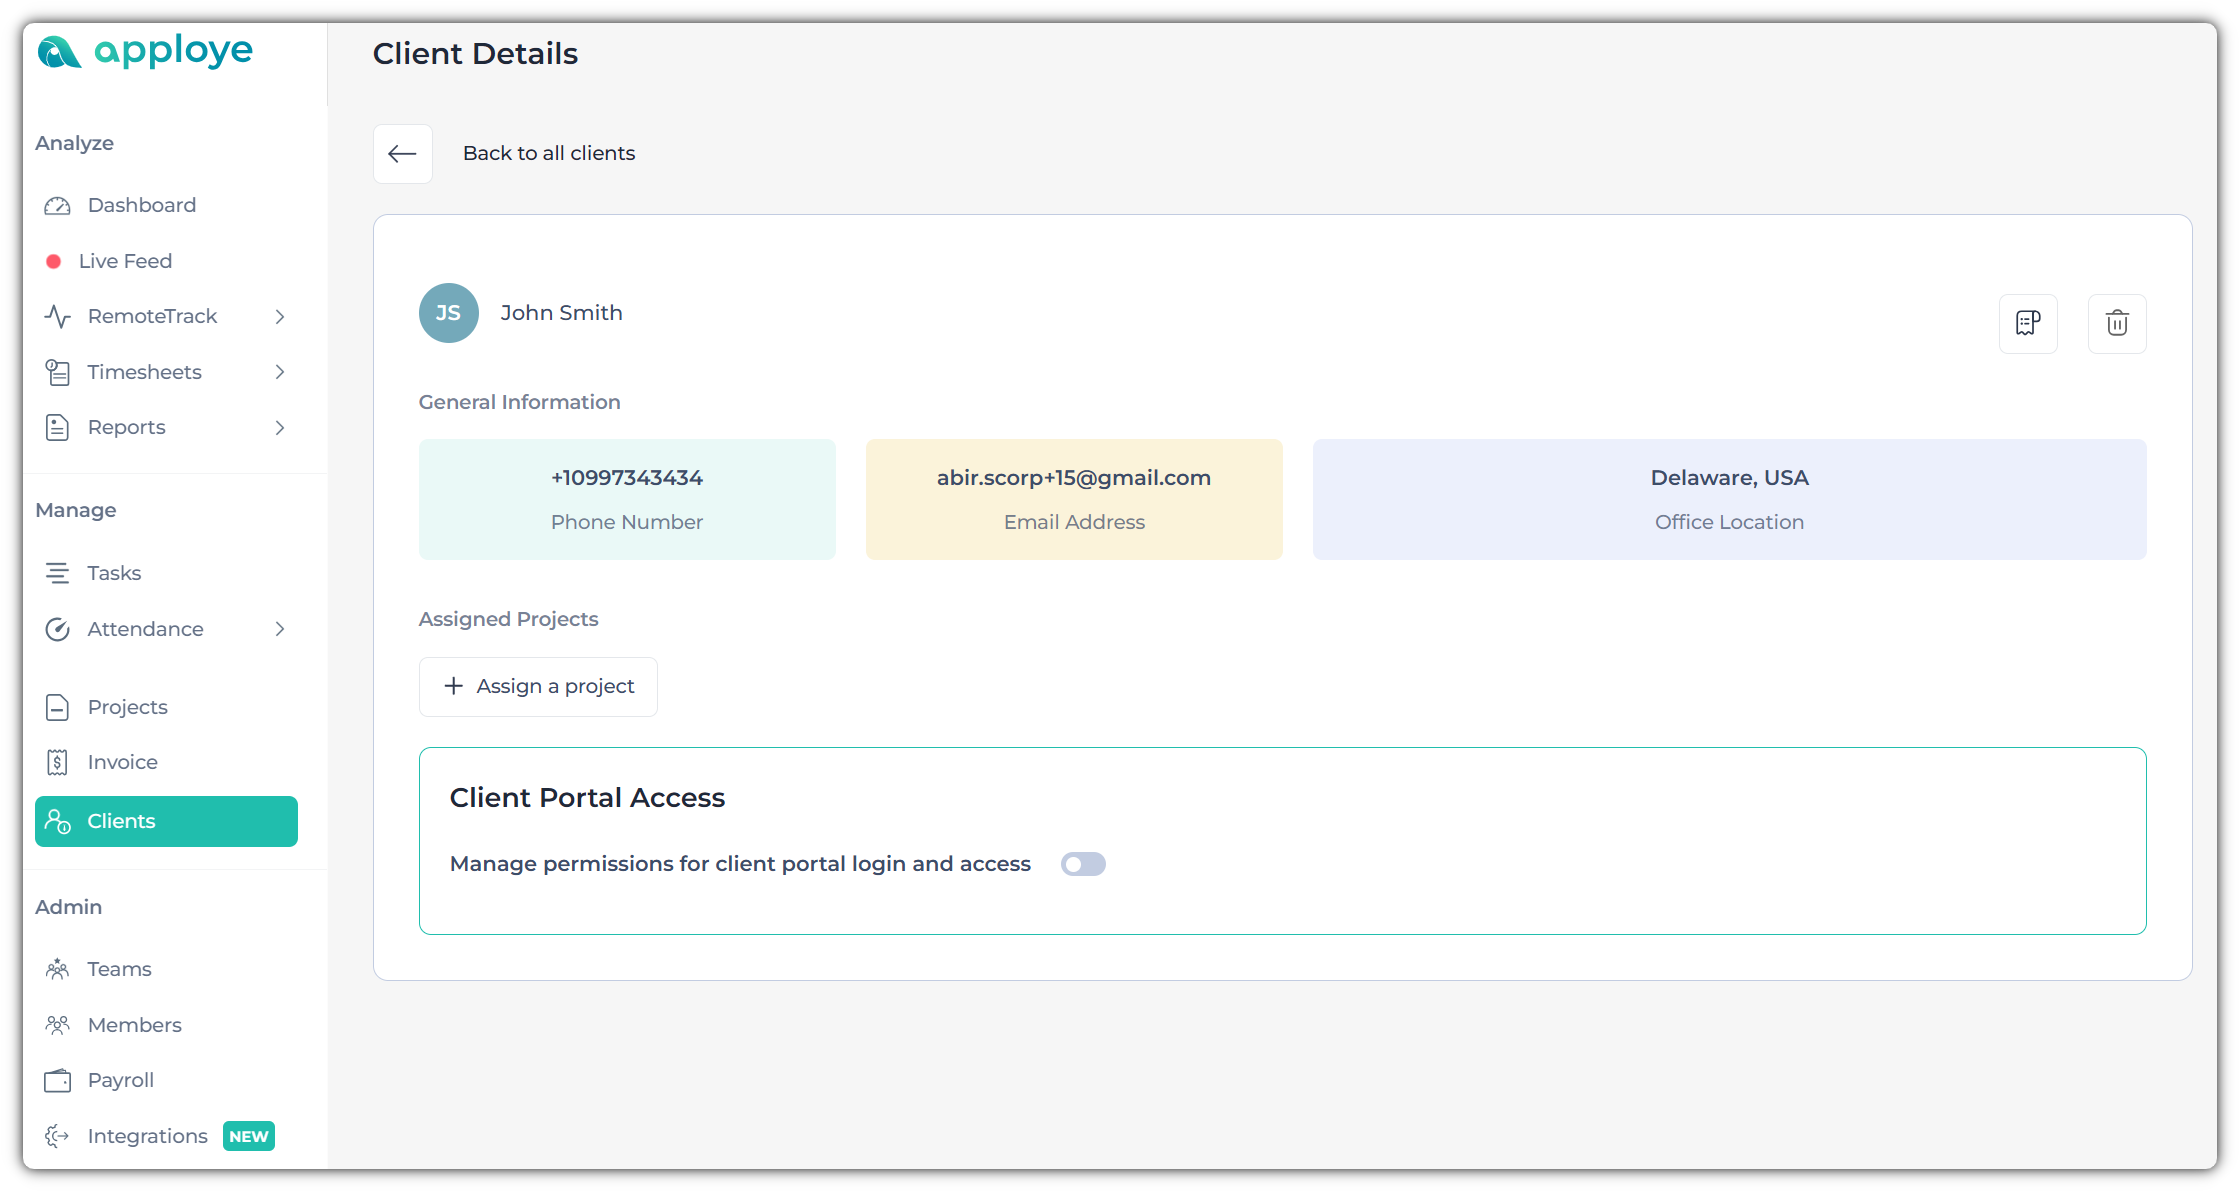
You have successfully added your client. Now, you may grant them permission to view the data associated with their project.
How to provide access to your clients?
1. Enabling client access requires an additional payment. The cost for each client will be the same as the per-user rate.
2. Please avoid using a client profile with a duplicate email address.
3. Upon logging in, they will see only the menu options for which access permissions have been granted.
4. Clients will have view-only access to the data shared with them.
First, you need to enable the 'Client Portal Login and Access' option for your client.
👉 After that, you can specify which data you’d like to grant access to by enabling the relevant permissions.
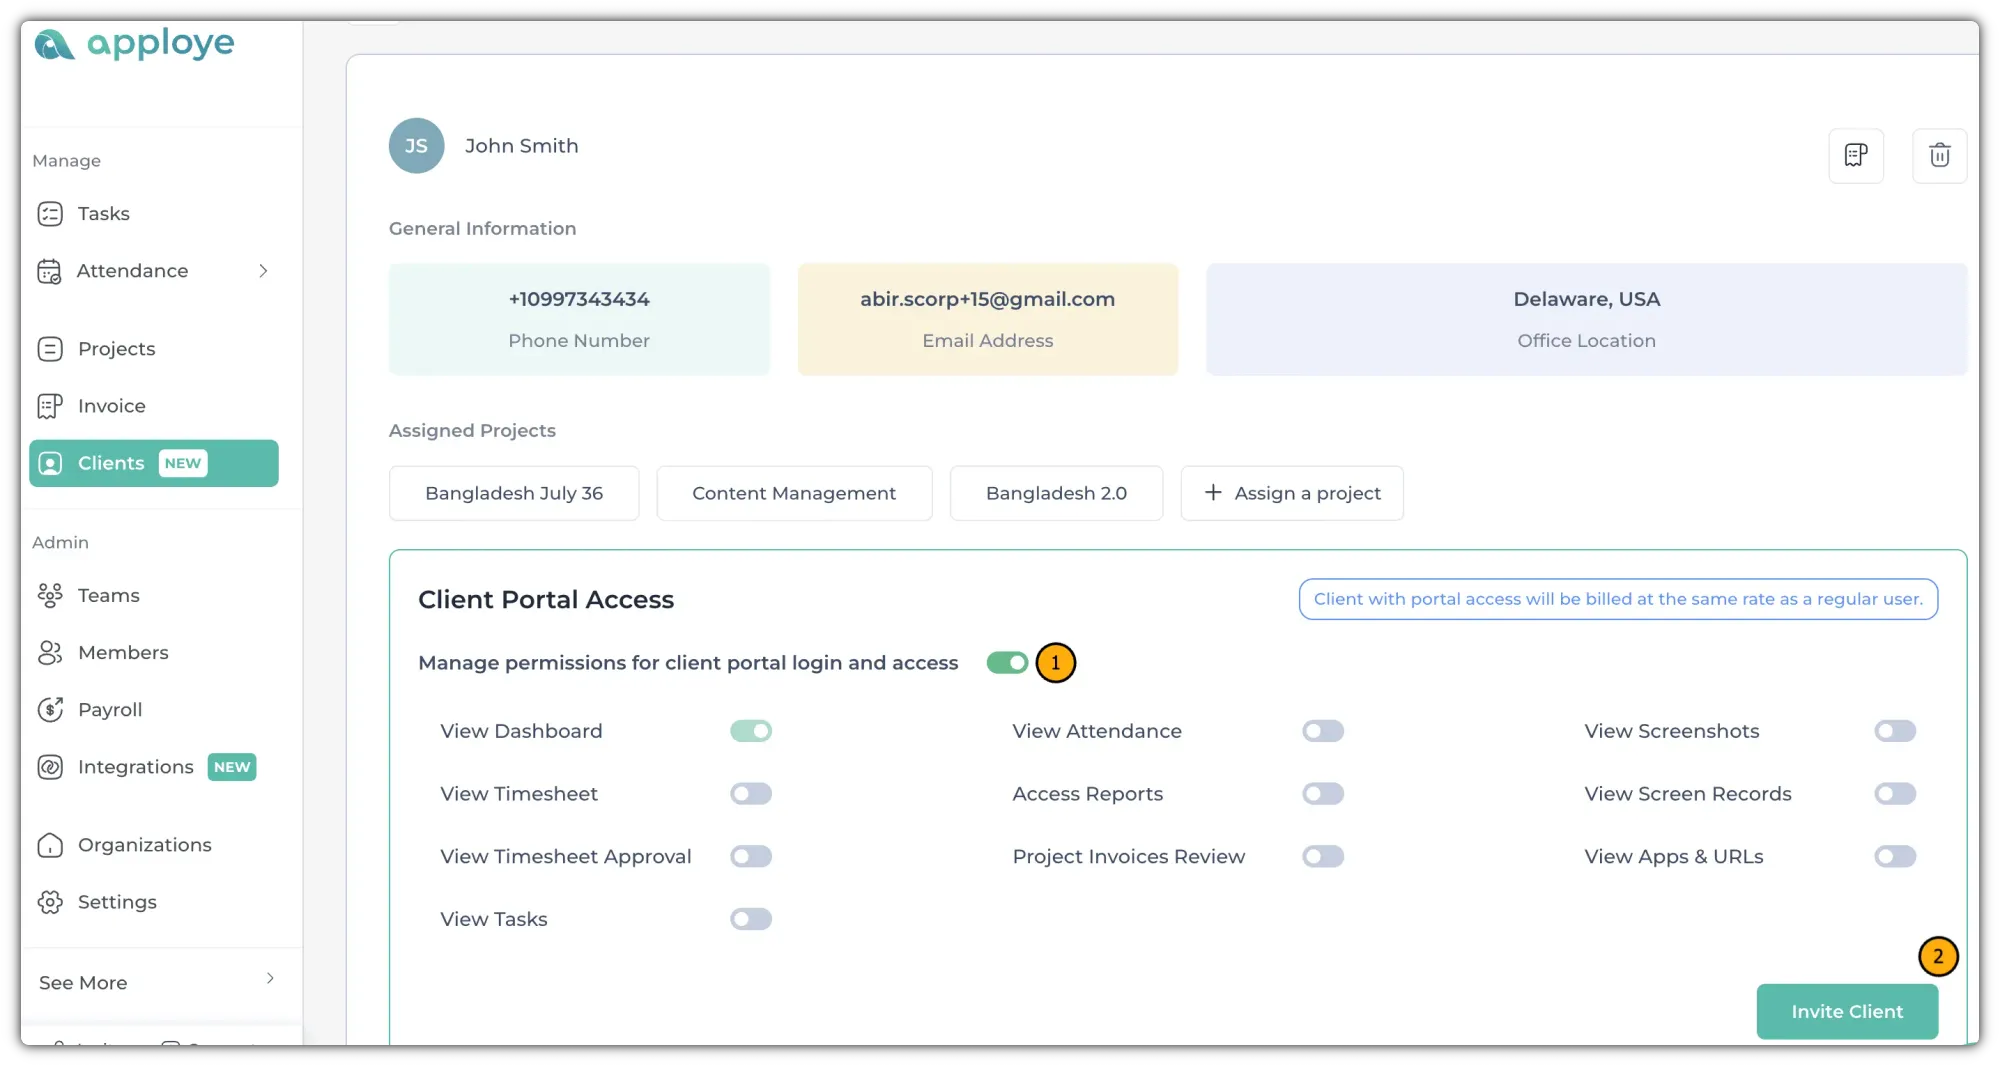
Once you click on 'Invite Client', your client will receive an invitation from your organization via email.
👉 They will need to click on the 'Accept Invitation' button.
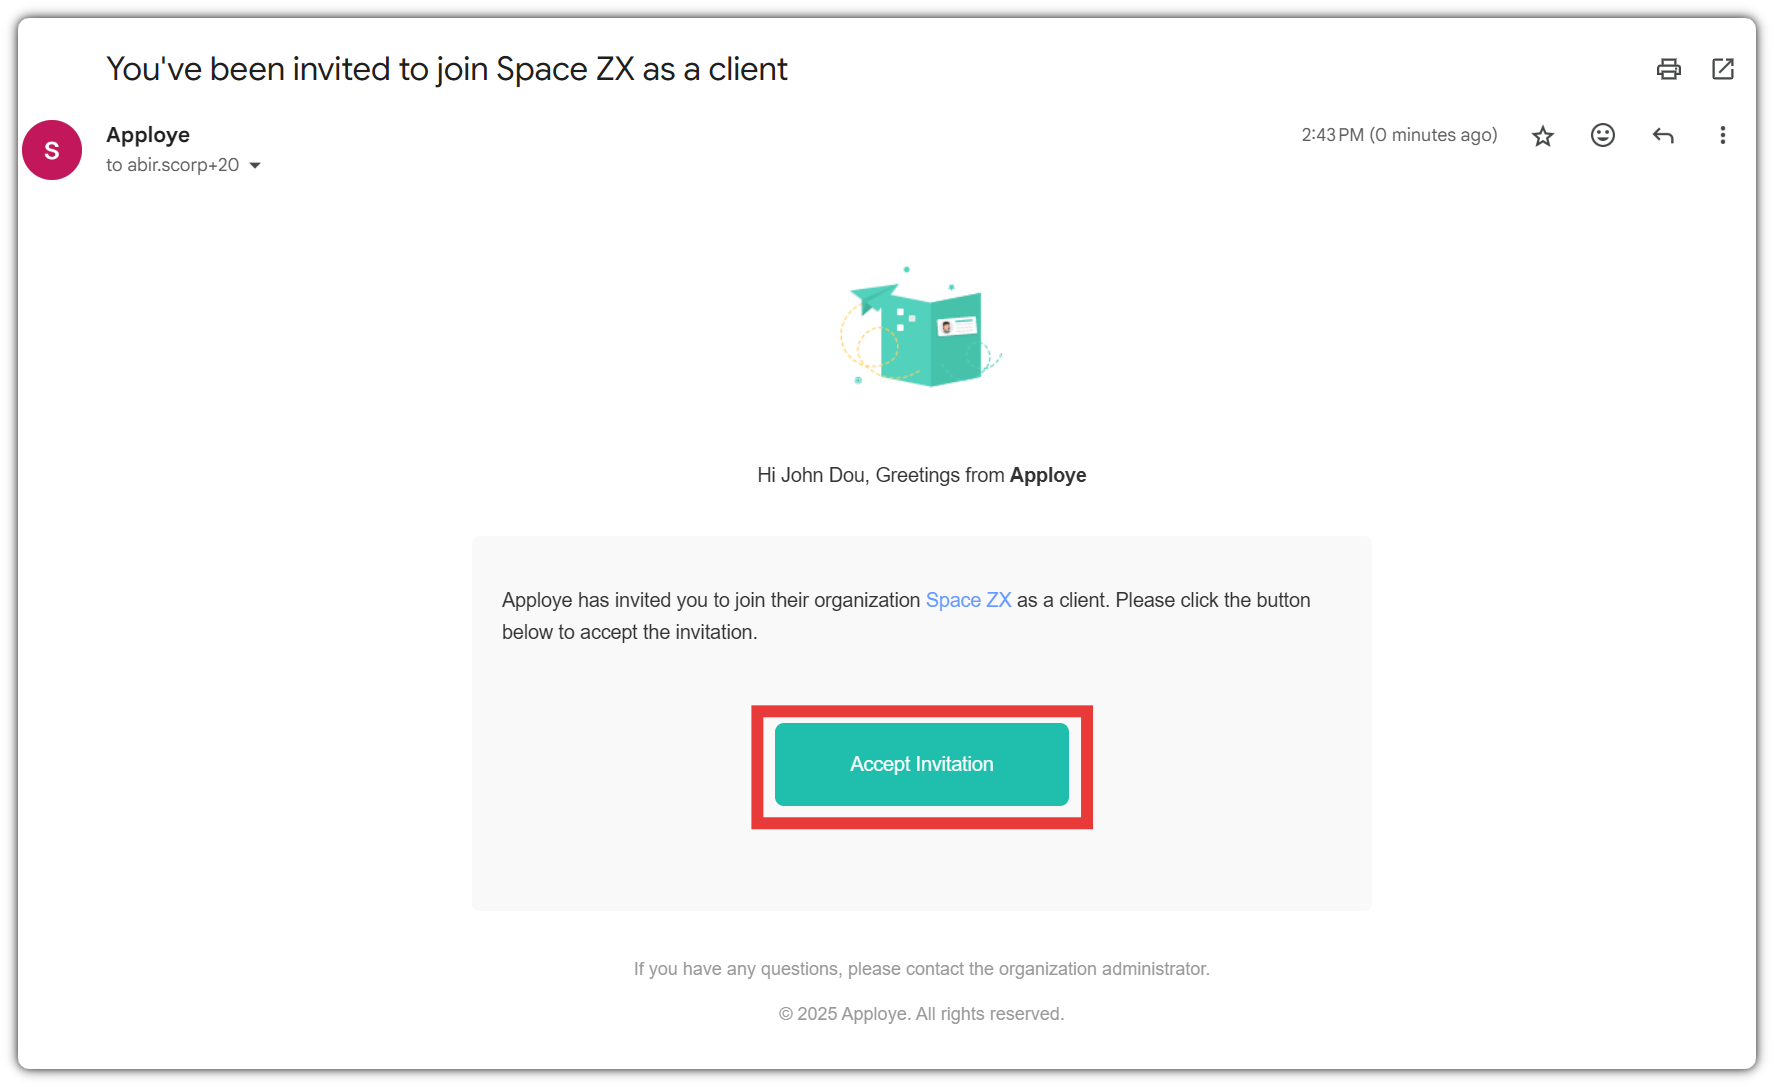
👉 After accepting the invitation, they will "Sign up" for the client access portal.
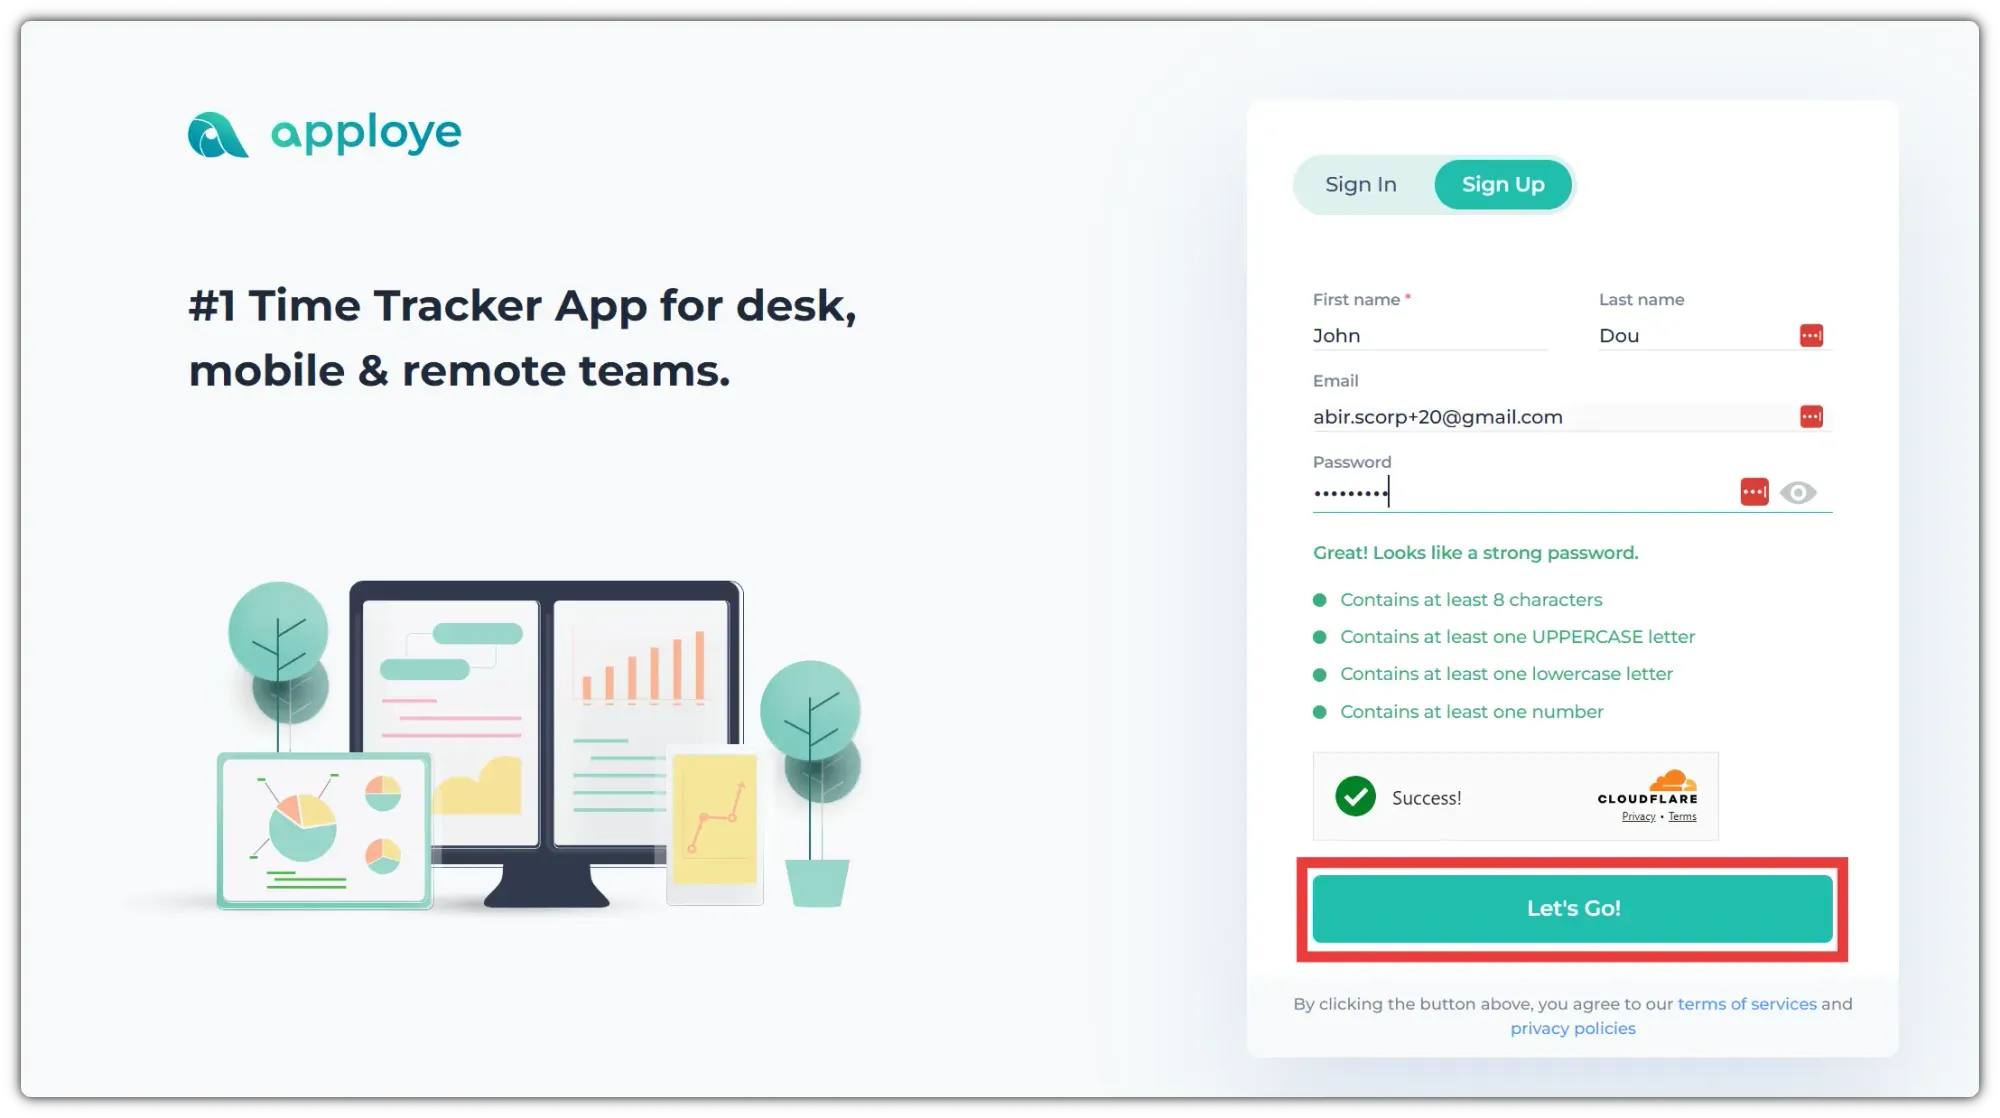
Now, they can access and view data related to the employees assigned to them, based on the associated projects.

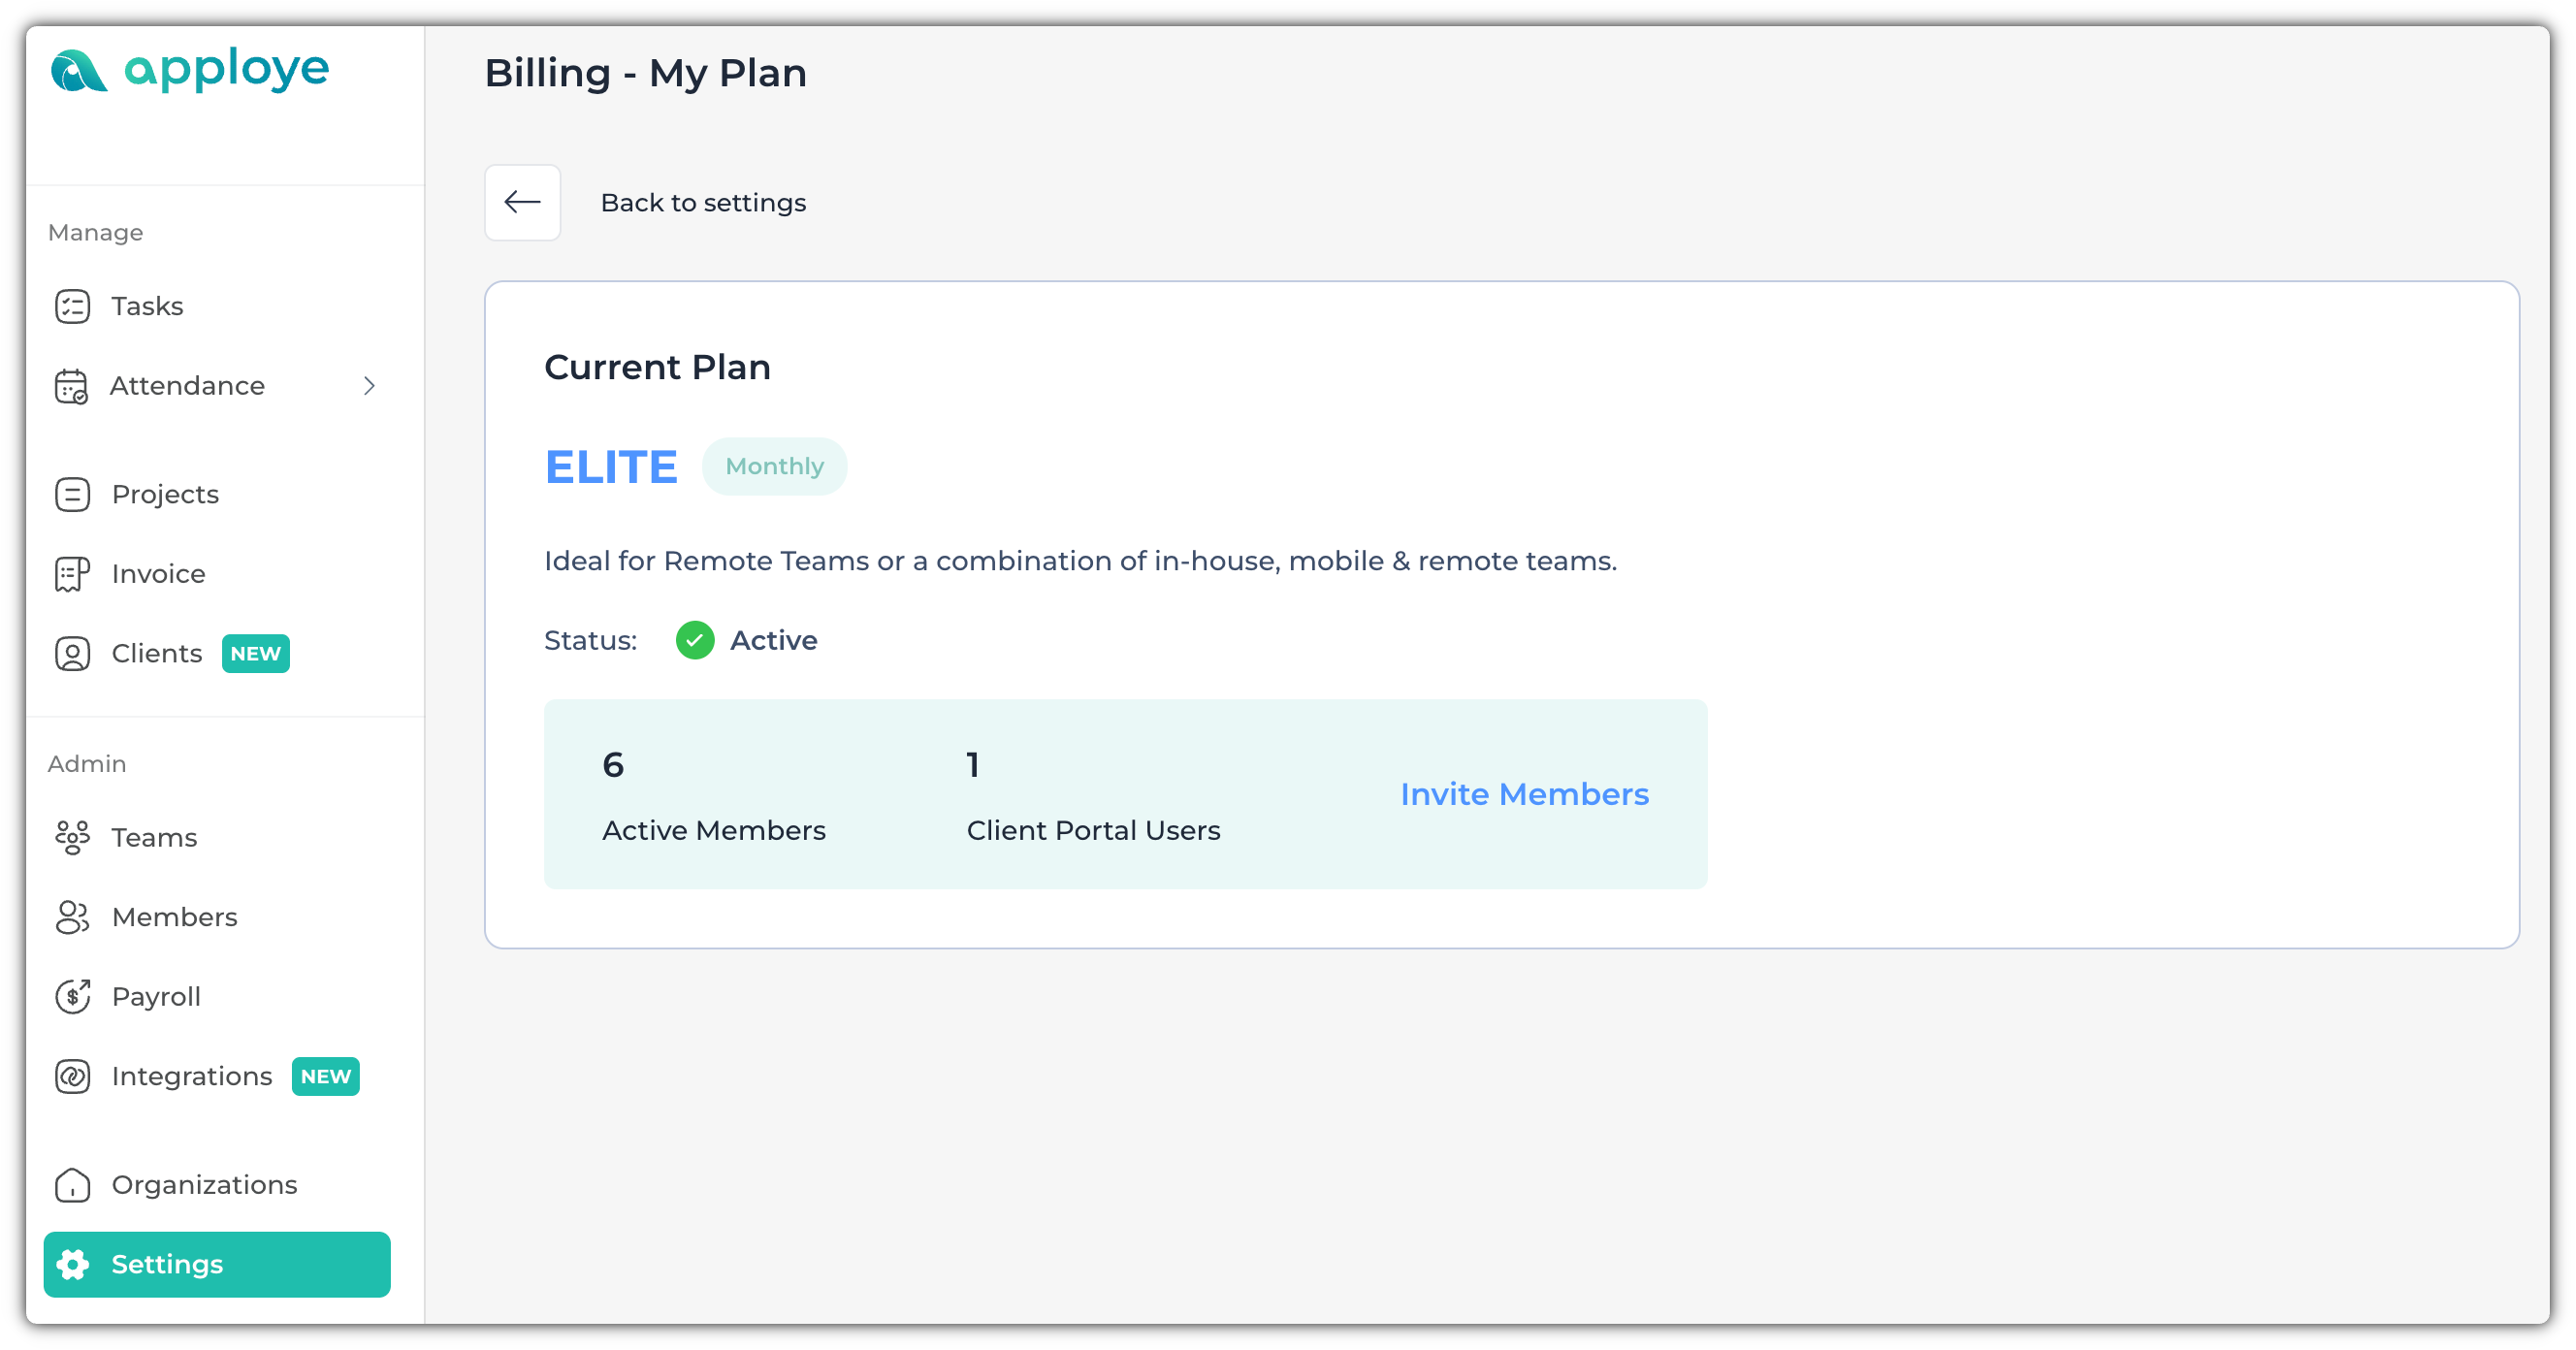
As the owner, you can go to Settings > My Plan to see the members & clients who are being billed.
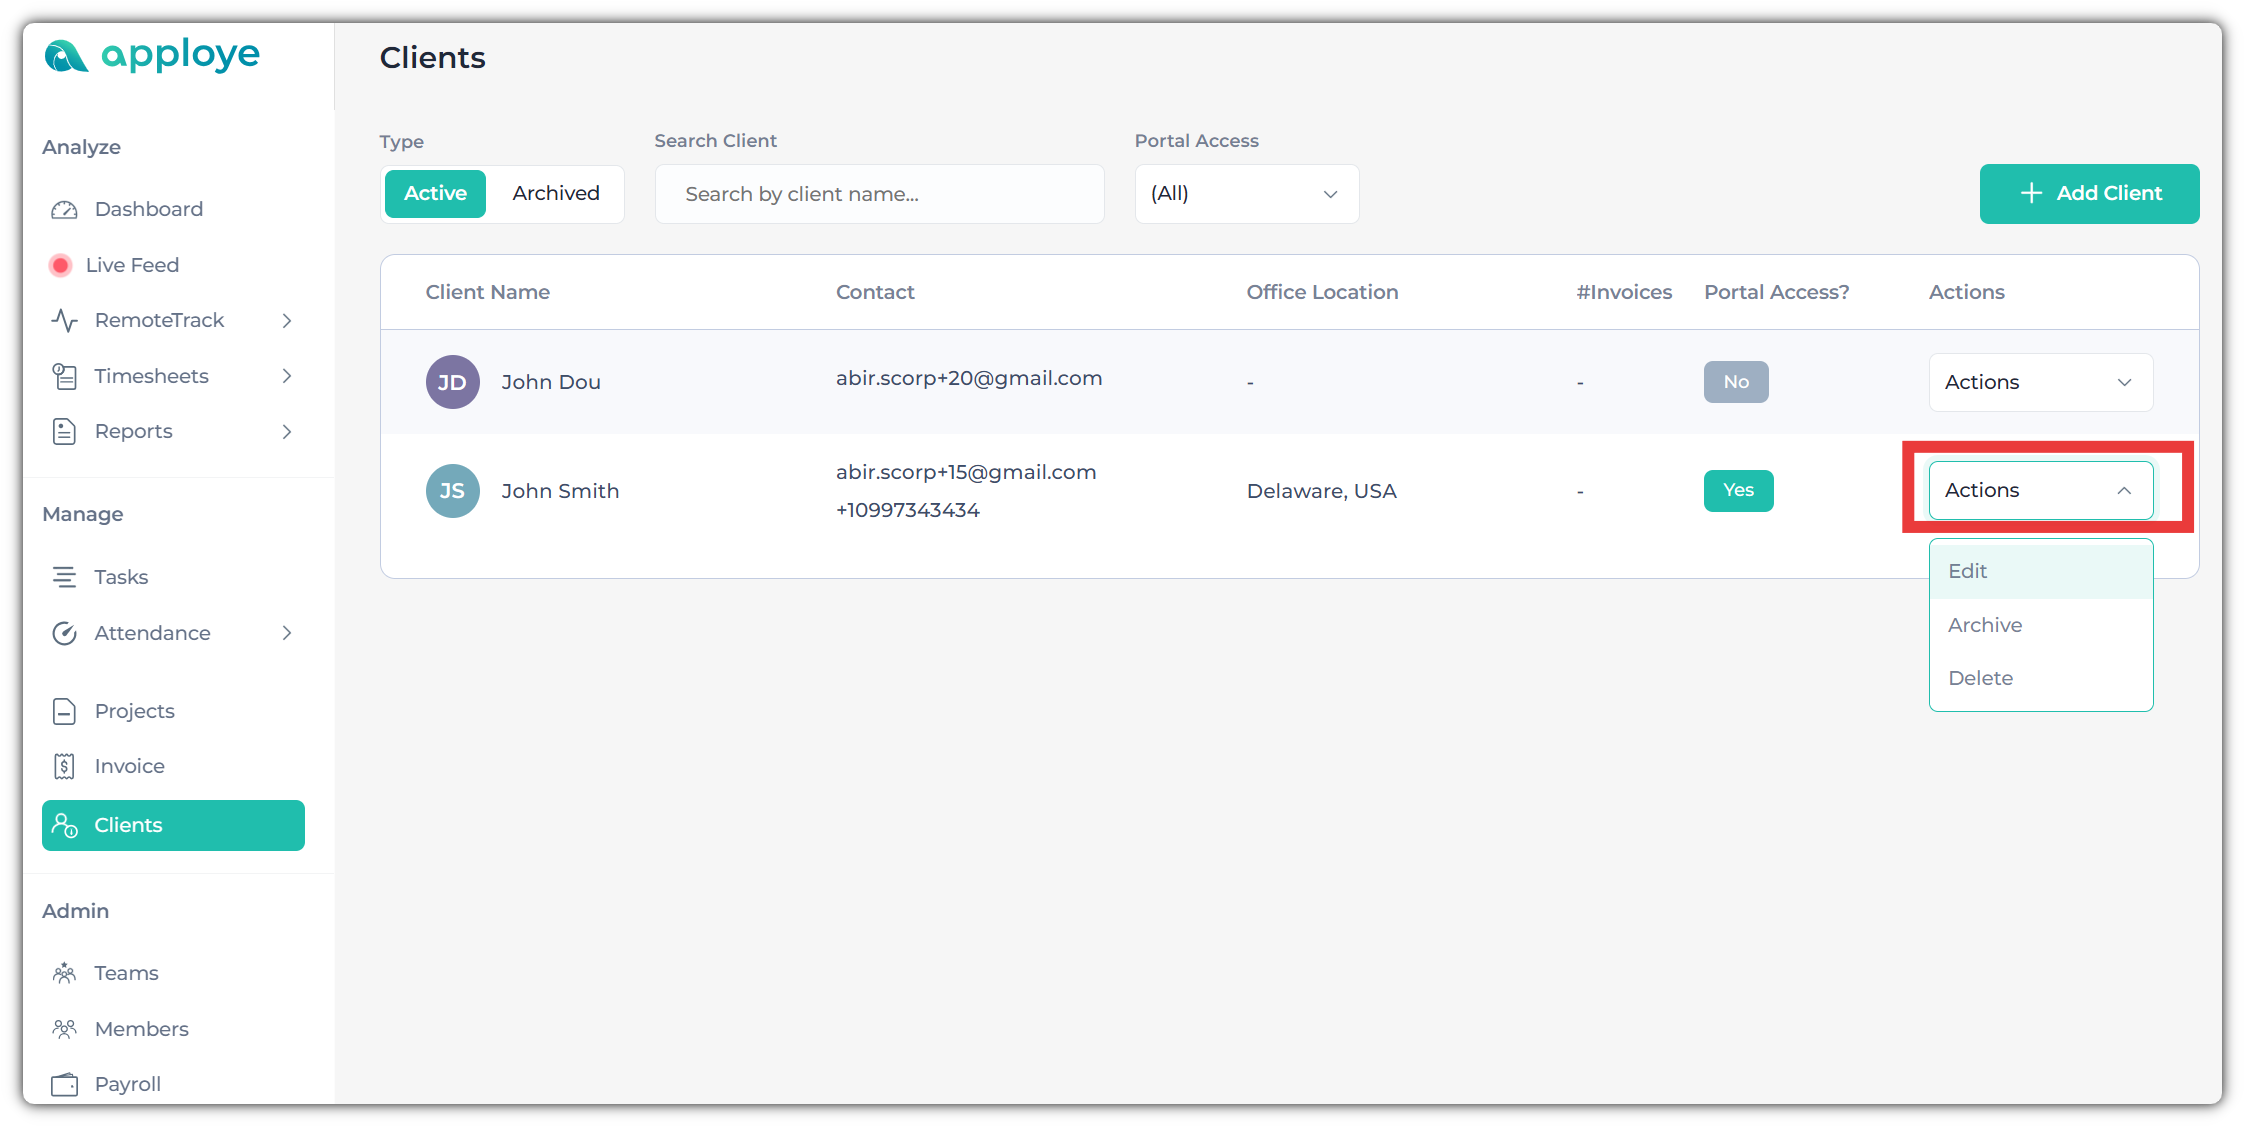
Edit/Archive/Delete clients in Apploye
Each client entry includes an “Actions” button. By clicking it, you may edit, archive, or delete the client anytime you wish.
If you have any questions, feel free to contact us at support@apploye.com.