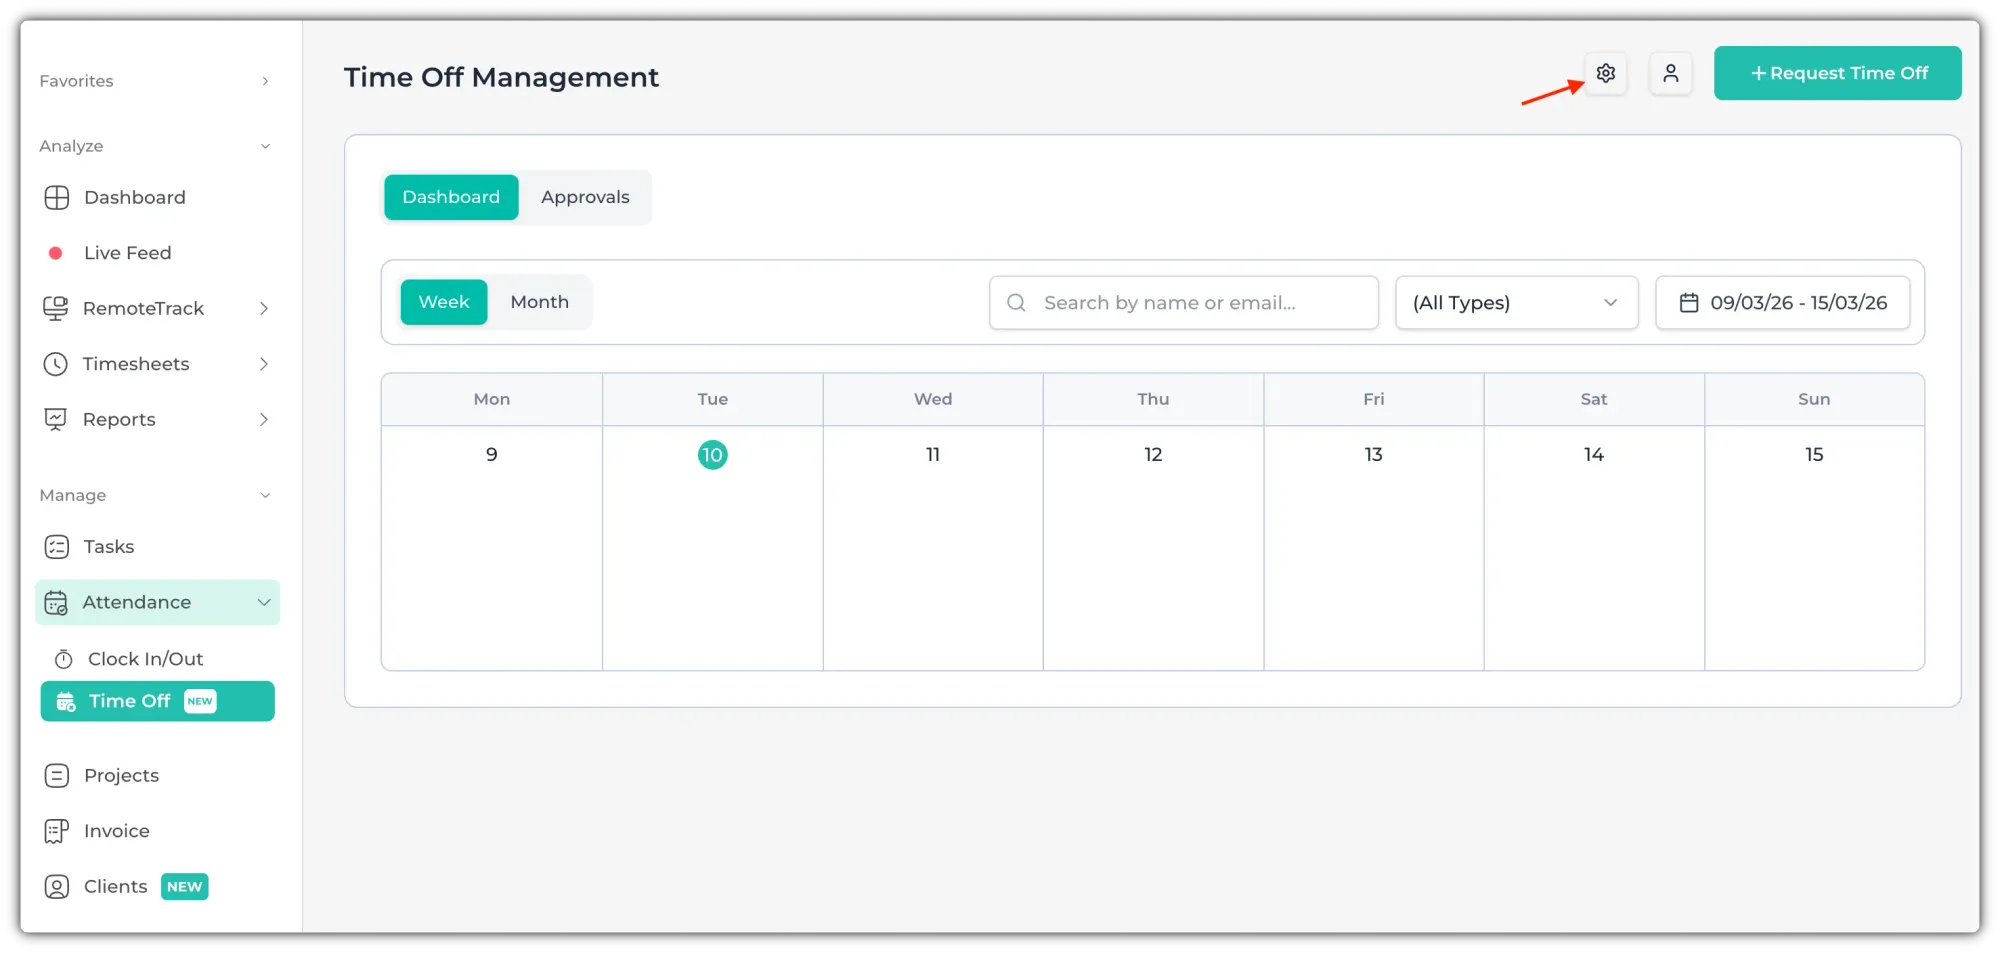
To manage the time off, go to Attendance > Time Off, from the left side panel.
Time Off Policy
Before you ask employees to apply for leave, you need to create a Leave Policy. Click on the settings icon to create/edit the leave policy.
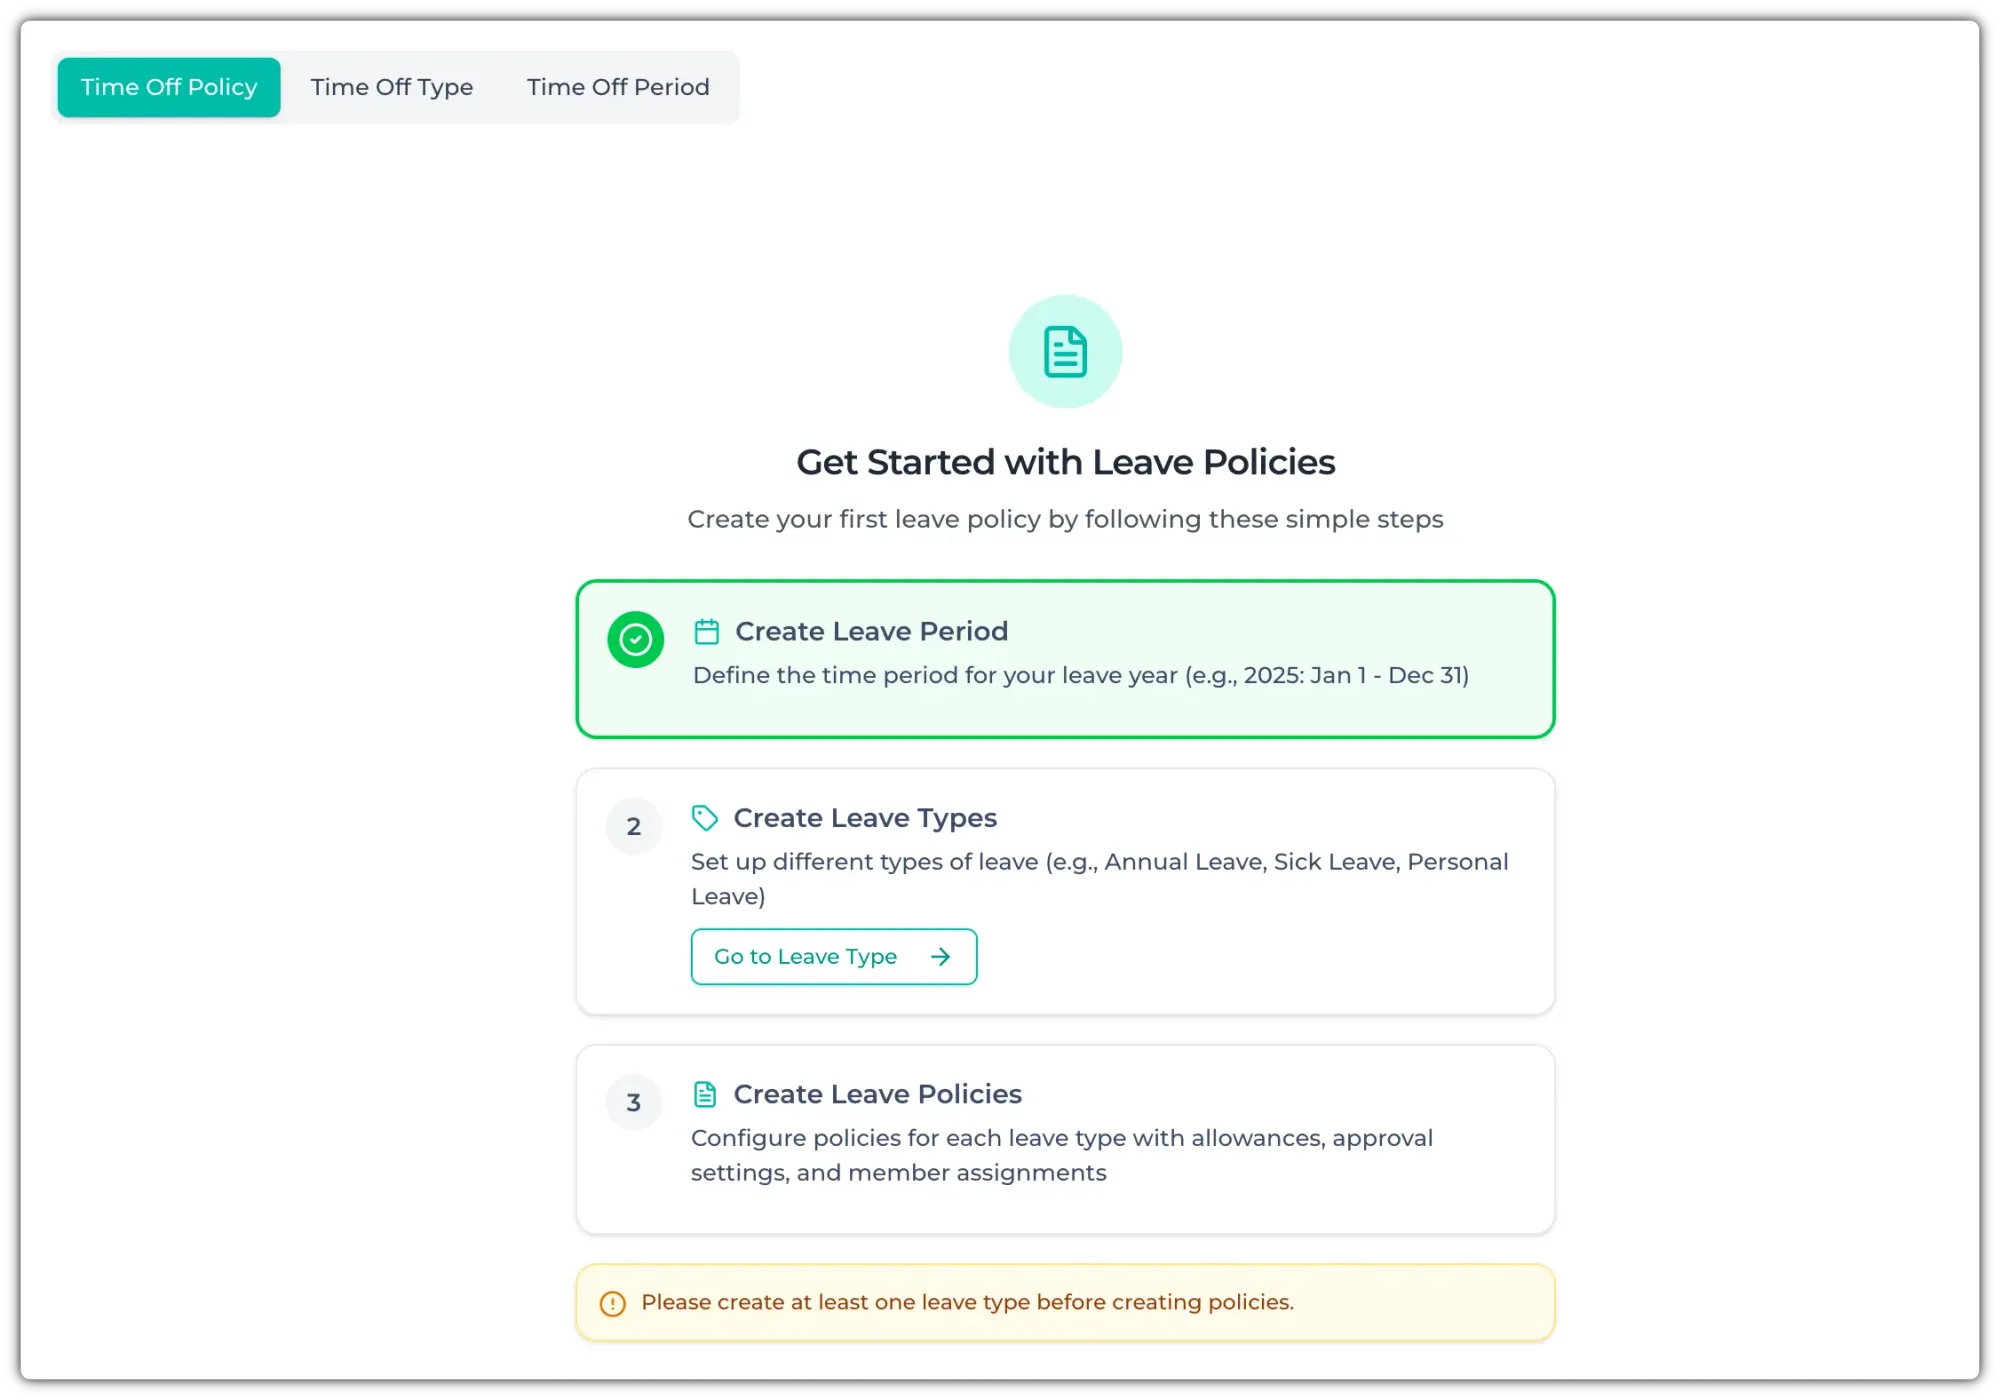
This will take you to the leave policy settings. For creating the leave policy for your organization, you need to create a time off type.
These will be based on "Time Off Period". Current and Next year will be generated automatically as a time-off period.

Go to "Time Off Type". Click on "+ Add Time Off Type" to add a leave type. It can be casual leave, earned leave, sick leave, etc. You can add any custom leave type from here. Give it a name & choose a color. You can also add a description for that time off type.
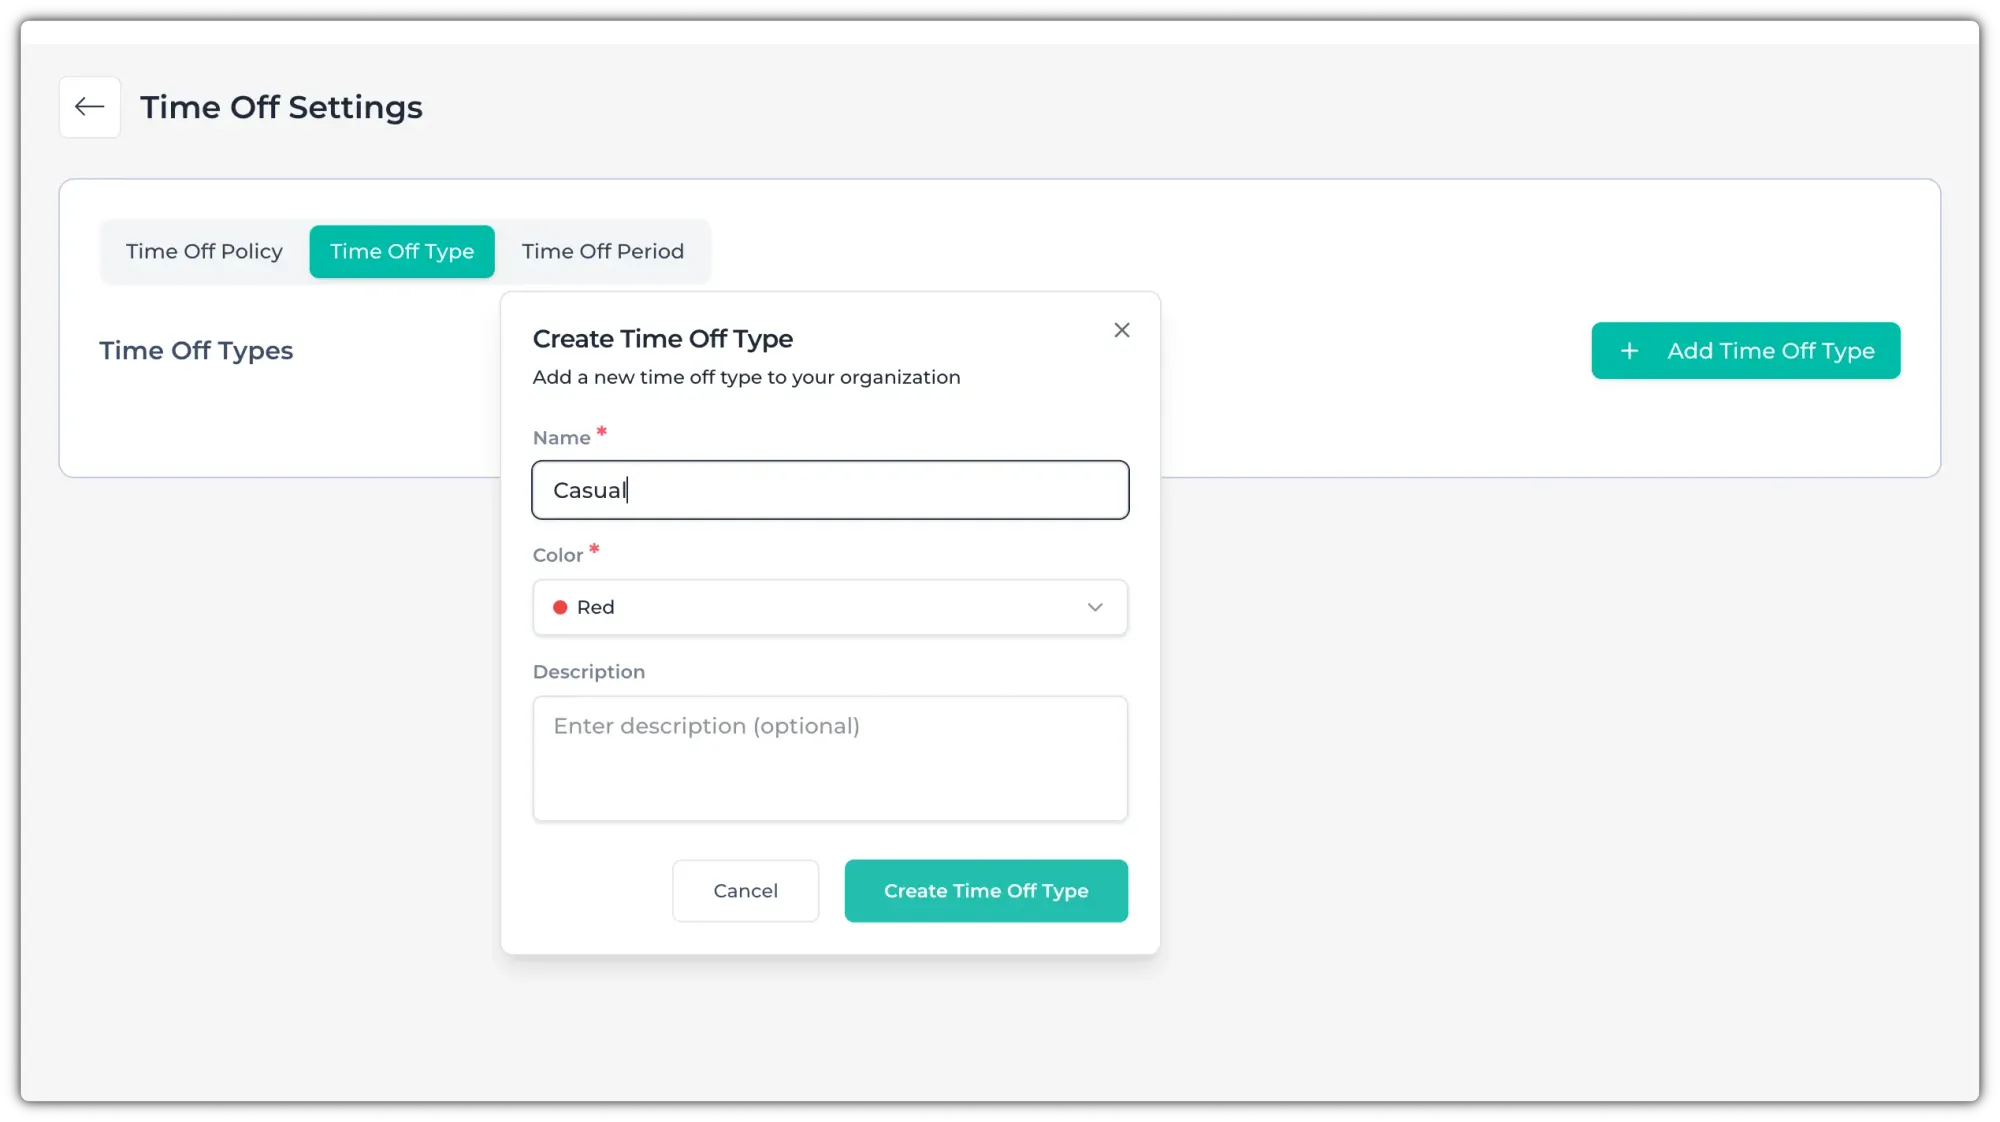
You can add more types by clicking on "+ Add Time Off Type". You can also edit using the edit/delete buttons on the right.
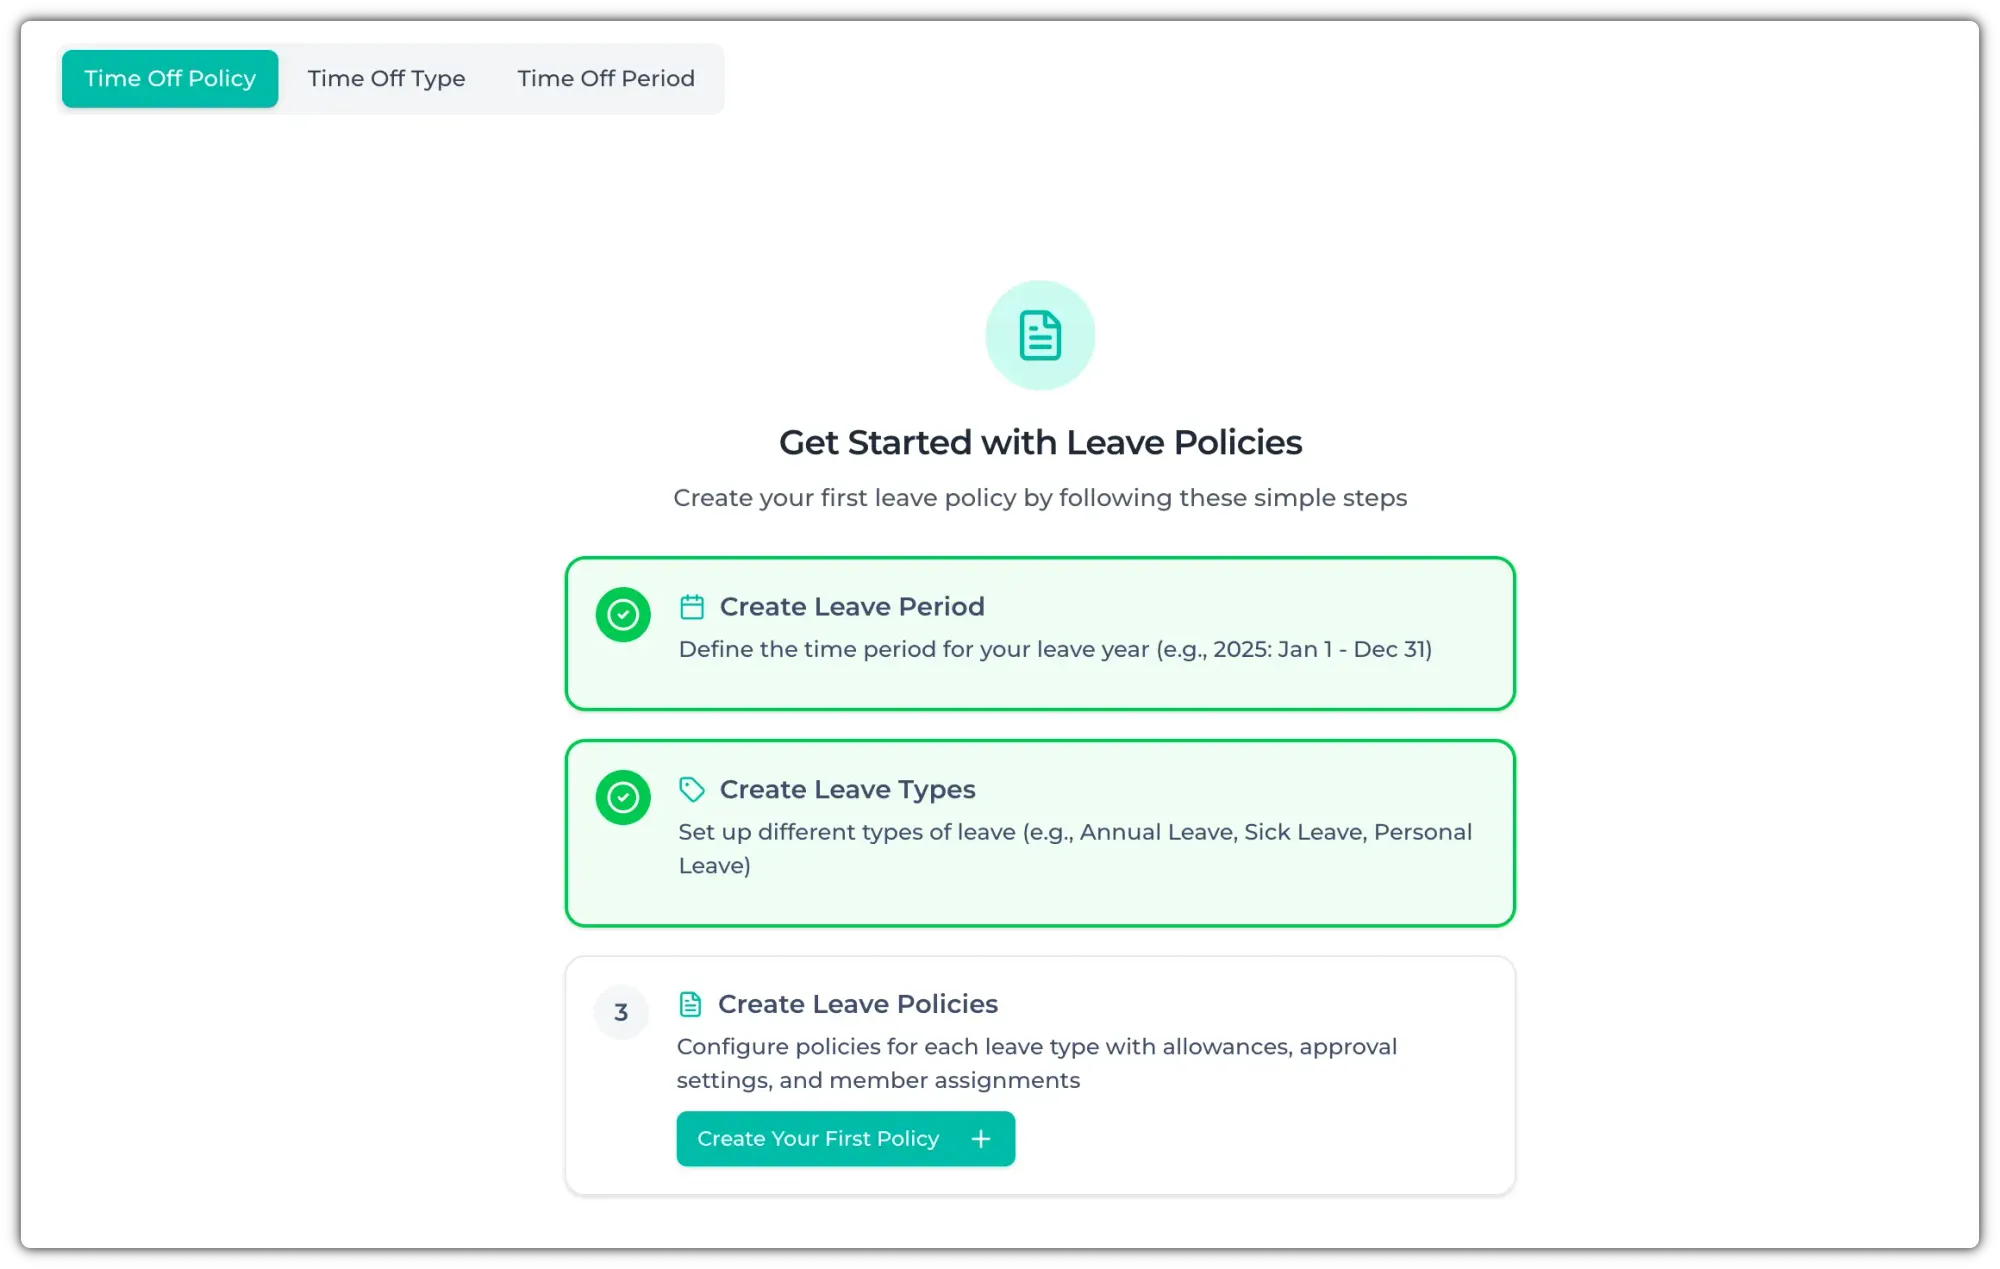
Now, go to "Time Off Policy" and click on the "Create Your First Policy" button.
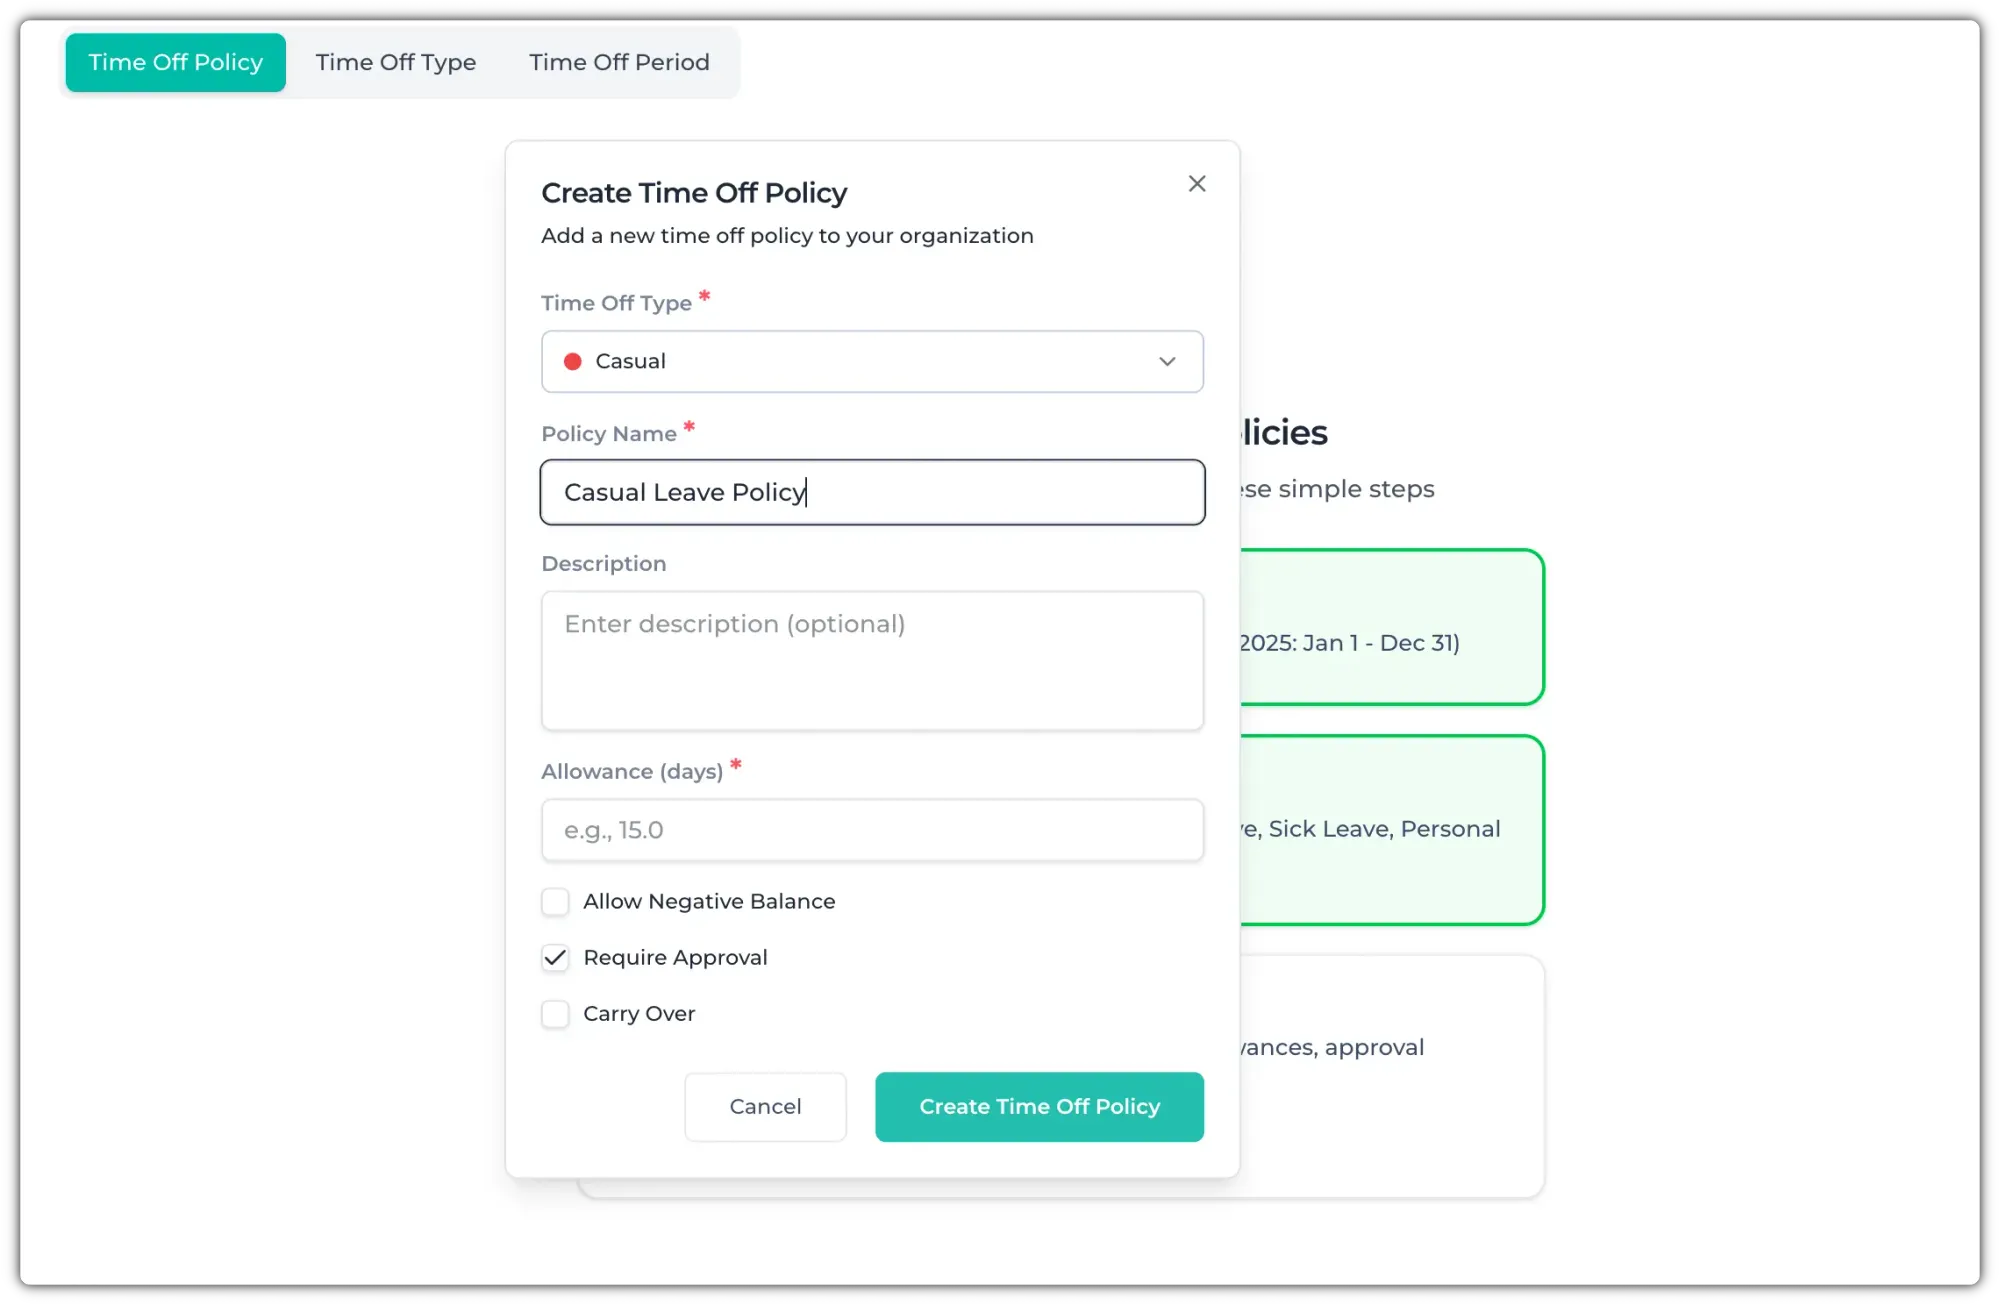
It will open a pop-up. Now, select the leave type, give it a name, and choose the number of days for this leave type. You can also choose whether to allow a negative balance, require approval, and if leave can carry over to the next leave period.
Go over these carefully, and then click on the "Create Time Off Policy" button to create it.
Now, assign members to this Time Off Policy.

Requesting Time Off
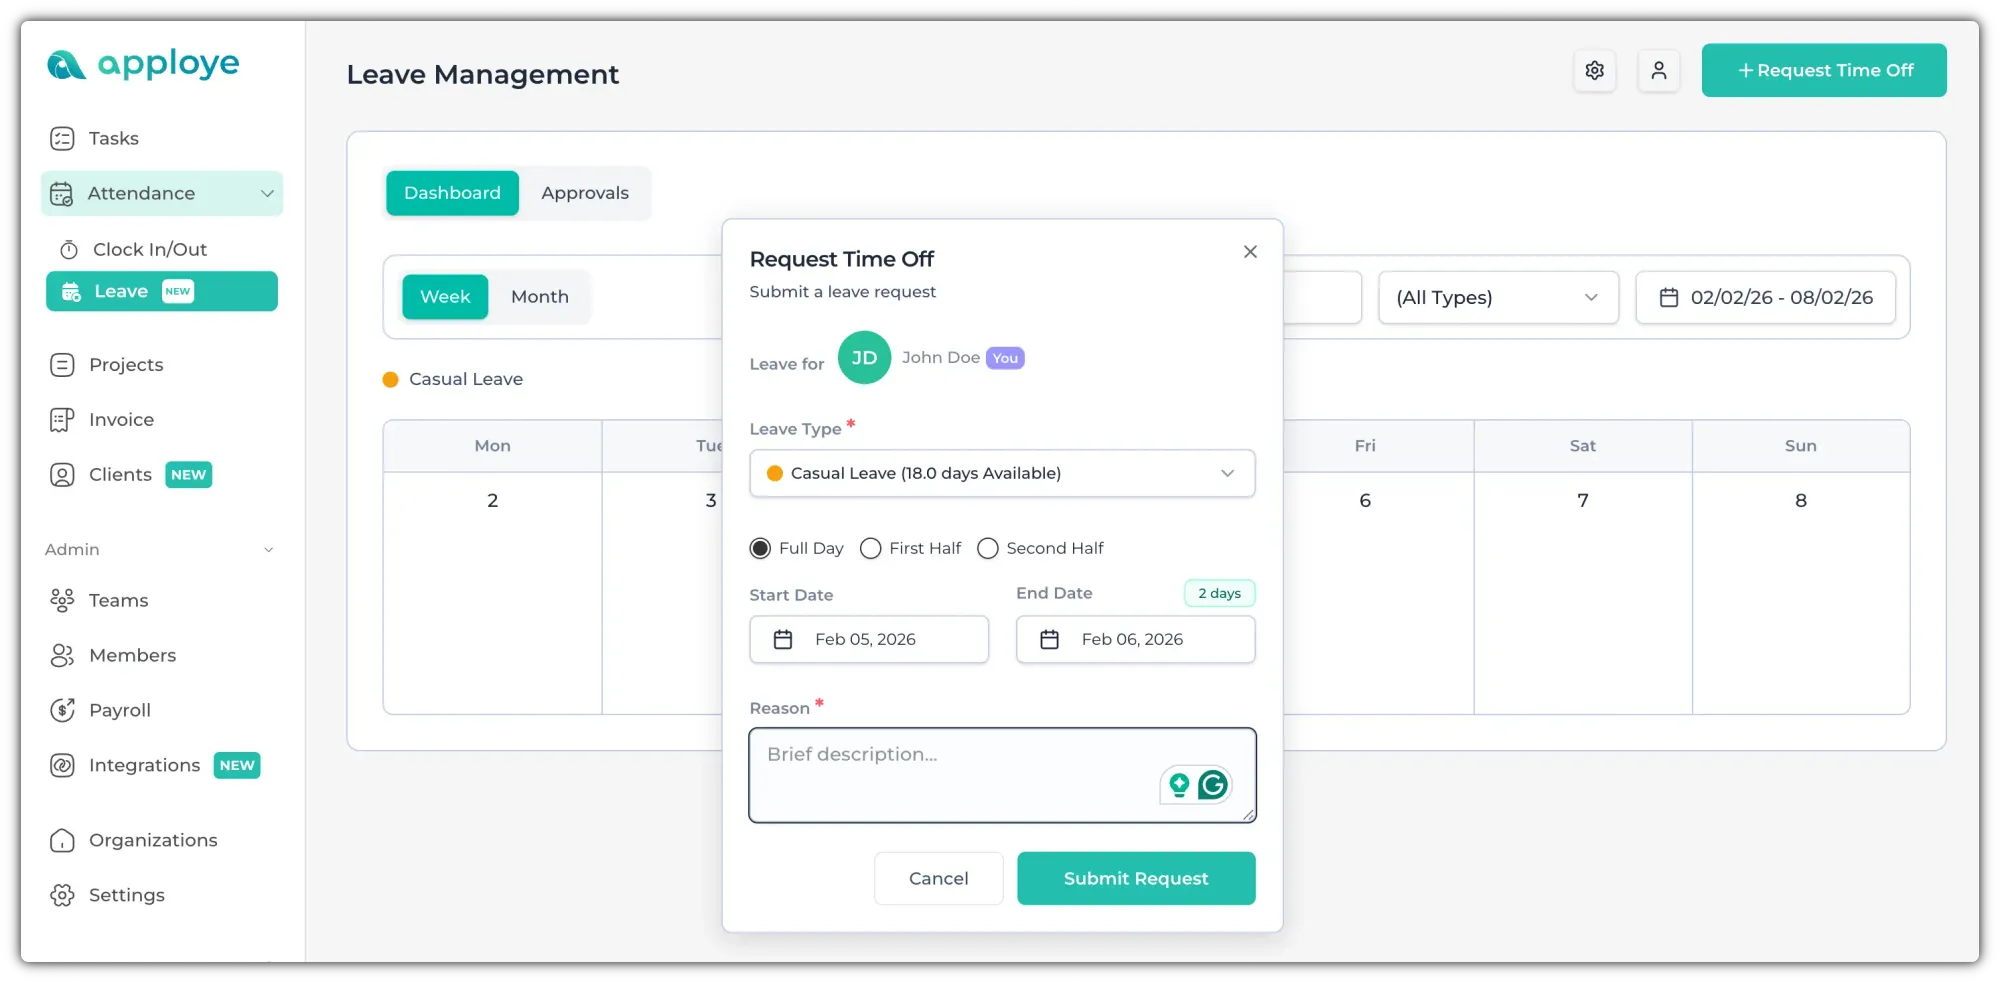
Employees need to click on the "+ Request Time Off" button to apply for leave. To request time off, they'd enter if it was a full day/half day and then the start & end date and give a reason for submitting the request.
Approval
If any employee has requested leave, you will see a number in the "Approvals" section. Click on the check mark ✅ or ❌ button to approve or reject.
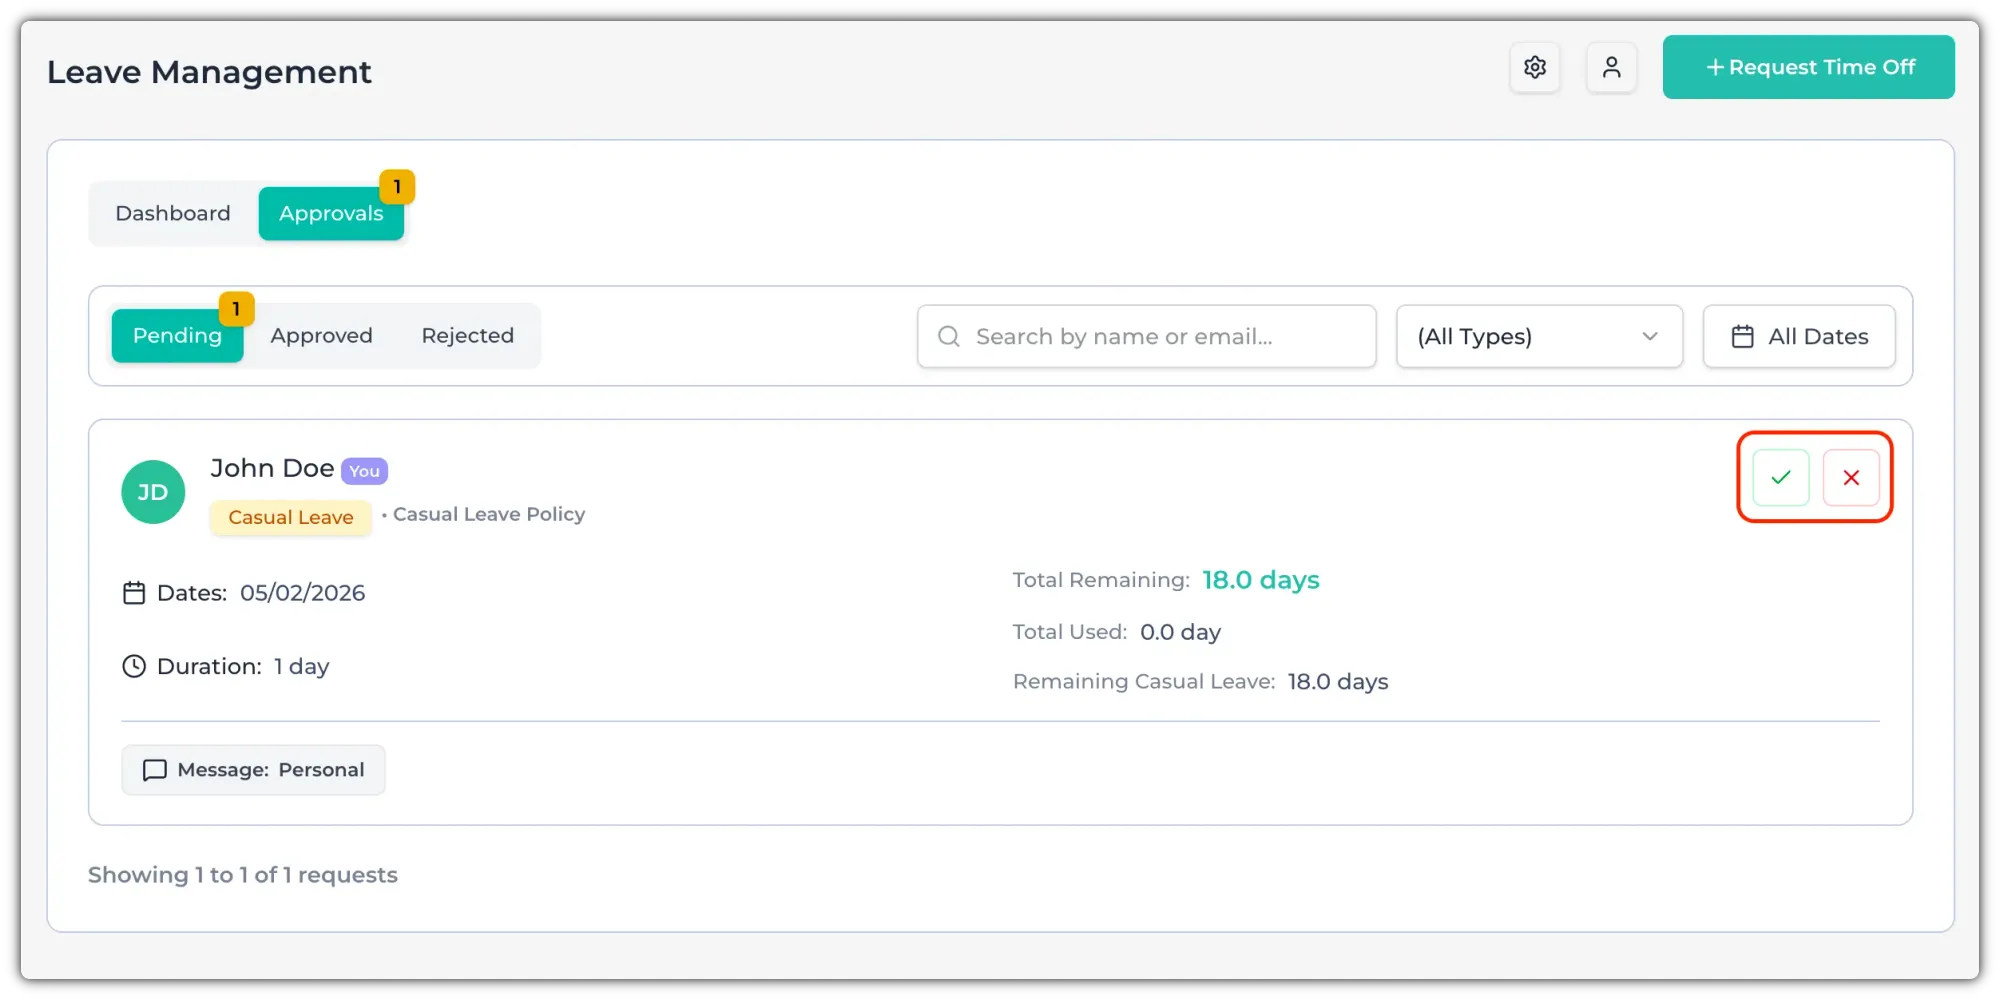
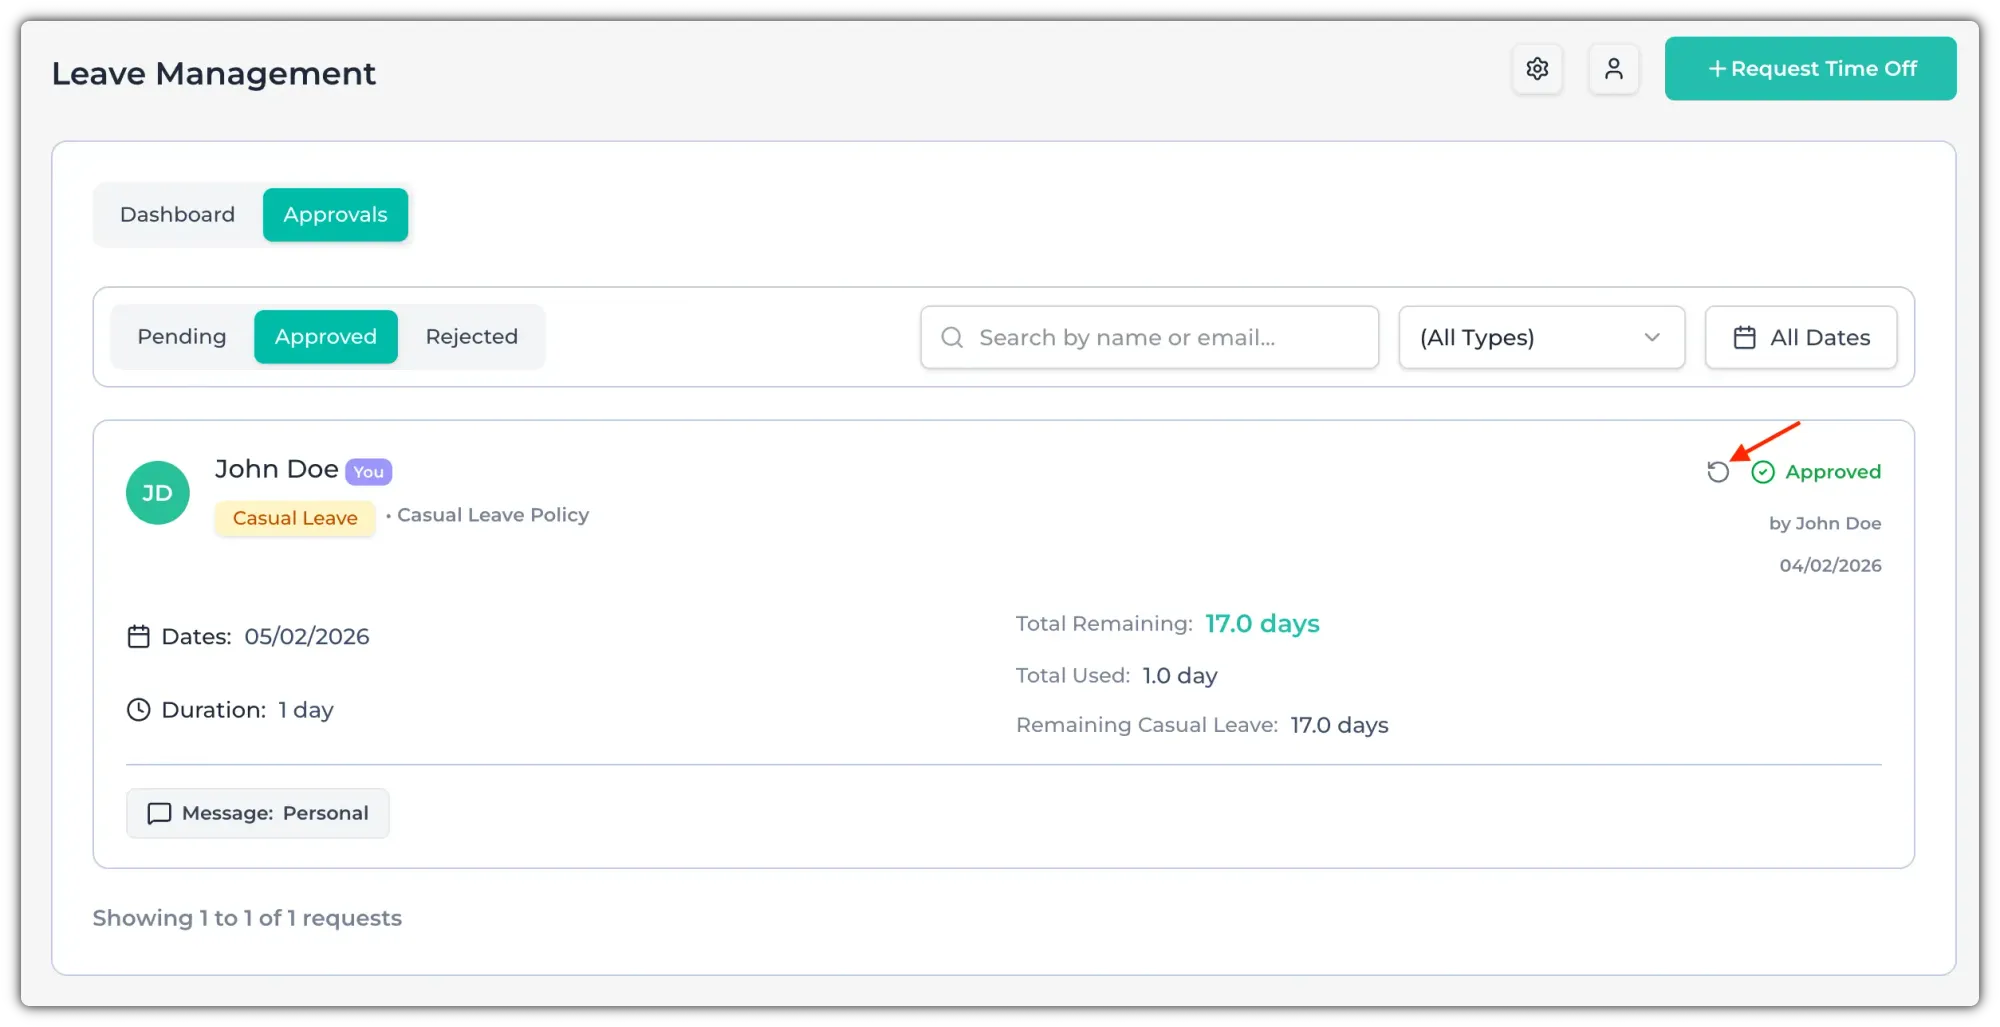
After approving, it will move to the "Approved" tab.
If you want to revert the approval, click on the circular arrow icon to restore to pending.