
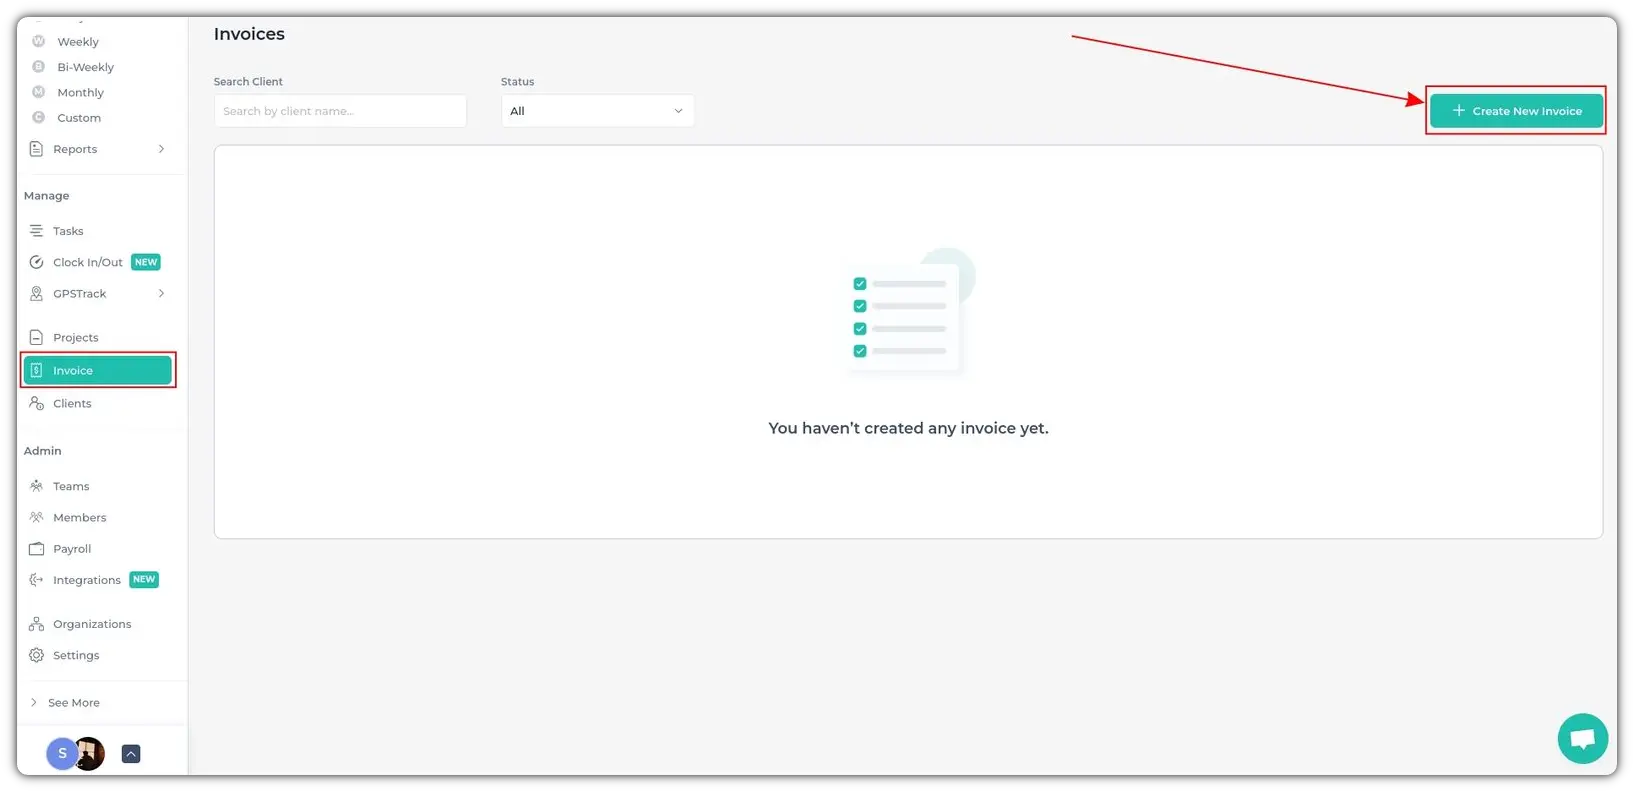
Go to Invoice from the left sidebar and click on + Create New Invoice.
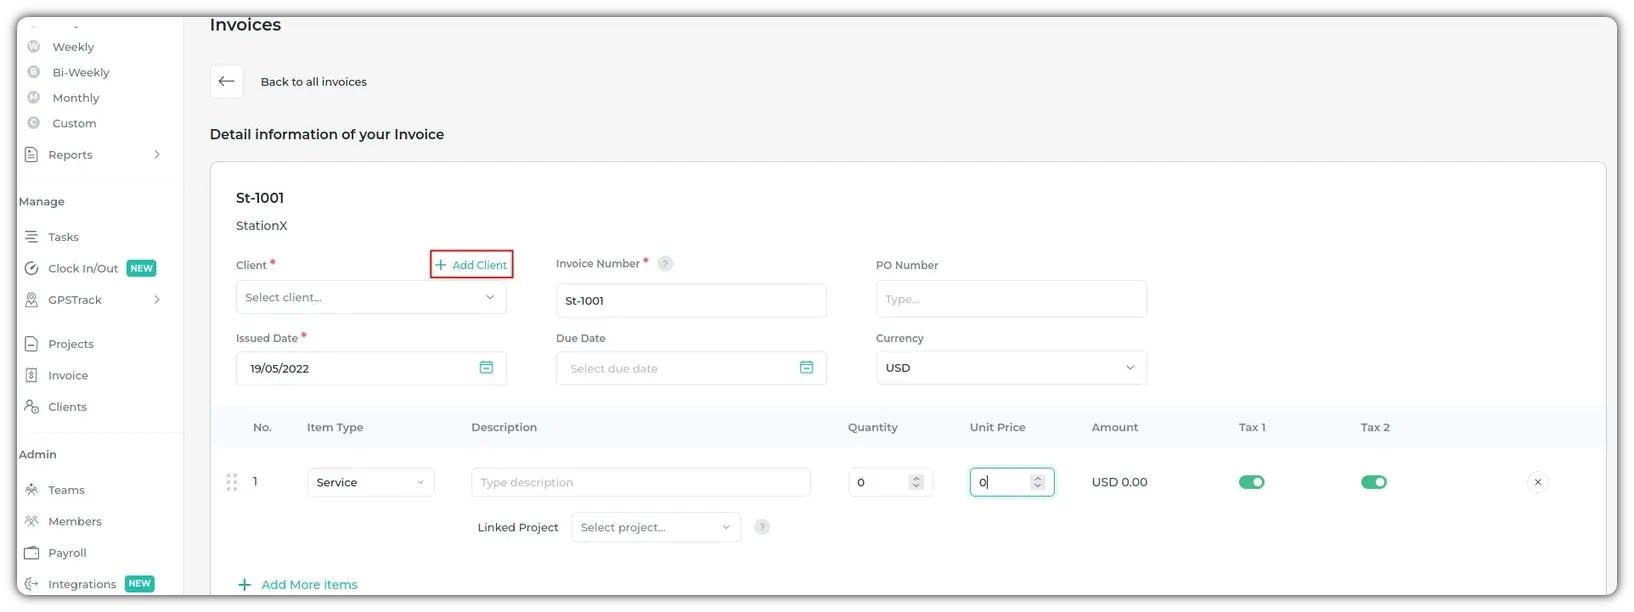
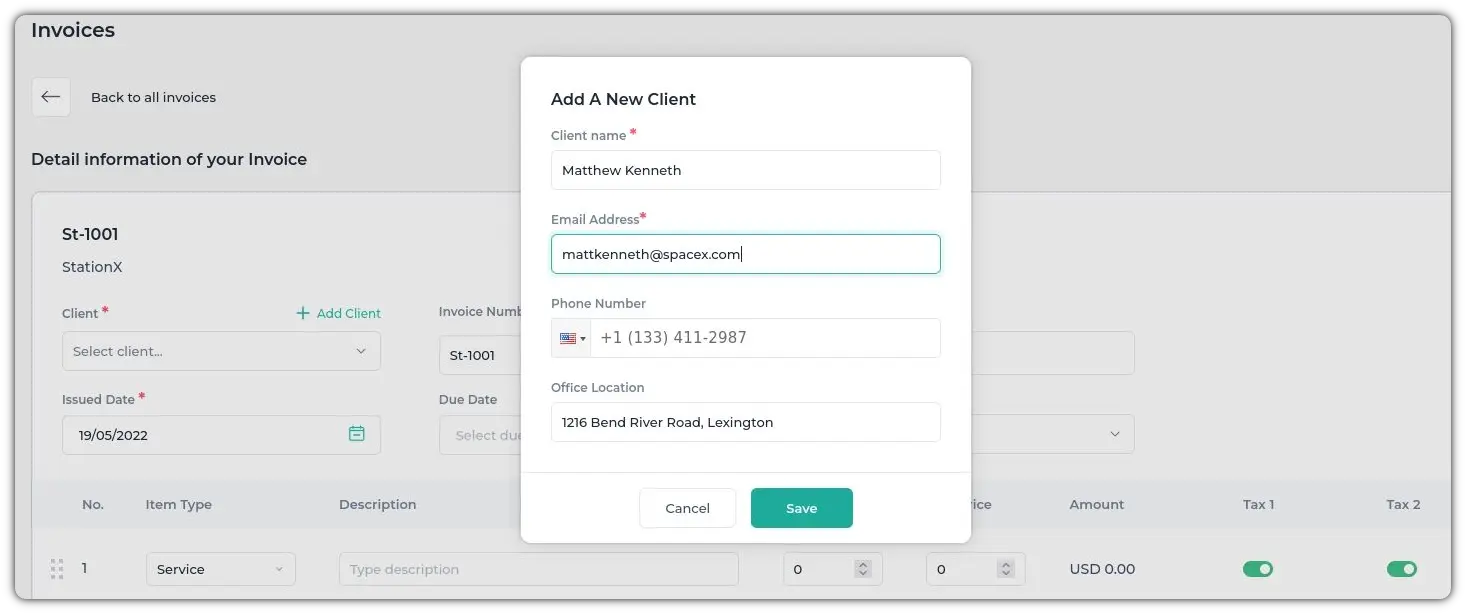
If you haven't created a client already, you can create a client by clicking on the " + Add Client " button.
Give the name and email address and click on Save. You can also add the phone number and address.
After the client is selected, you can also modify a few other data:
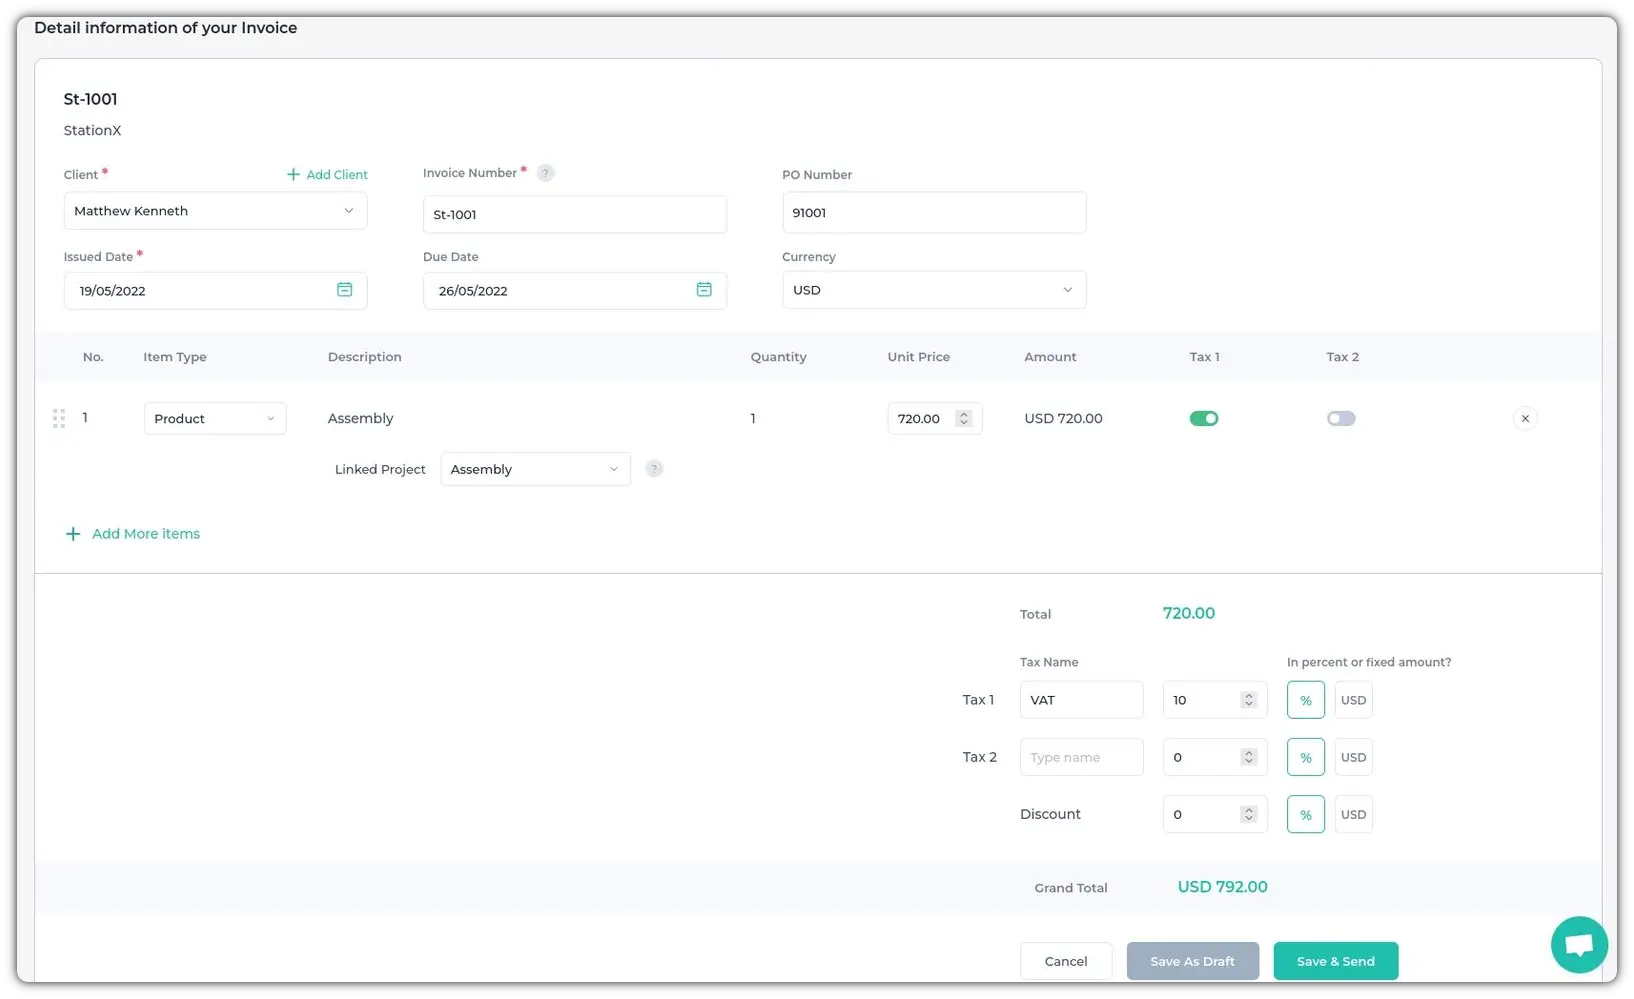
- Change the Issued Date (if necessary). You can change the Invoice Number. You can also set the due date, currency, and PO numbers, but those are optional.
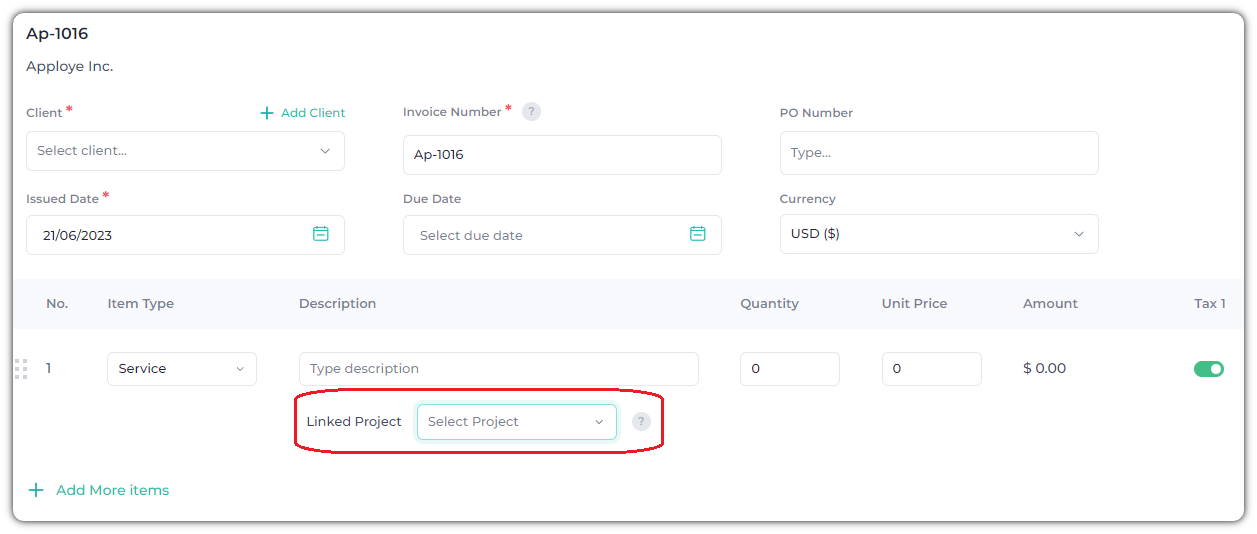
- Write the Item name in the description. You can also link existing projects here.
- Select whether it's a product/service from the drop-down menu.
- Click on Linked Project to add existing Apploye project here.
- Click on + Add More Items to add more items to this invoice.
- Add taxes (if applicable). You can add up to 2 taxes, as a percentage or in the currency (of your organization). You can also add discounts (if applicable). Apploye will automatically calculate all of these for you.
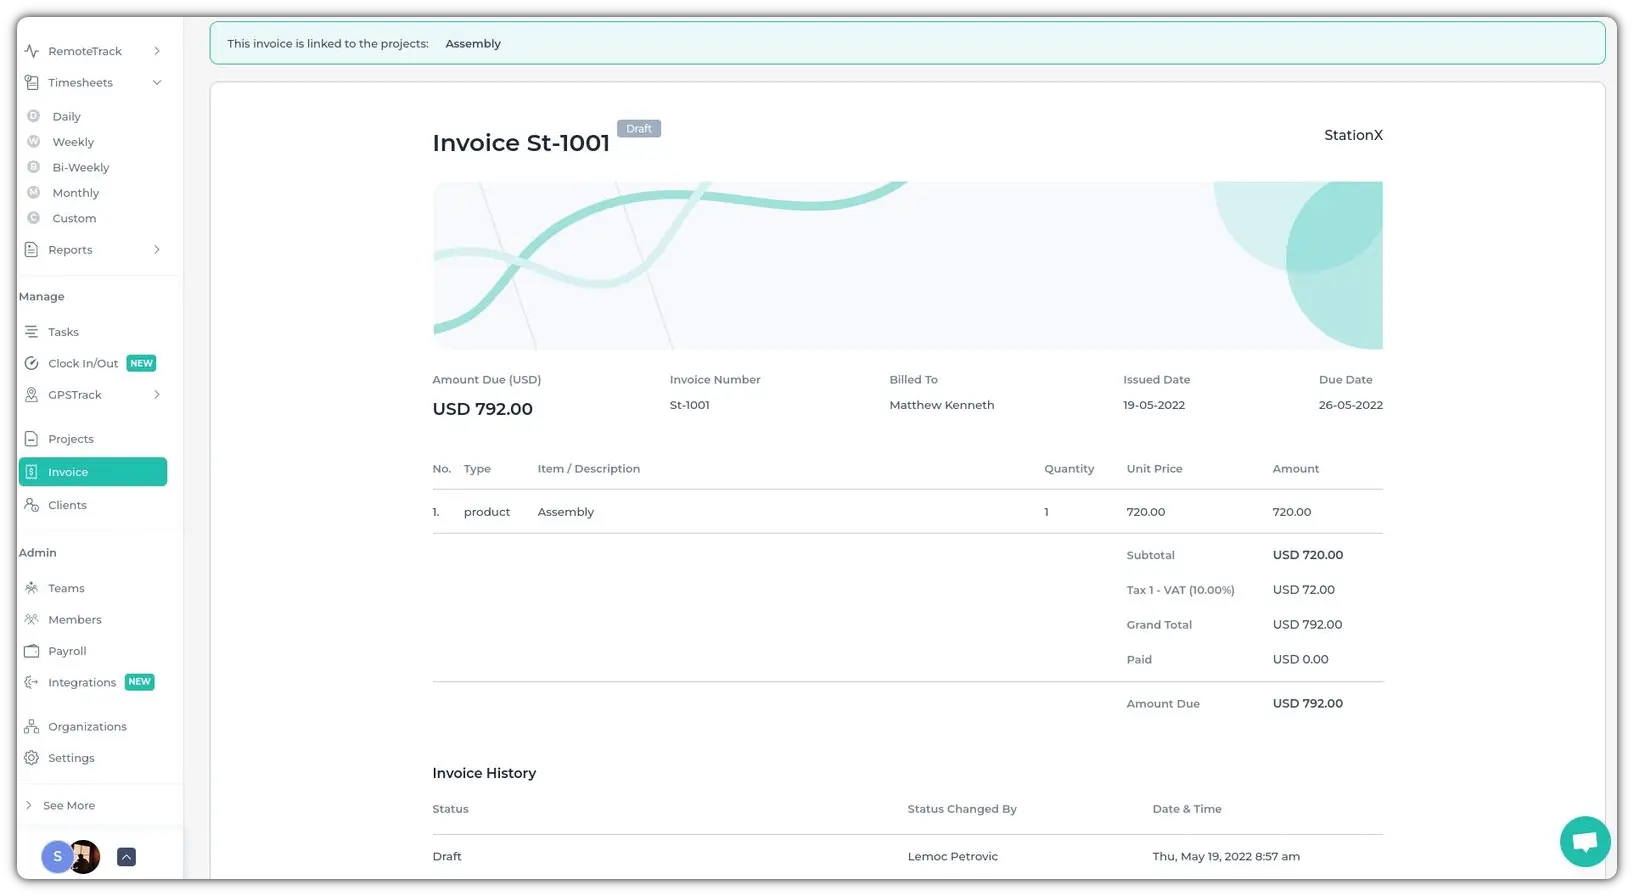
If you want to add the total tracked time in an existing Apploye project, click on Linked Project and select the project from the dropdown menu, to link that project in this invoice.
If you want to edit later, click on Save As Draft. Or, directly send it to the client by clicking on Save & Send.
After you click on Save & Send, you can click on the preview or use the link to get a preview of how this looks from the client's side.
After you send the invoice, the status will be changed to "Sent" and you can record payment (if the client has paid).
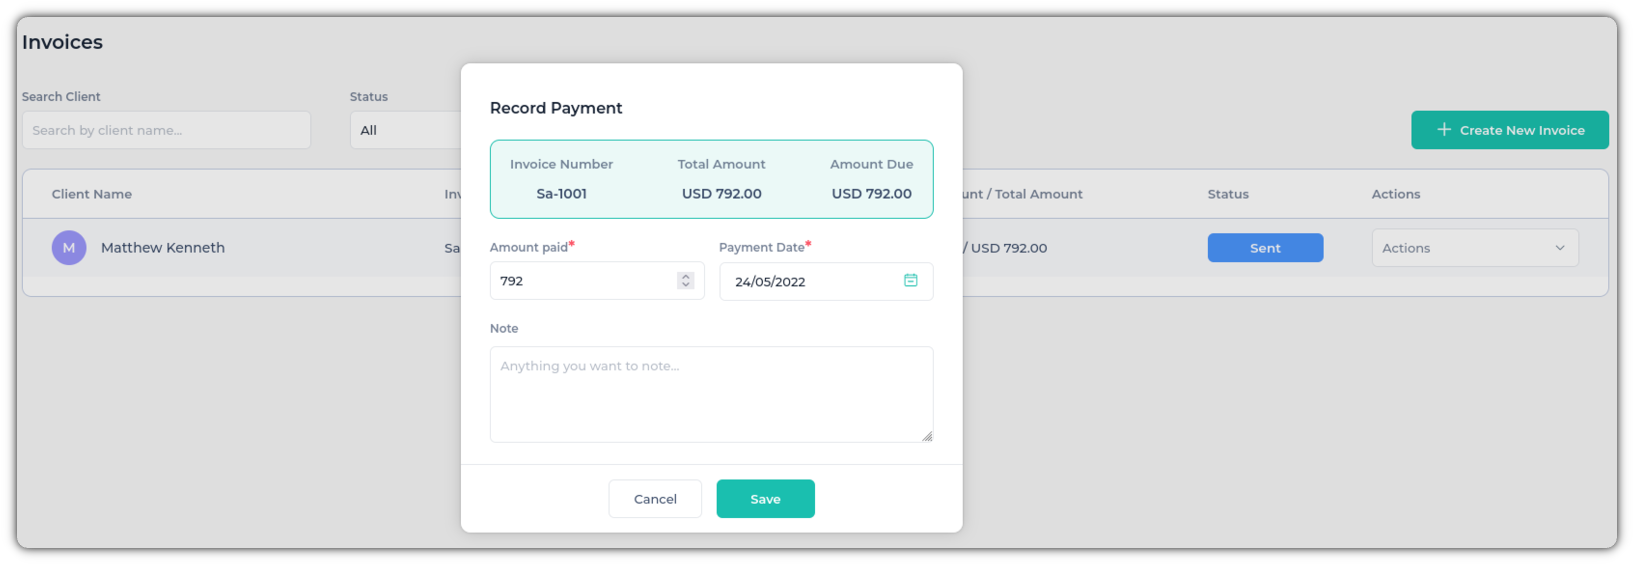
After entering the full payment, the status will be changed to paid. If the client hasn't paid the total amount, please put the exact amount paid by the client and it'll be marked as "Partially Paid".

👉 Check how the invoice looks from the client's side.