Welcome to Apploye Time Tracker! 🎉

This article will discuss how to get started with the Apploye time tracker, from an employee perspective. If you are an employer or organization owner, please follow this getting started guide for employers instead.

How to get started with Apploye Time Tracker

If you are an employee of an existing organization, please follow these steps.

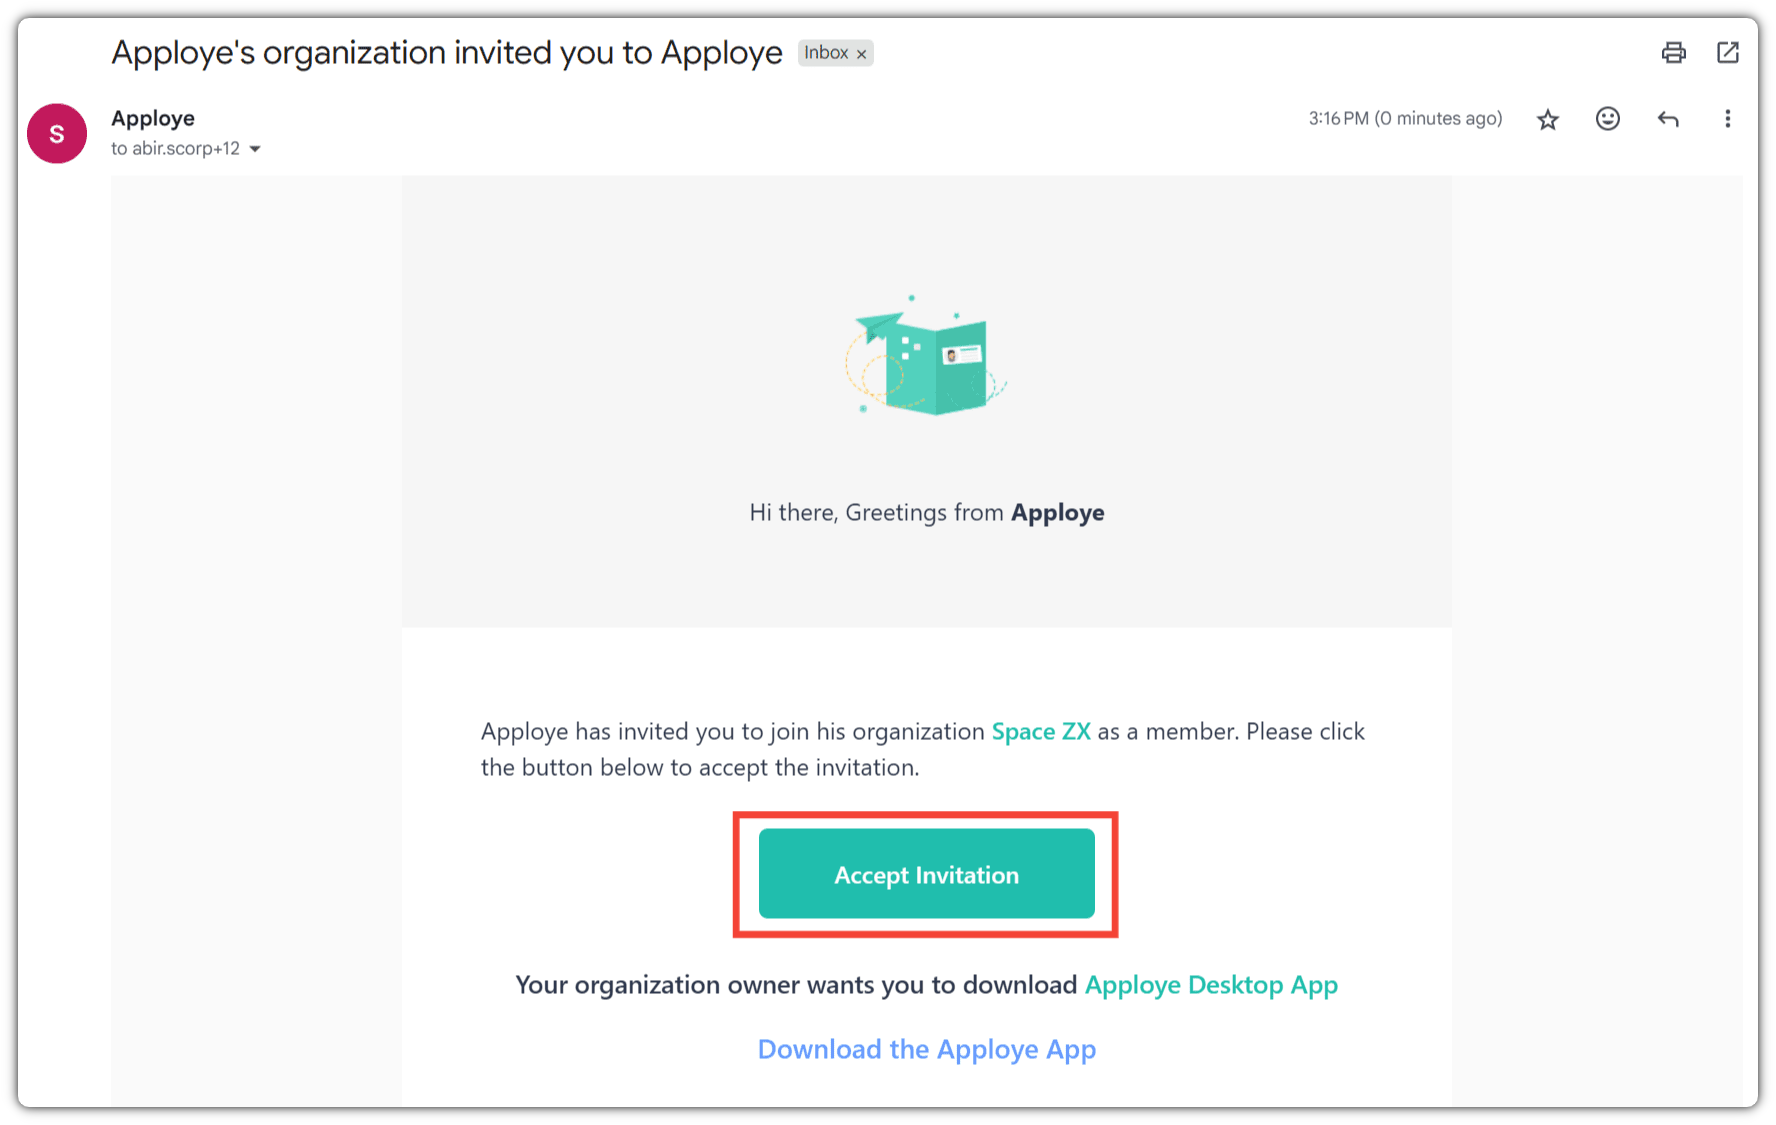
  1. Firstly, open your email and click on the "Accept Invitation" button.
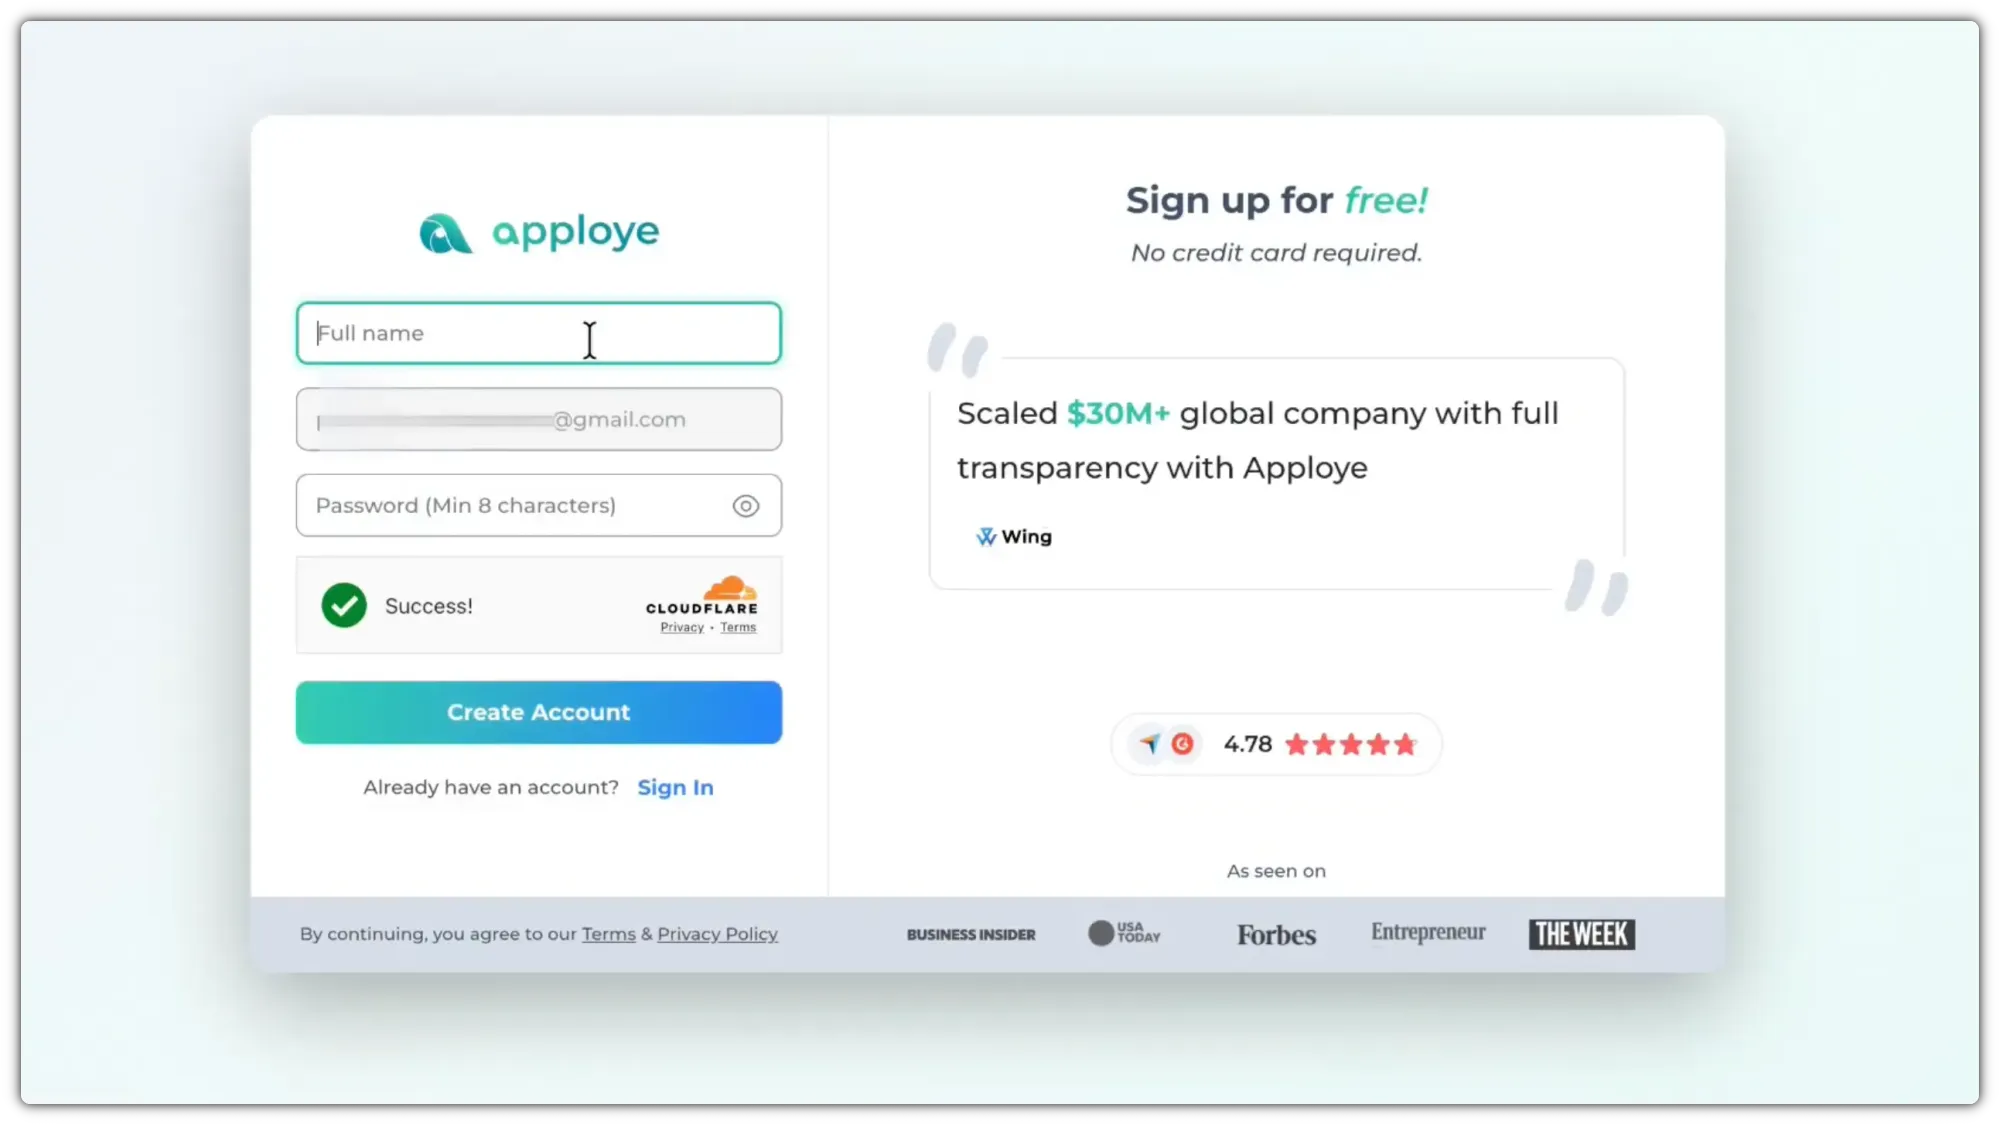
 Then, sign up with your name and password.
💡
If you are asked to join via Organization code, please follow this guideline on how to join an organization with code.

Depending on whether you are a field employee or a desk employee, your experience will be slightly different. So, please follow the appropriate guide for you. As a field/mobile/deskless/outdoor employee, skip to this section.


Getting started as a Desk (In-house/Remote/Office) employee

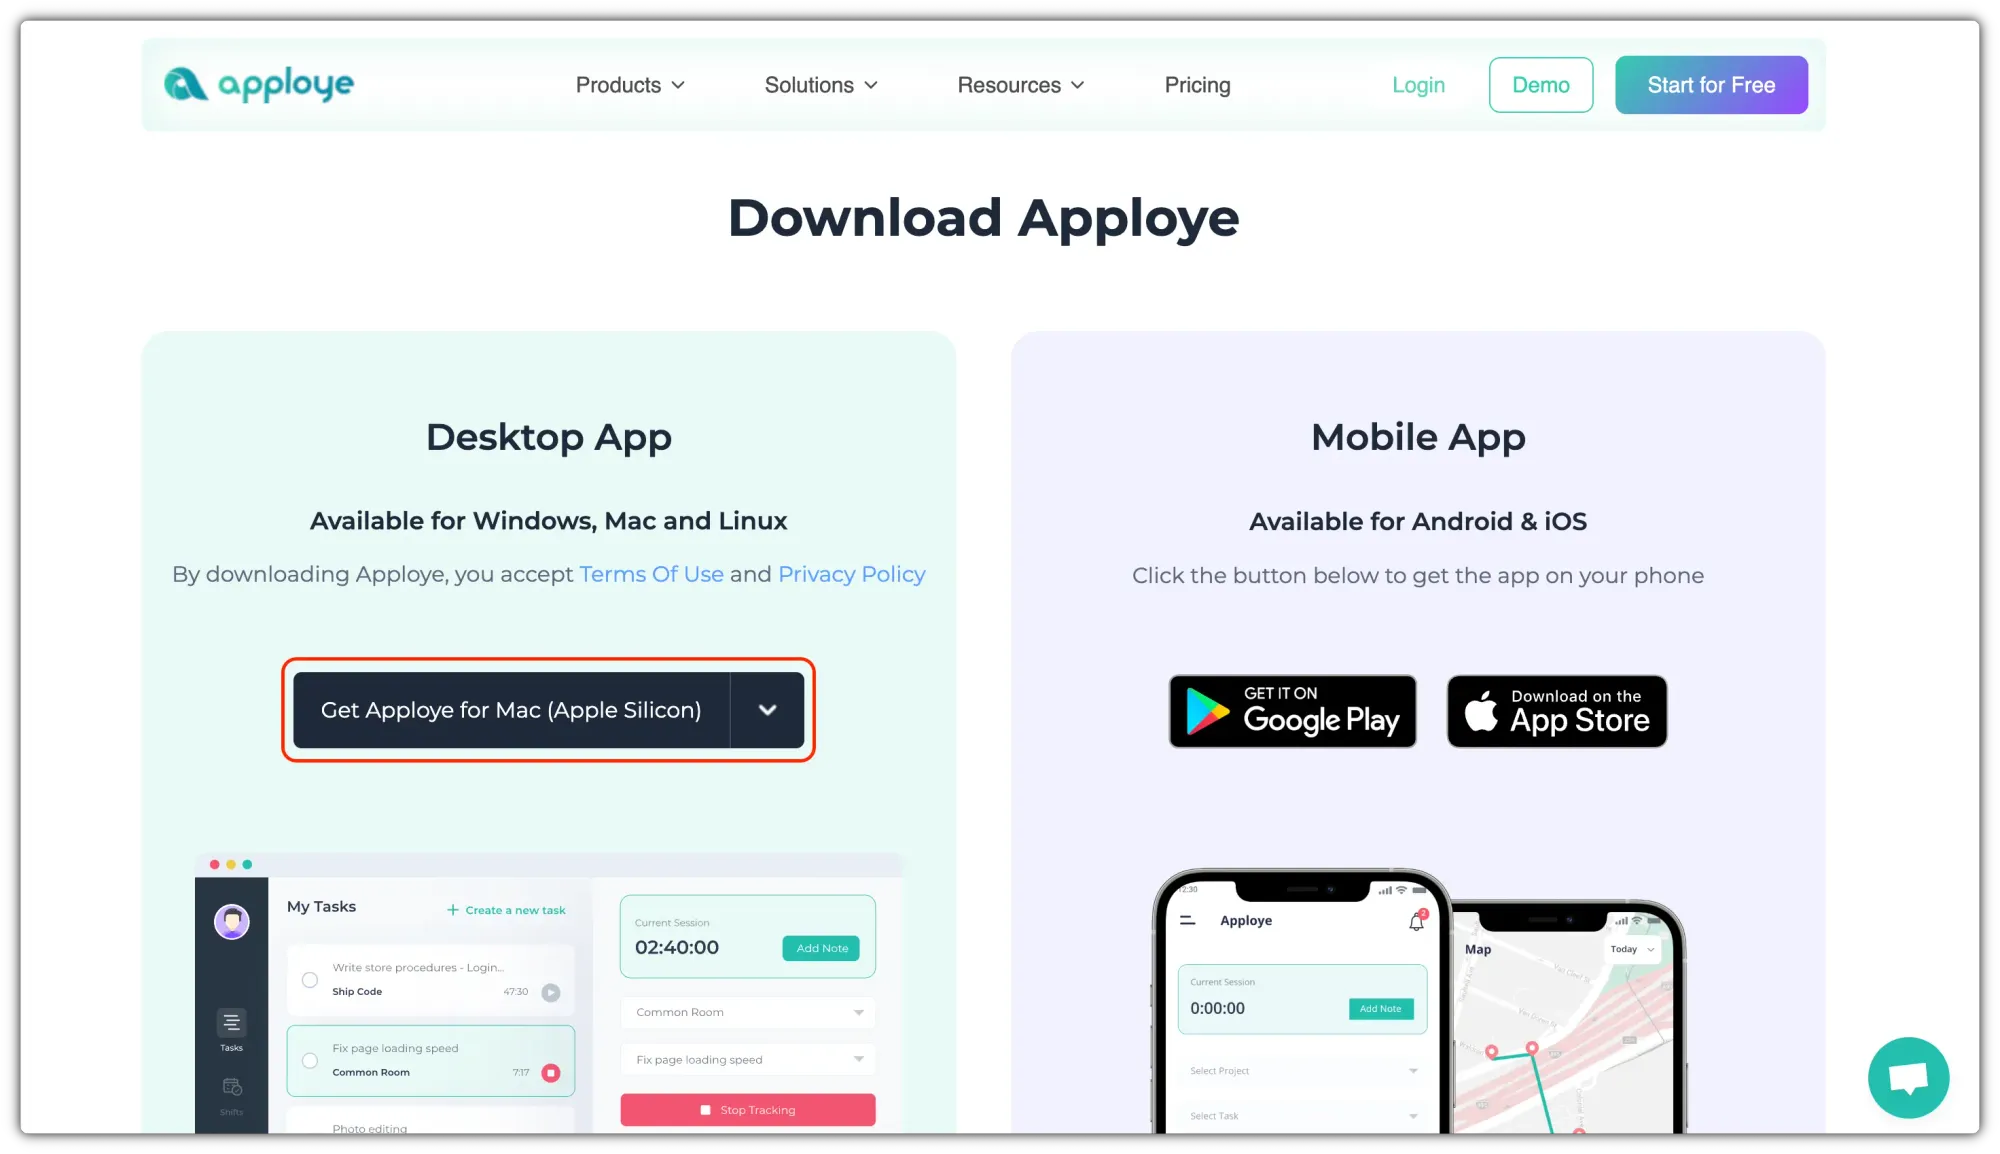
2.  Download the app from the download page & Install the app.

If you are using a MacBook, please remember to give the necessary permissions for MacOS.

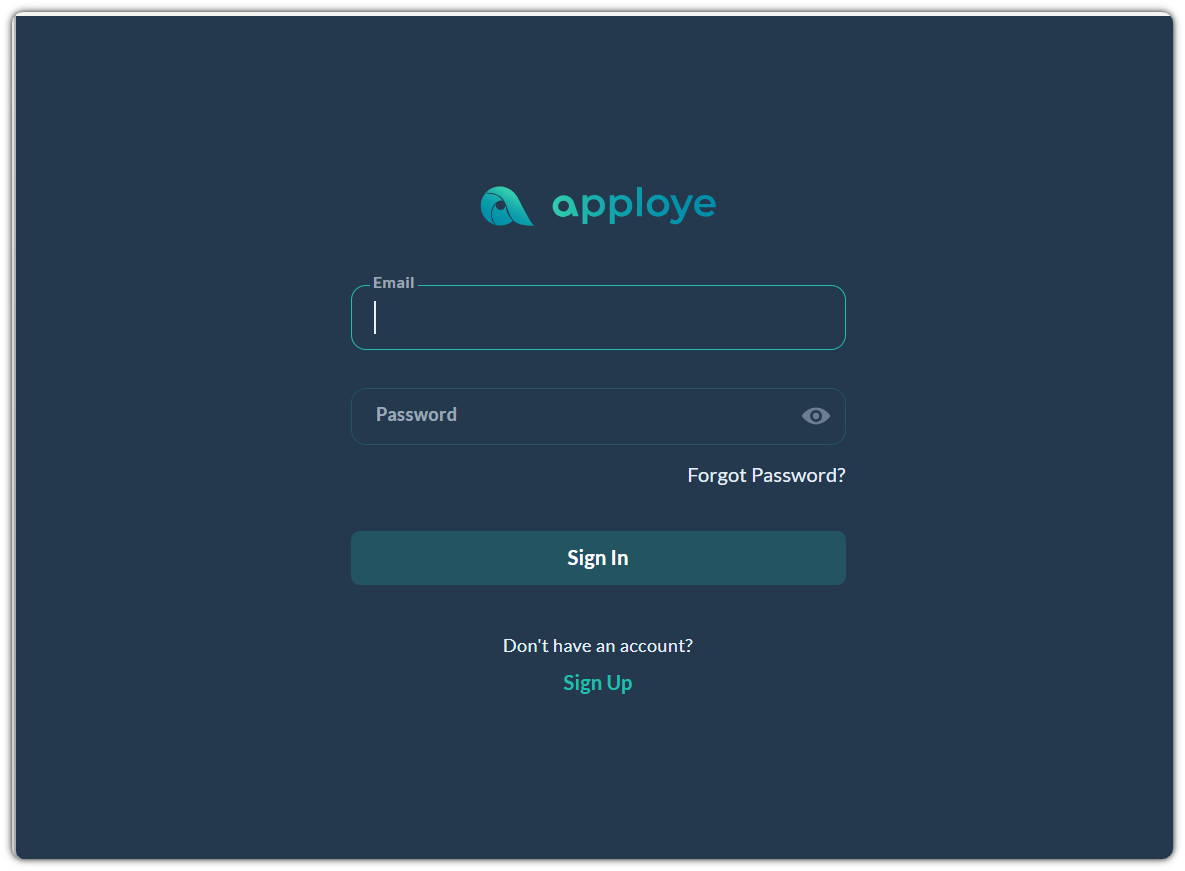
3. Now, open the app and log in using your credentials. Then, select the organization.

4. Now, select a project and click the "Start Tracking" button to track your time. Click on the "Stop Tracking" button to stop tracking time. You can select a task as well, but that's optional.

💡
You can create tasks from the desktop app by clicking on "+ Create a new task".
💡
If a task has been finished, you can complete it from either the desktop app or the web app.

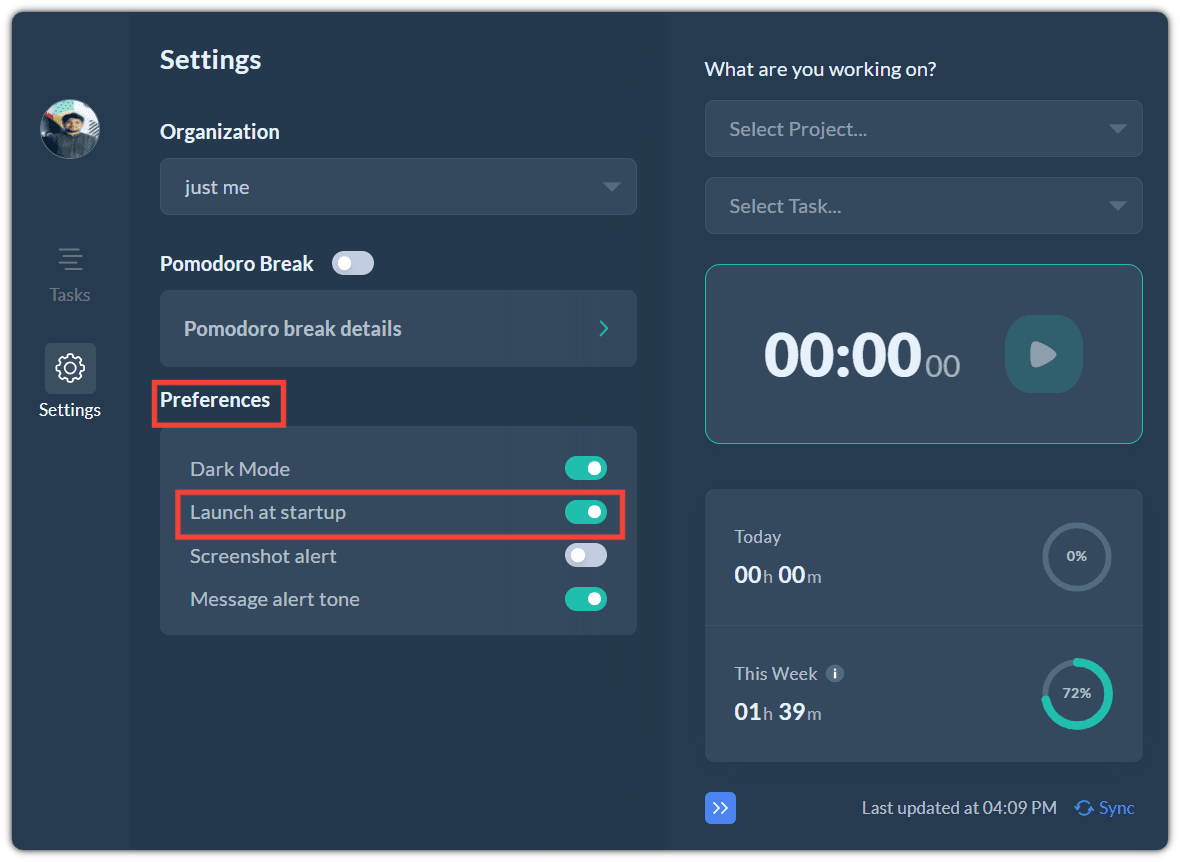
5. Check out the settings options. You can turn on Dark Mode from here or change other settings. We recommend keeping "Launch at startup" option on, so that you can start tracking with only 1 click.

💡
You can add notes to let your admin/supervisor know about something. It is available only when you are tracking time.

6. You can turn on Pomodoro Break feature. By default, you'll be notified after 25 minutes for a 5 minutes break. Keep in mind that, during this break, your time won't be tracked. You can change the time of the break as you would like.

7. After tracking time for a few minutes, you can check out the timesheet and screenshots from the web app.

💡
As a regular employee/member, you can only check your timesheet and screenshots. If you need to check more, please ask the owner to make you Admin/Project manager.

Getting started as a Field employee

1. Accept the invitation from your employer/admin. After that sign up for an account.

2. Download the mobile app from App Store/Google Play. You can find the direct link on our download page.

3. Login using your credentials. And select the organization.

4. Then, please select a project that you are supposed to track time in. You can also choose a task (optional).

💡
You can swipe up to bring up "Tasks Overview". From here you can directly track time on tasks, or mark a task as complete (you can do that from the web app as well).

5. Click on the "Clock Me In" button. If you have tracked time today, "Start Tracking" will be shown instead. Click on this button to start tracking time in the project/task.

6. Geofence clock in: Go to the Time Clock section (in the middle of the bottom row). If you are assigned to a job site, you will be able to select that. After that, tap and hold a finger on the clock-in circle to clock in to that job site.

If you are inside the area designated by the job site, you will see that "You are clocked in" with a green box.

💡
If you are away from the Job Site, or if not selected the correct Job Site, it'll show a red alert box instead.

7. Check your current location. Go to the location icon on the right and you can check your location in real time.

8. While you are tracking the time you can add notes to let the admins know about any issues faced or any updates.

9. After you are finished tracking time click on the "Stop tracking" button. If you are leaving a job site, don't forget to tap & hold Clock Out button.