
Welcome to Apploye 🎉 !!
TL;DR: You have to invite your team members first. Then, assign them a project and ask them to download the app and start tracking time. Now, you can check the timesheets, screenshots, and other data from the web app (you need to select member, if you want to see employee data).
Apploye allows you to track your employee time and monitor the productivity of your team. Let’s get you started with a few easy steps:
1. Onboarding
2. Invite your employees to the organization
3. Downloading the app
4. Add project and budget
5. Assign a member to a project
6. Add task
7. Set up pay rates
8. Add team
9. RemoteTrack (screenshot, app, URL)
10. Check Timesheets & Reports
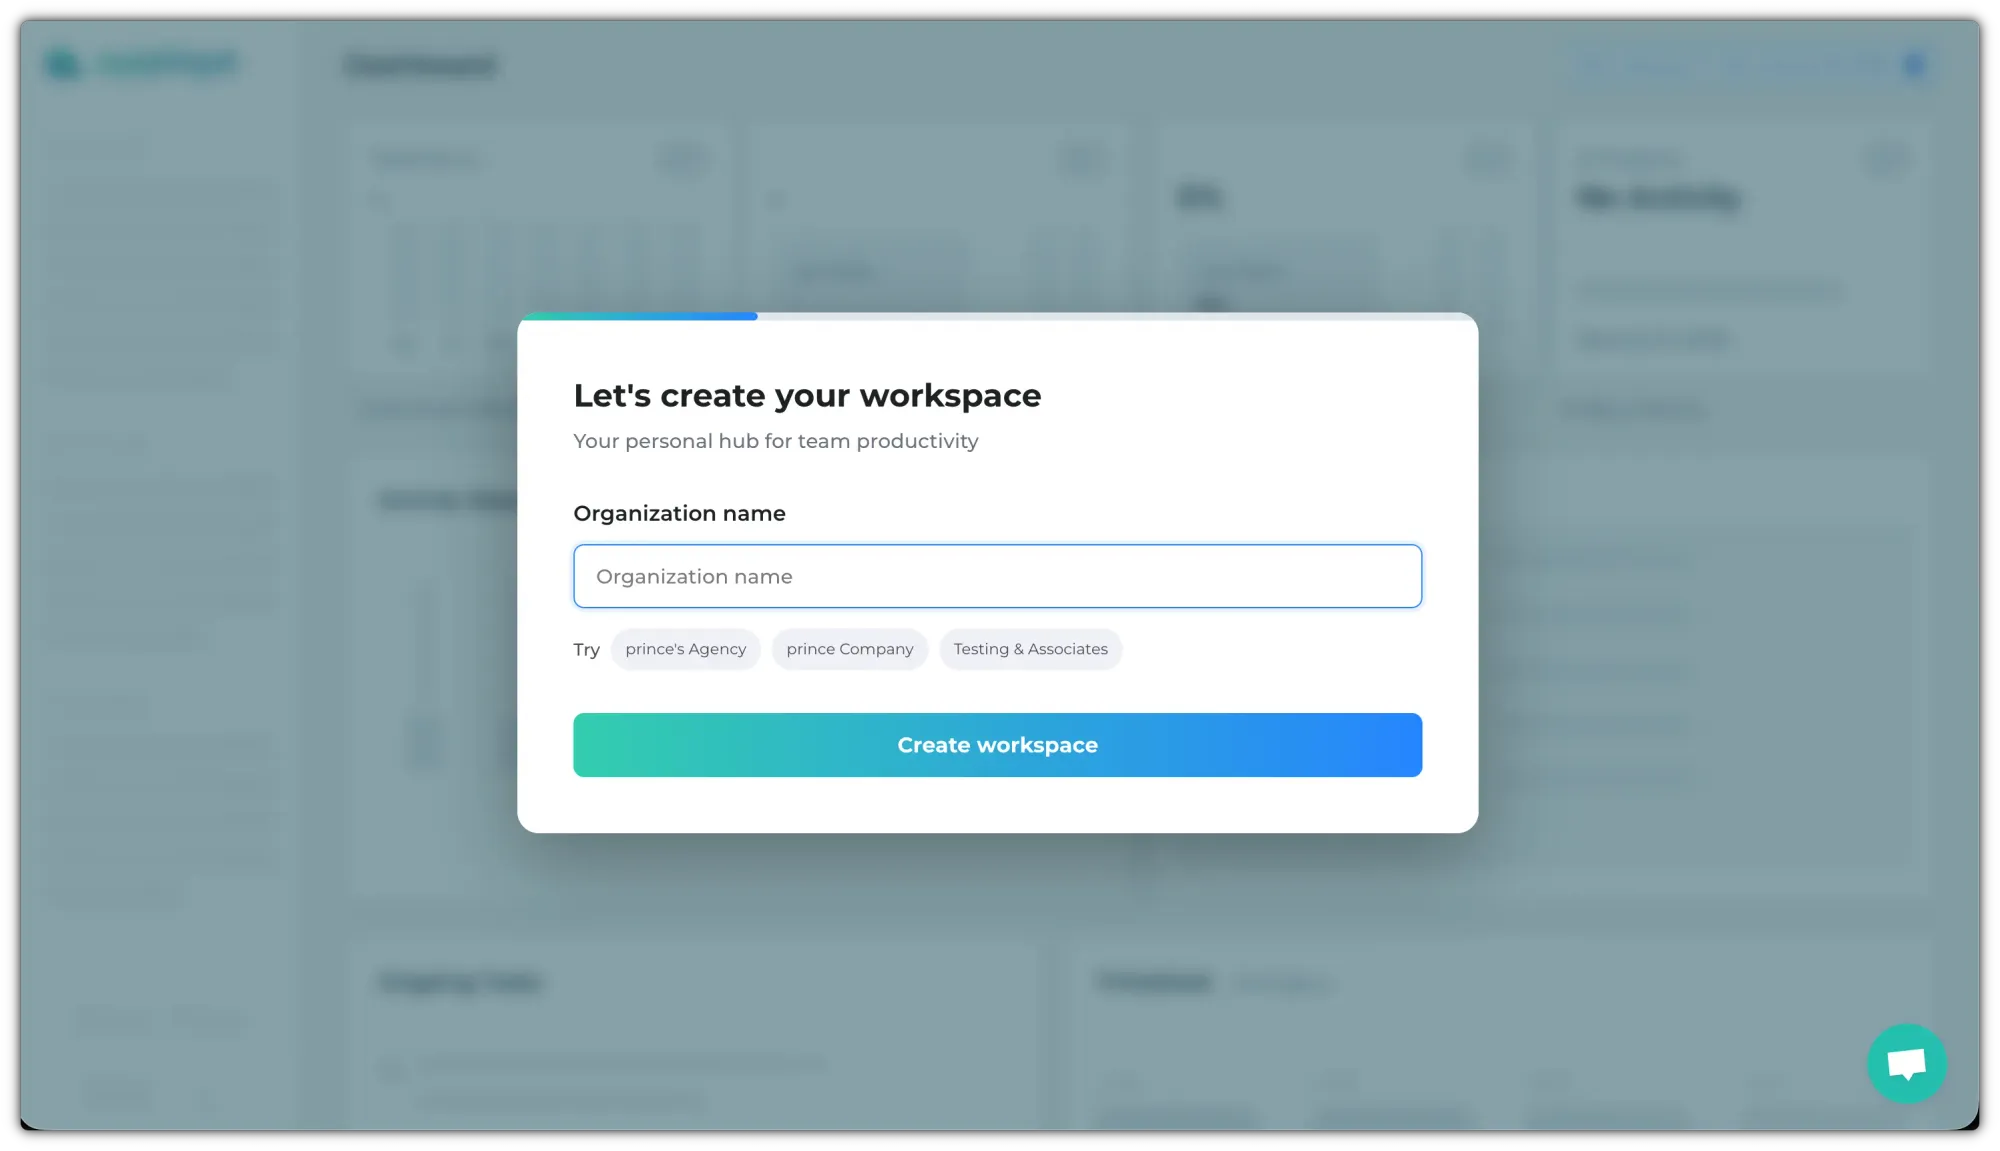
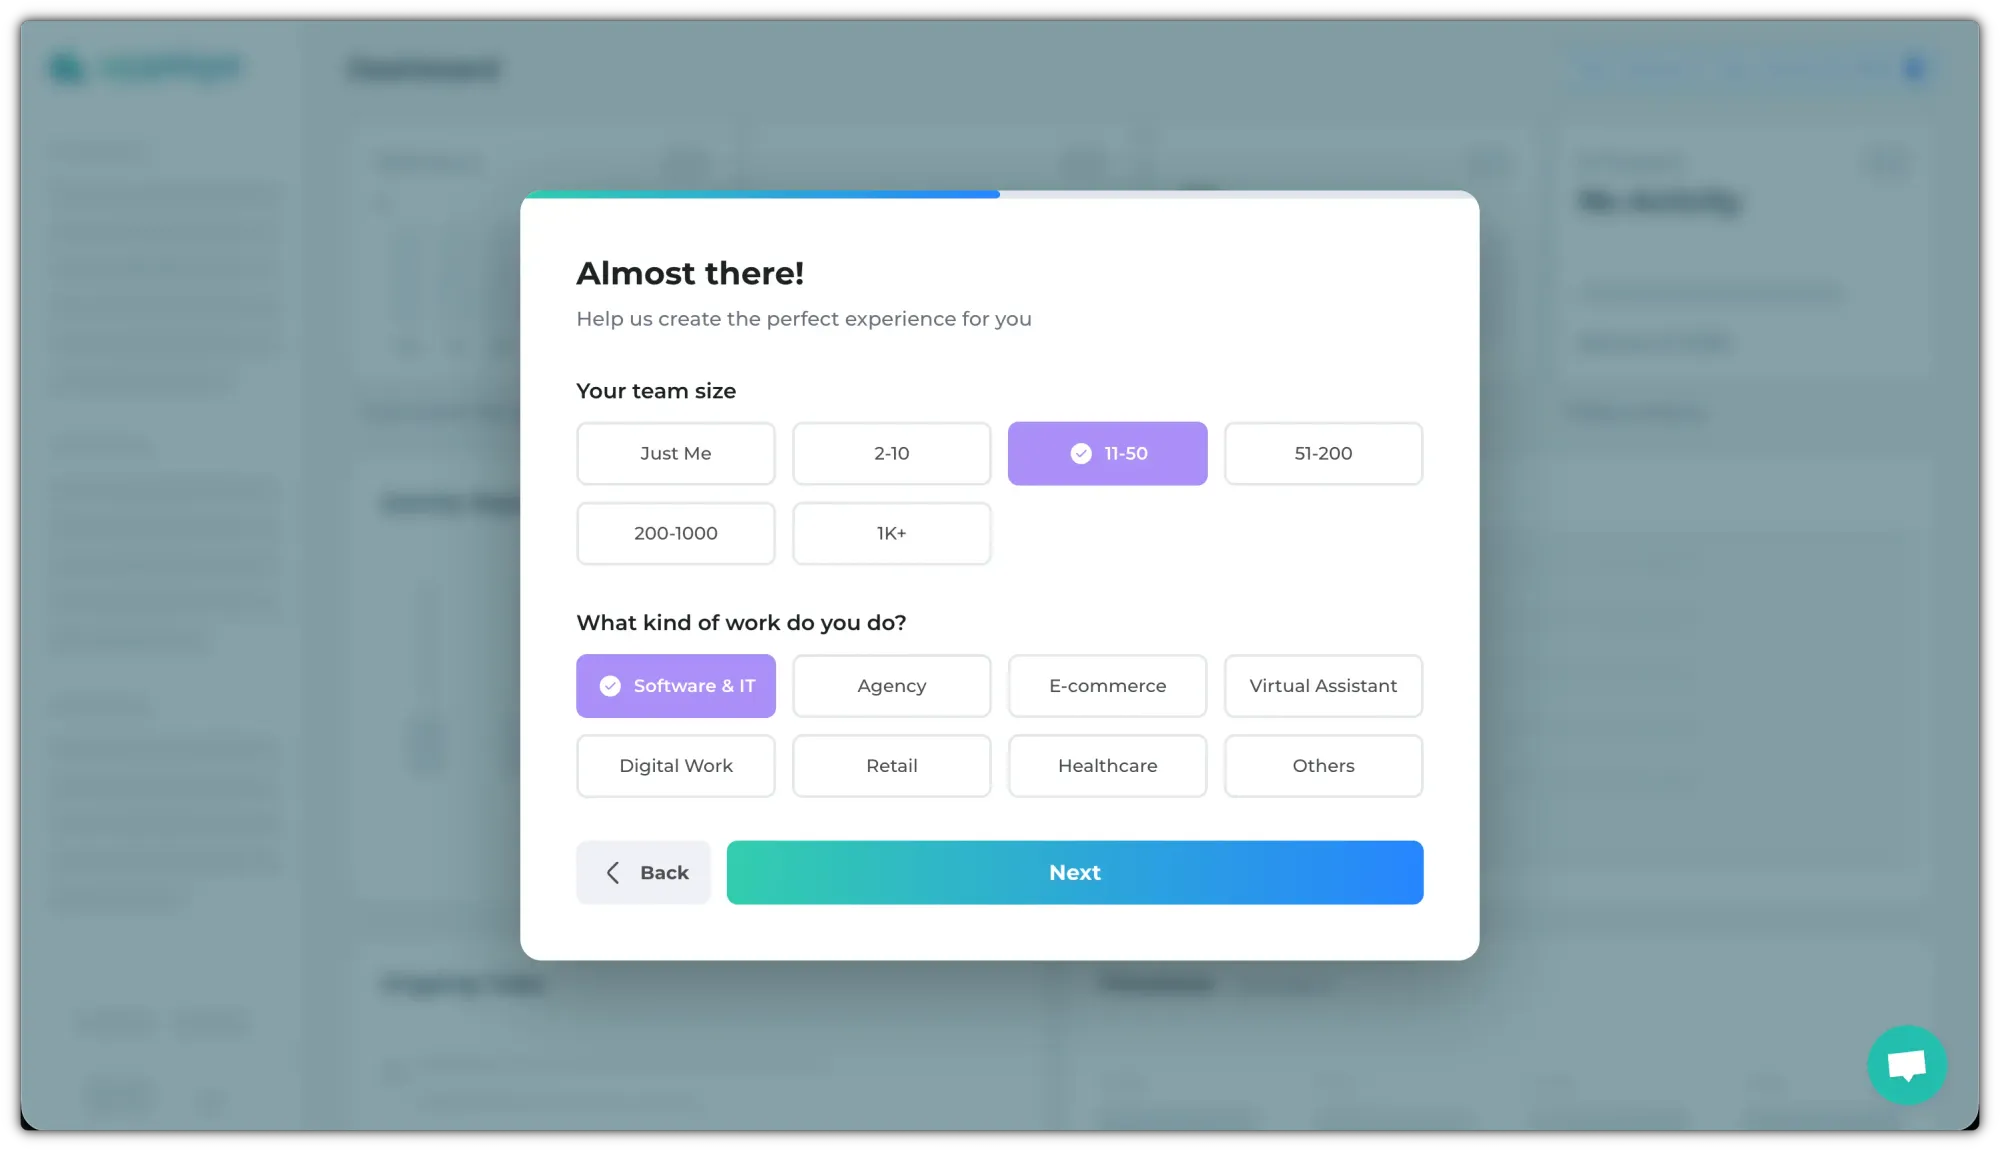
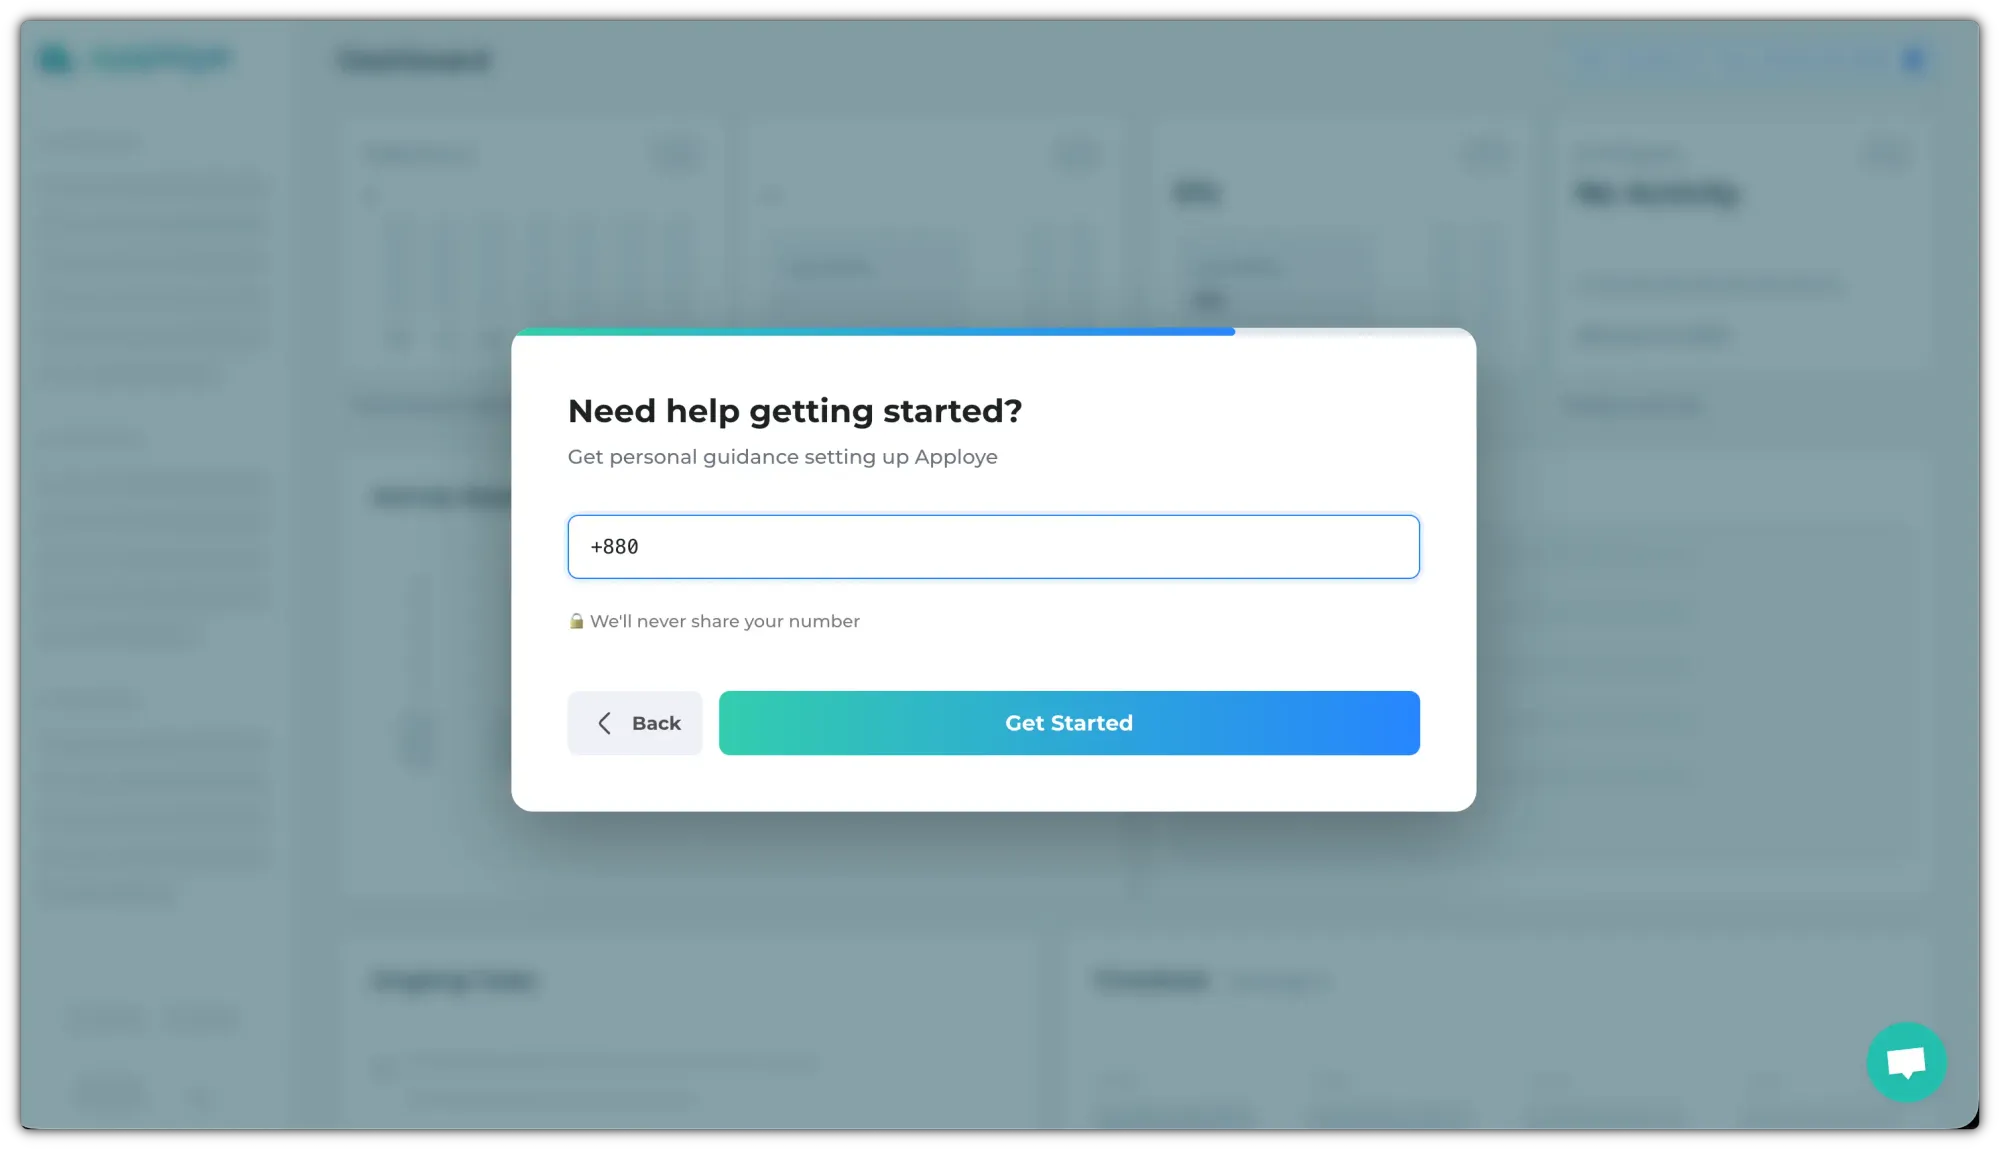
1. Onboarding Process 🧙
After signing up and verifying your account, you will need to give the organization's name. Click on the "Create Workspace" button to go to the next step.
👉 Now, give some info and click on "Next":
👉 You can share your number and click on "Get Started".
2. Invite your Employees to the Organization 👥
After joining Apploye, you will see a pop-up to invite team members. Using this pop-up, you can invite employees to work in your organization (You can add them later, too).
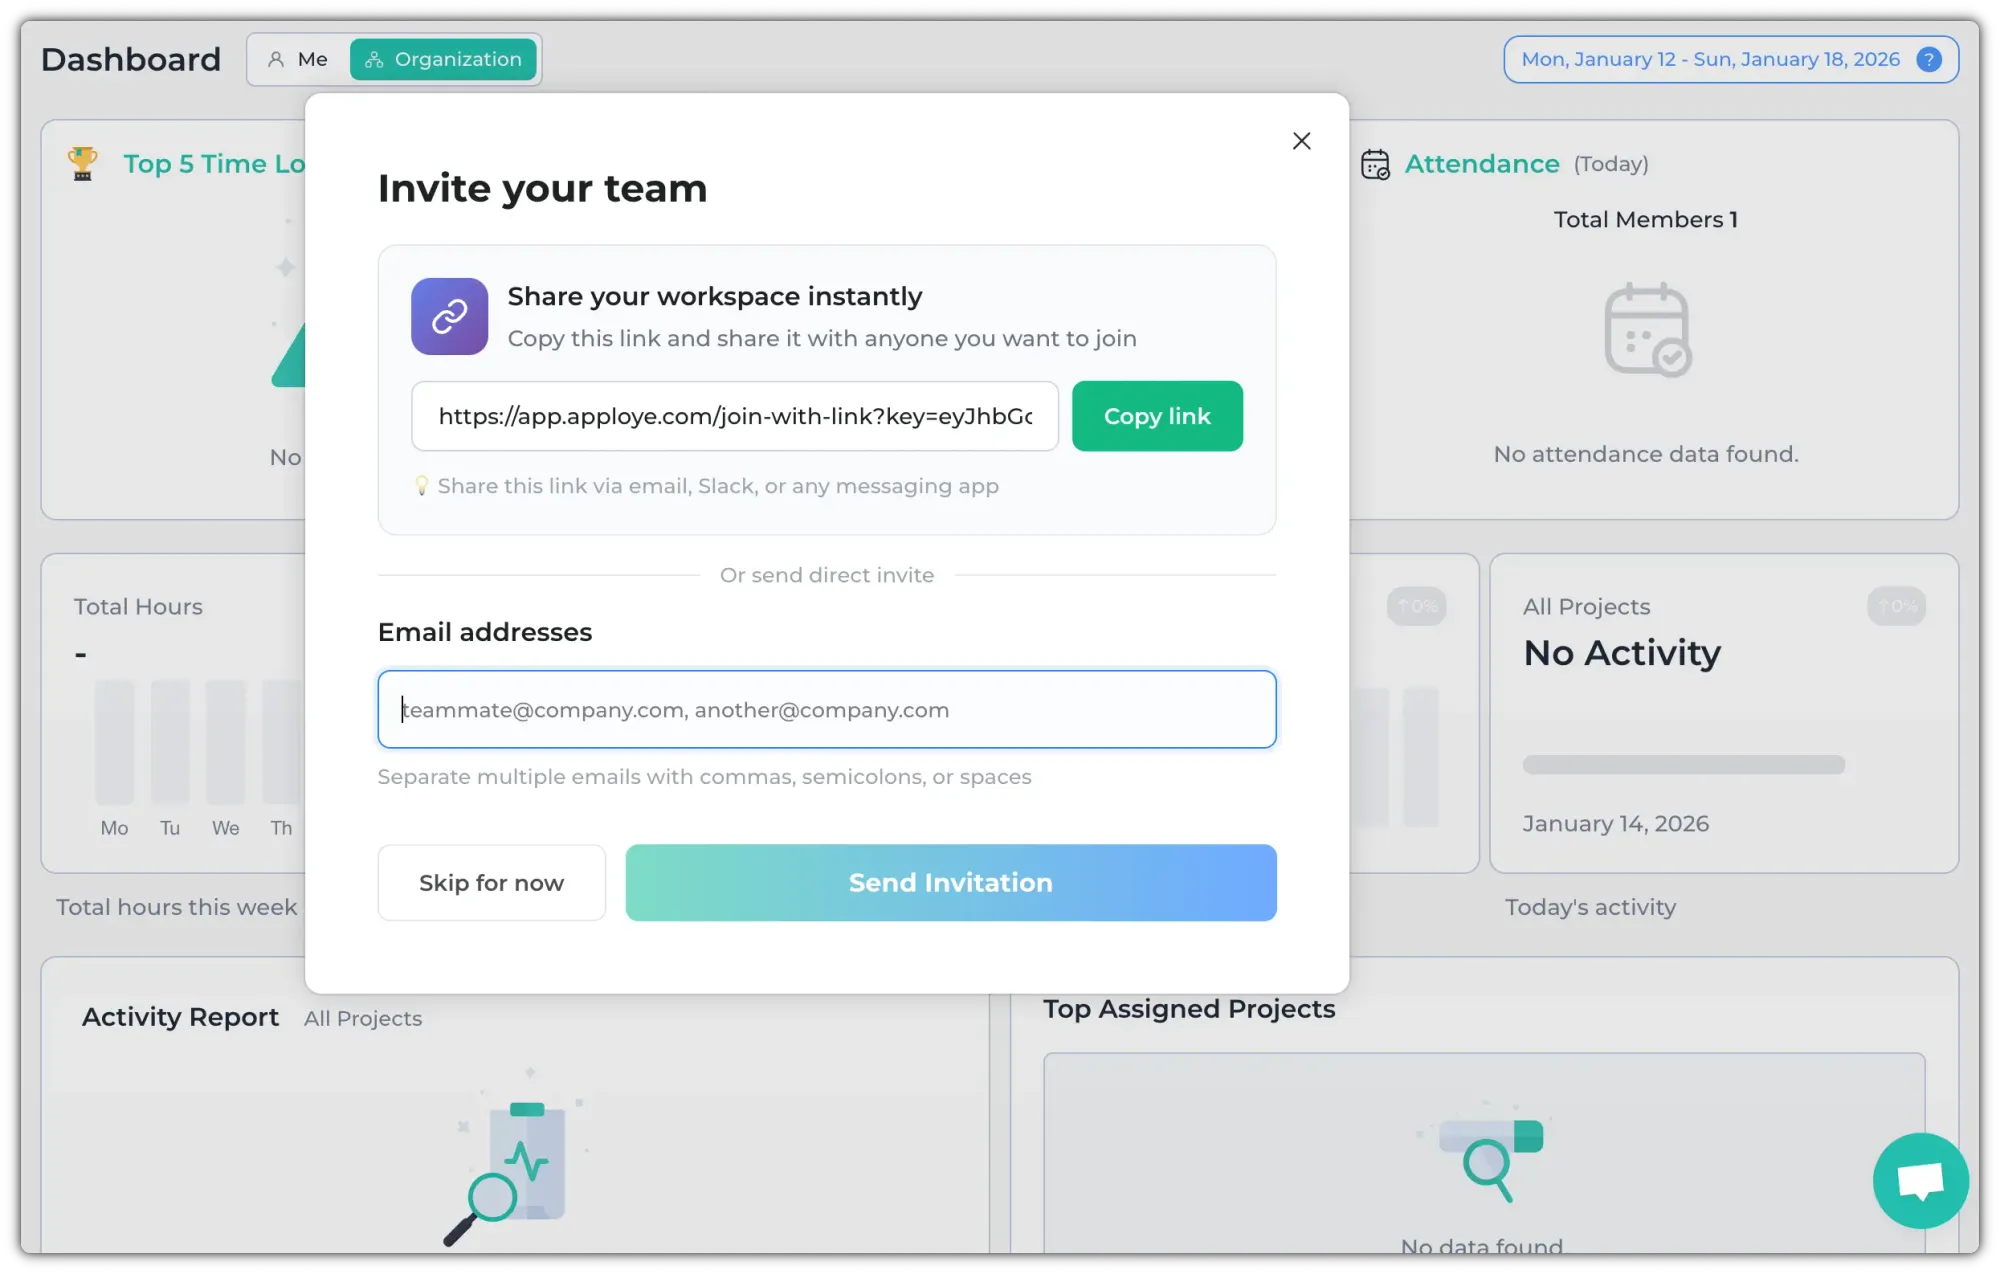
Enter their email addresses and click on the "Send Invitation" button to send them invites. You can also copy the joining link, and ask the employees to join by link.
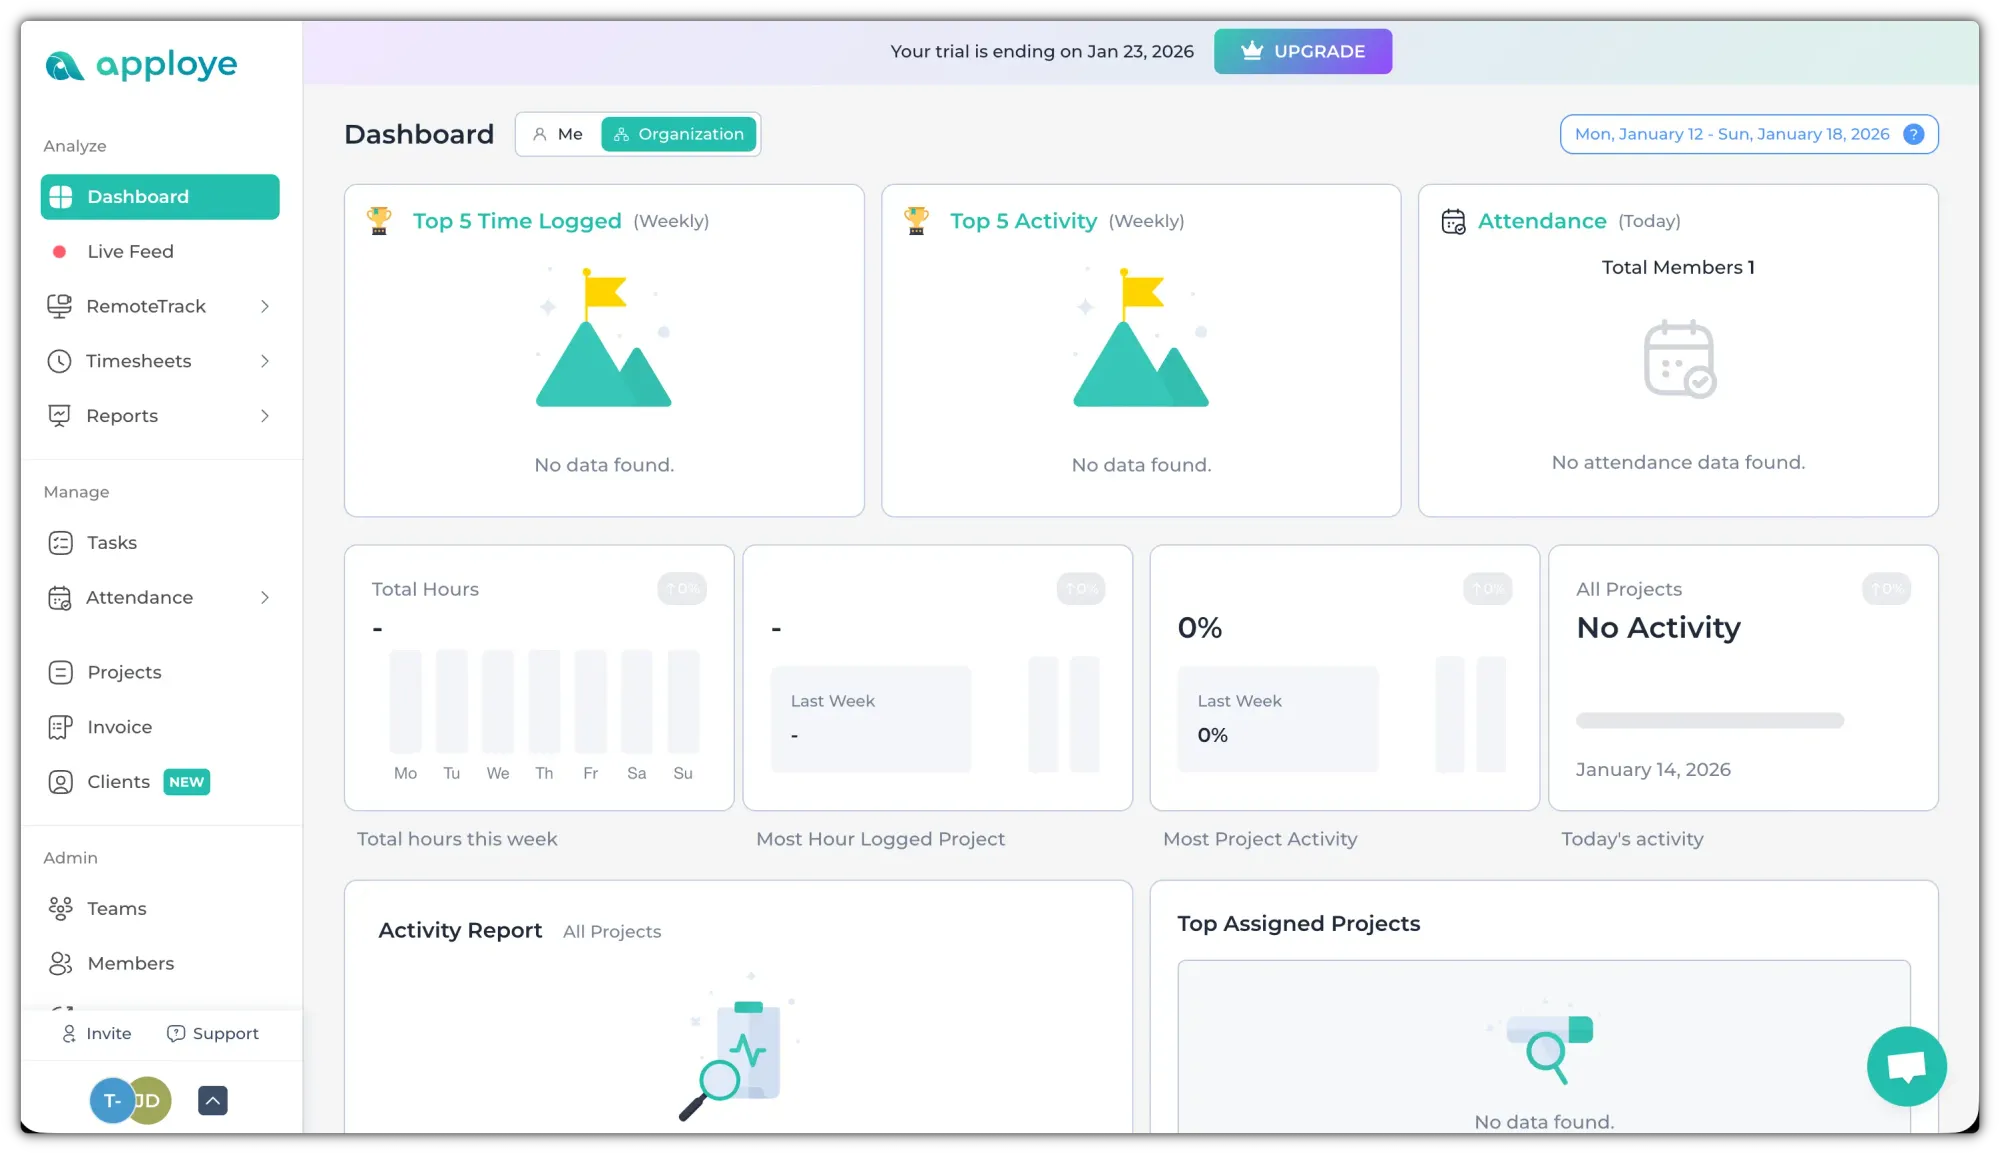
The next thing that you’ll see is your Dashboard (Right now, it’s empty because there’s no data to show, as you/your employees haven’t yet started the tracker. Don’t worry, we’ll get there 🚀).
👉 On this Dashboard page, you can find visualized time reports and metrics about your employees and the projects of the organization. You should also see a side panel on the left; this is mainly how you’ll navigate ⛵.
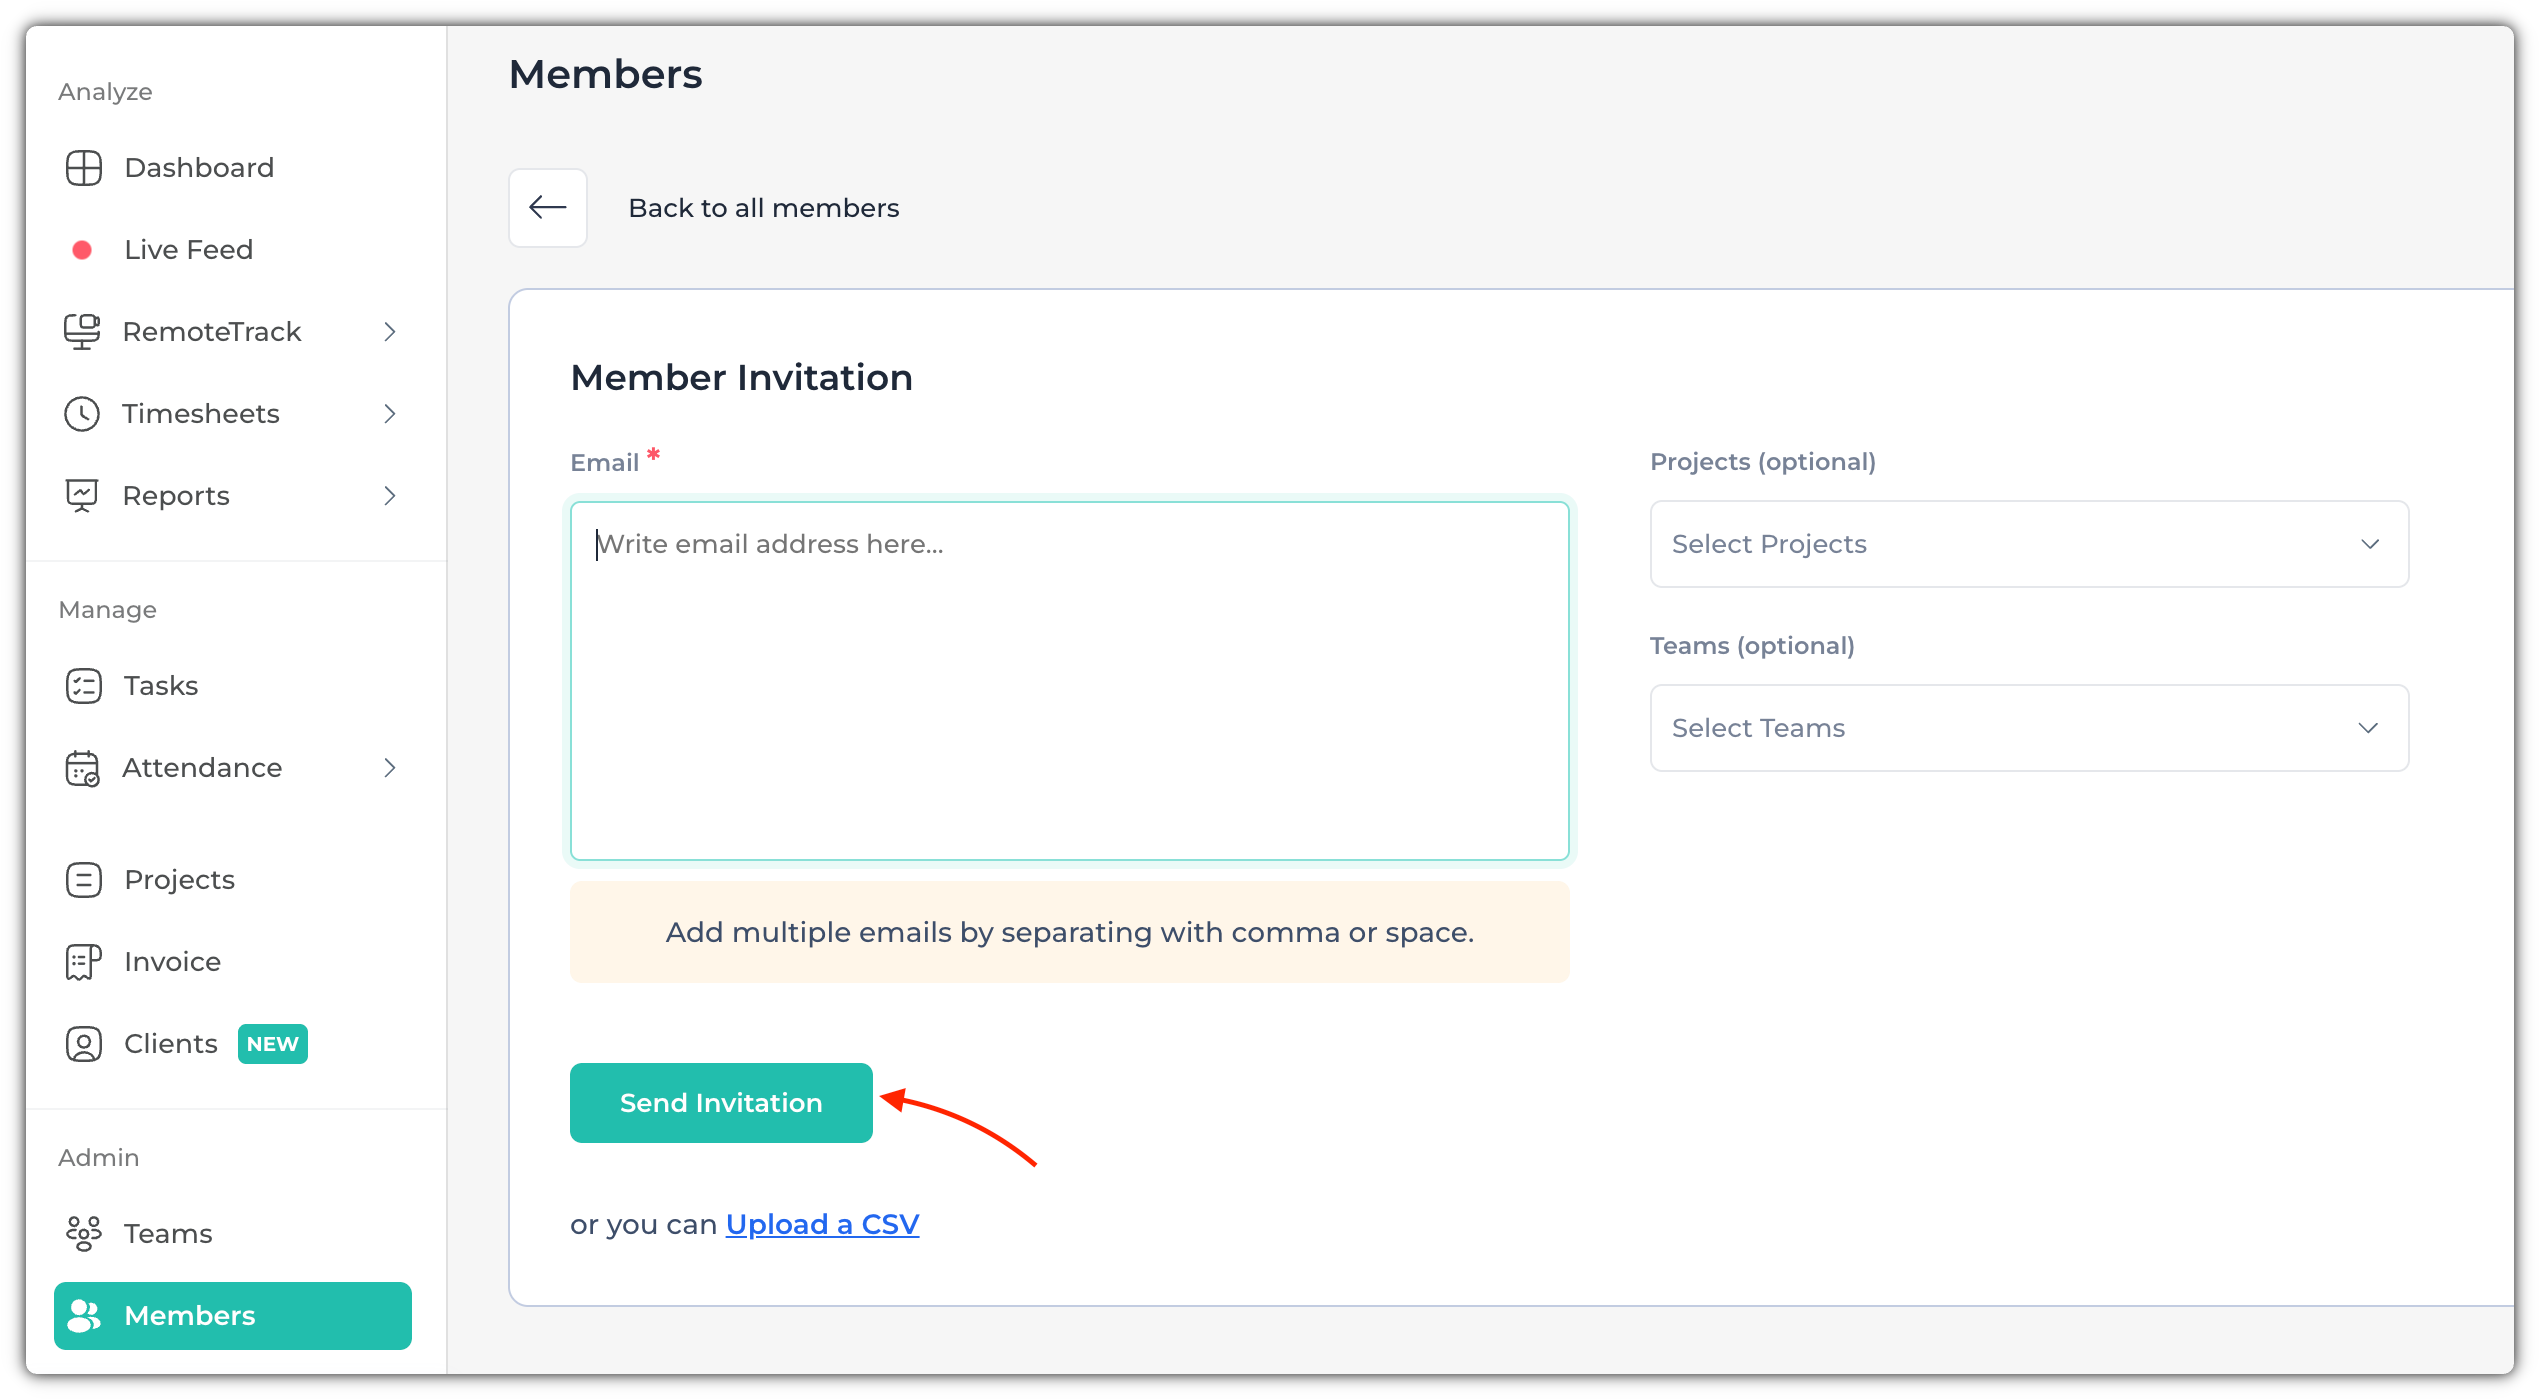
If you haven’t already added members, you can still invite members. If you don’t want to send invites right now, you can skip this step for now.
👉 Go to the “Members” page and click on “+ Invite Member”. Now, put their email address and select the projects you want to invite them to.
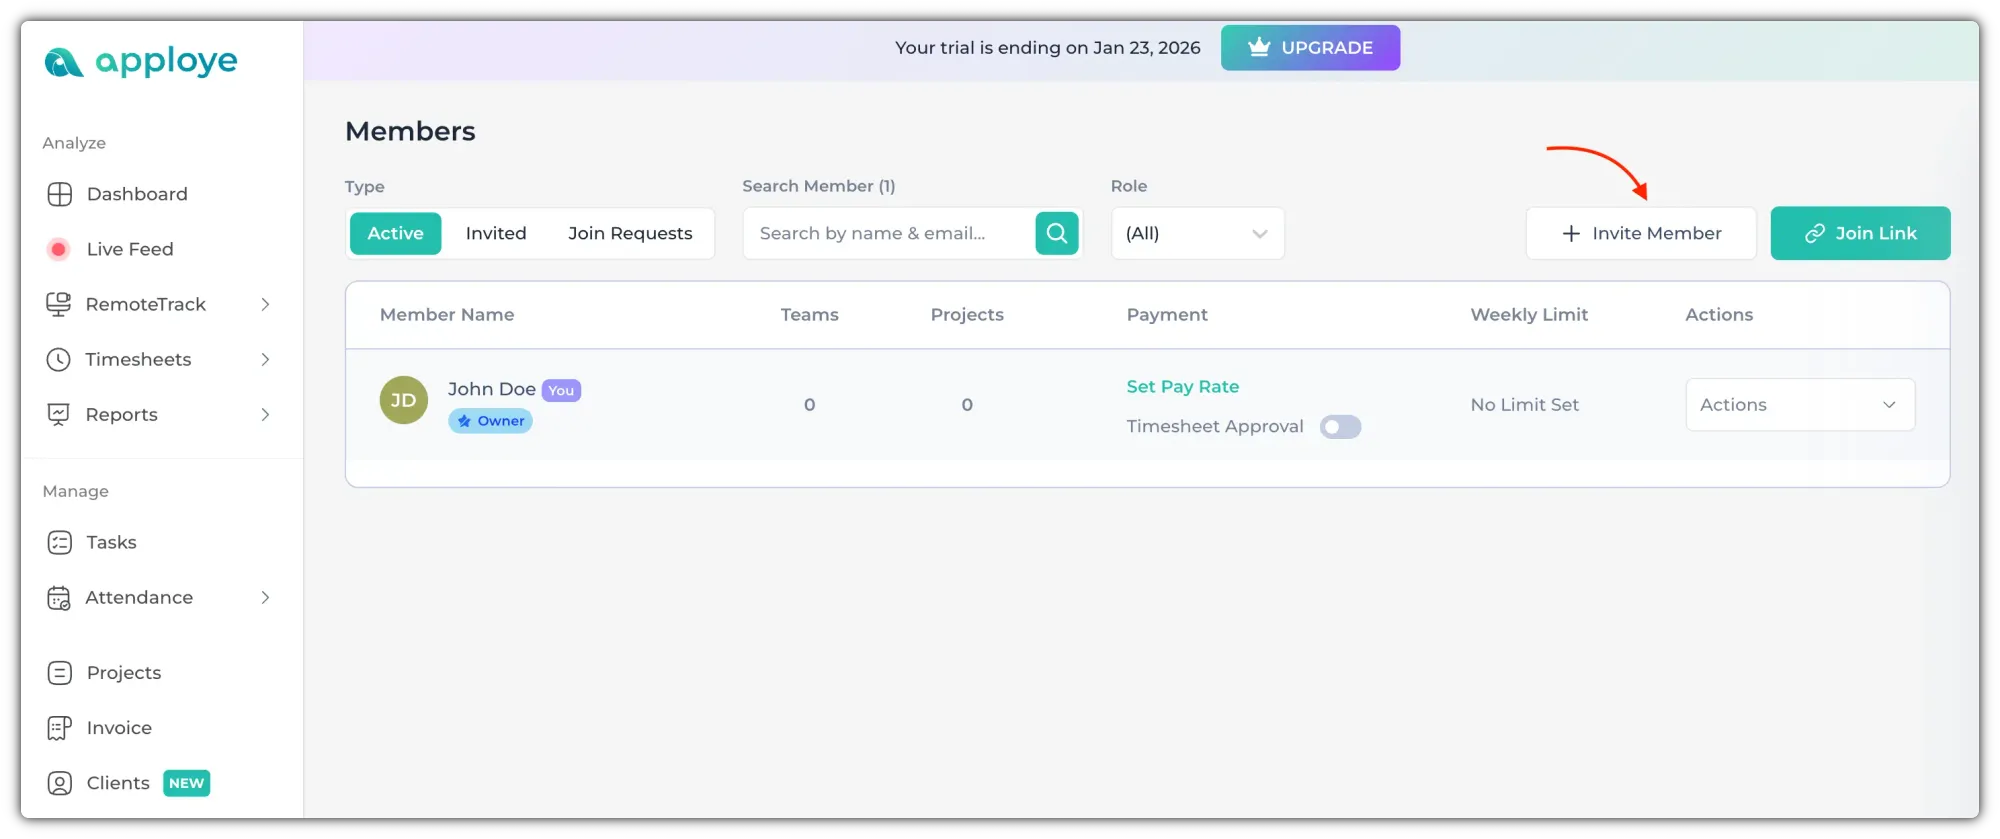
👉 If you want to invite people, input your team member's email address and click "Send Invitation".
Now your employees will simply go to their email and find the invitation mail, and join by clicking on "Accept Invitation".
At this step, please ask them not to create an account without accepting an invitation from your organization.
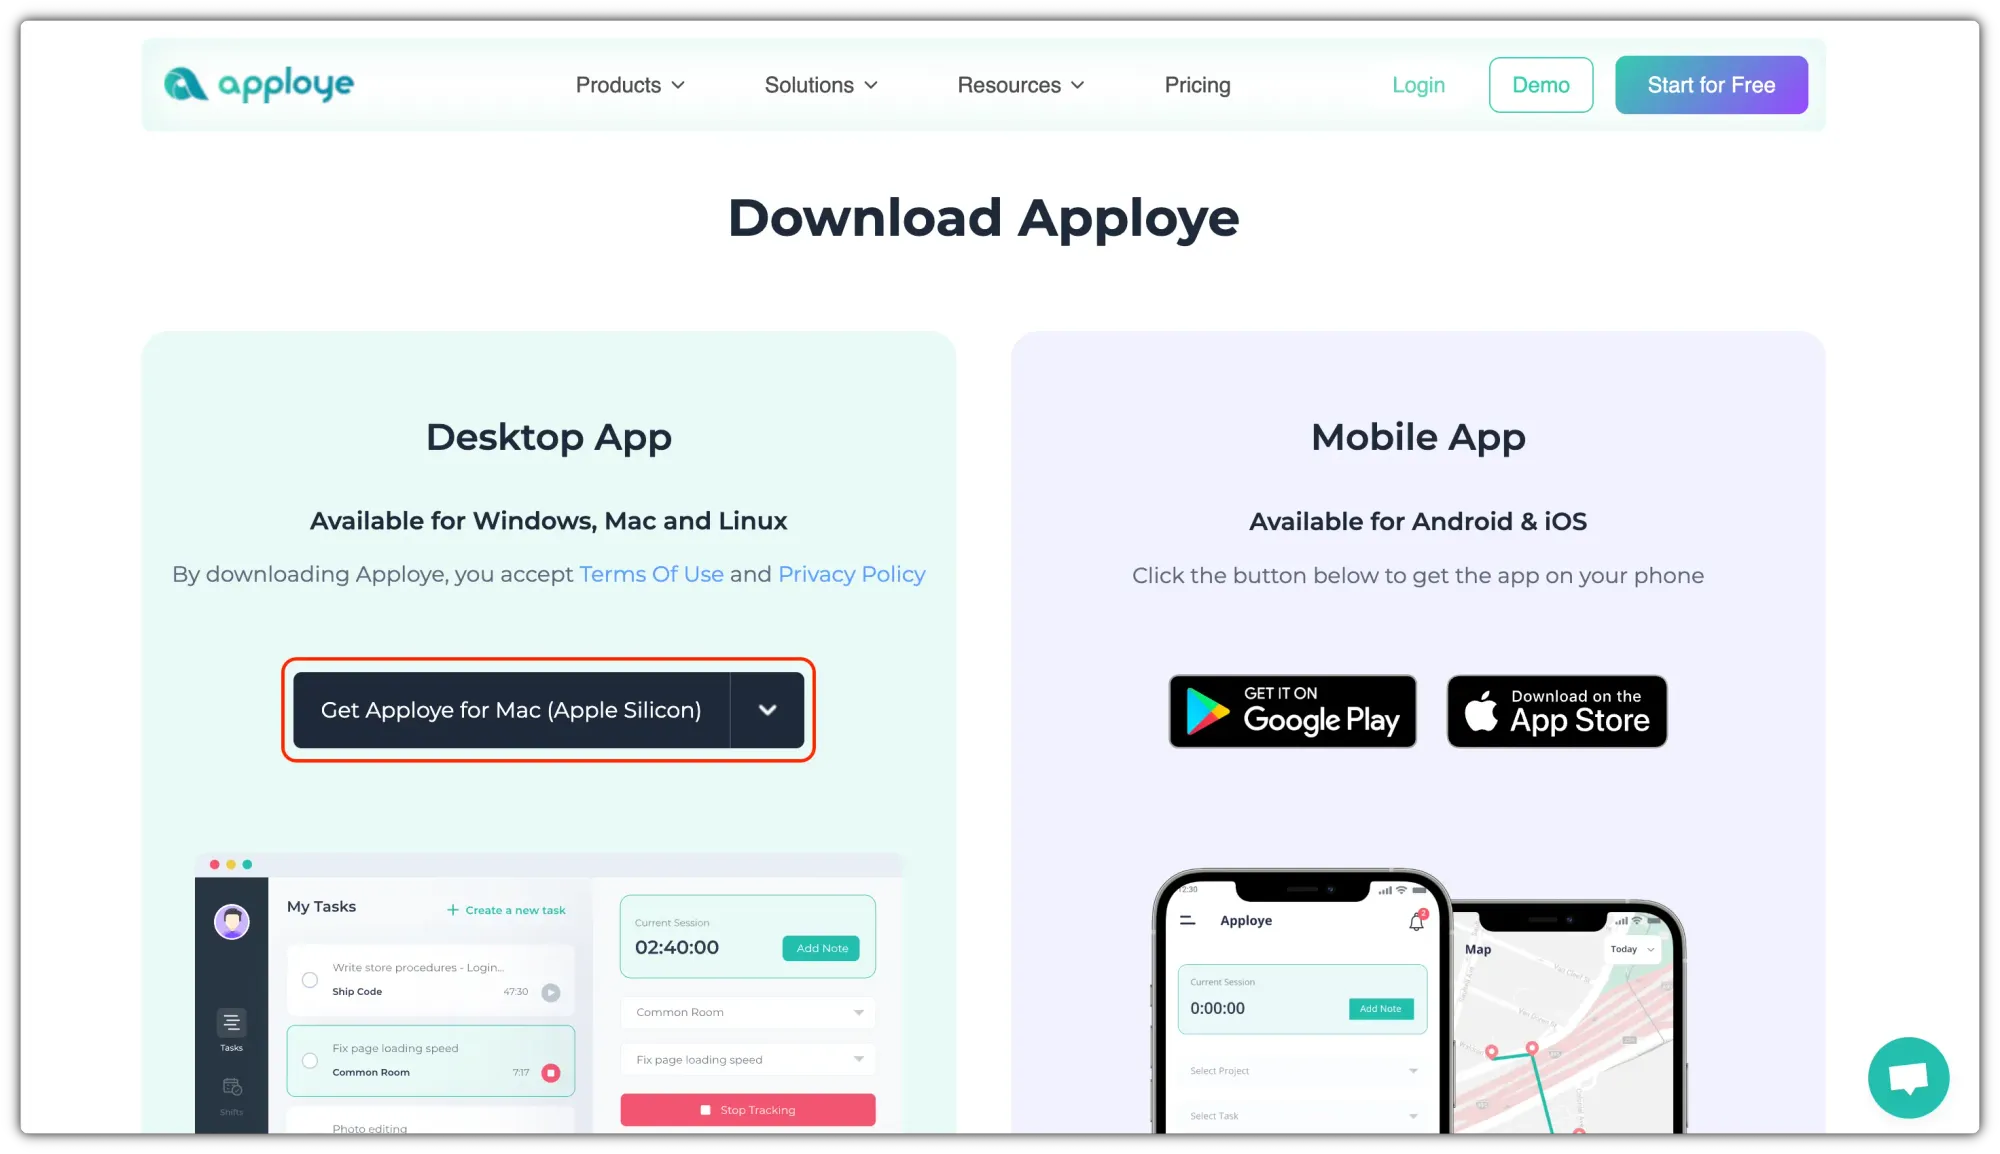
3. Downloading the App 🎁
Once your team is onboarded, you can easily see them on your "member" list. Now, they will need to install their app to track time. For download, go to the Apploye website and click on More>Download. You can also directly go to this Download link.
Your operating system will be automatically detected. Just click on the “Get Apploye for (OS)” button to begin downloading. Then, you can install the application.
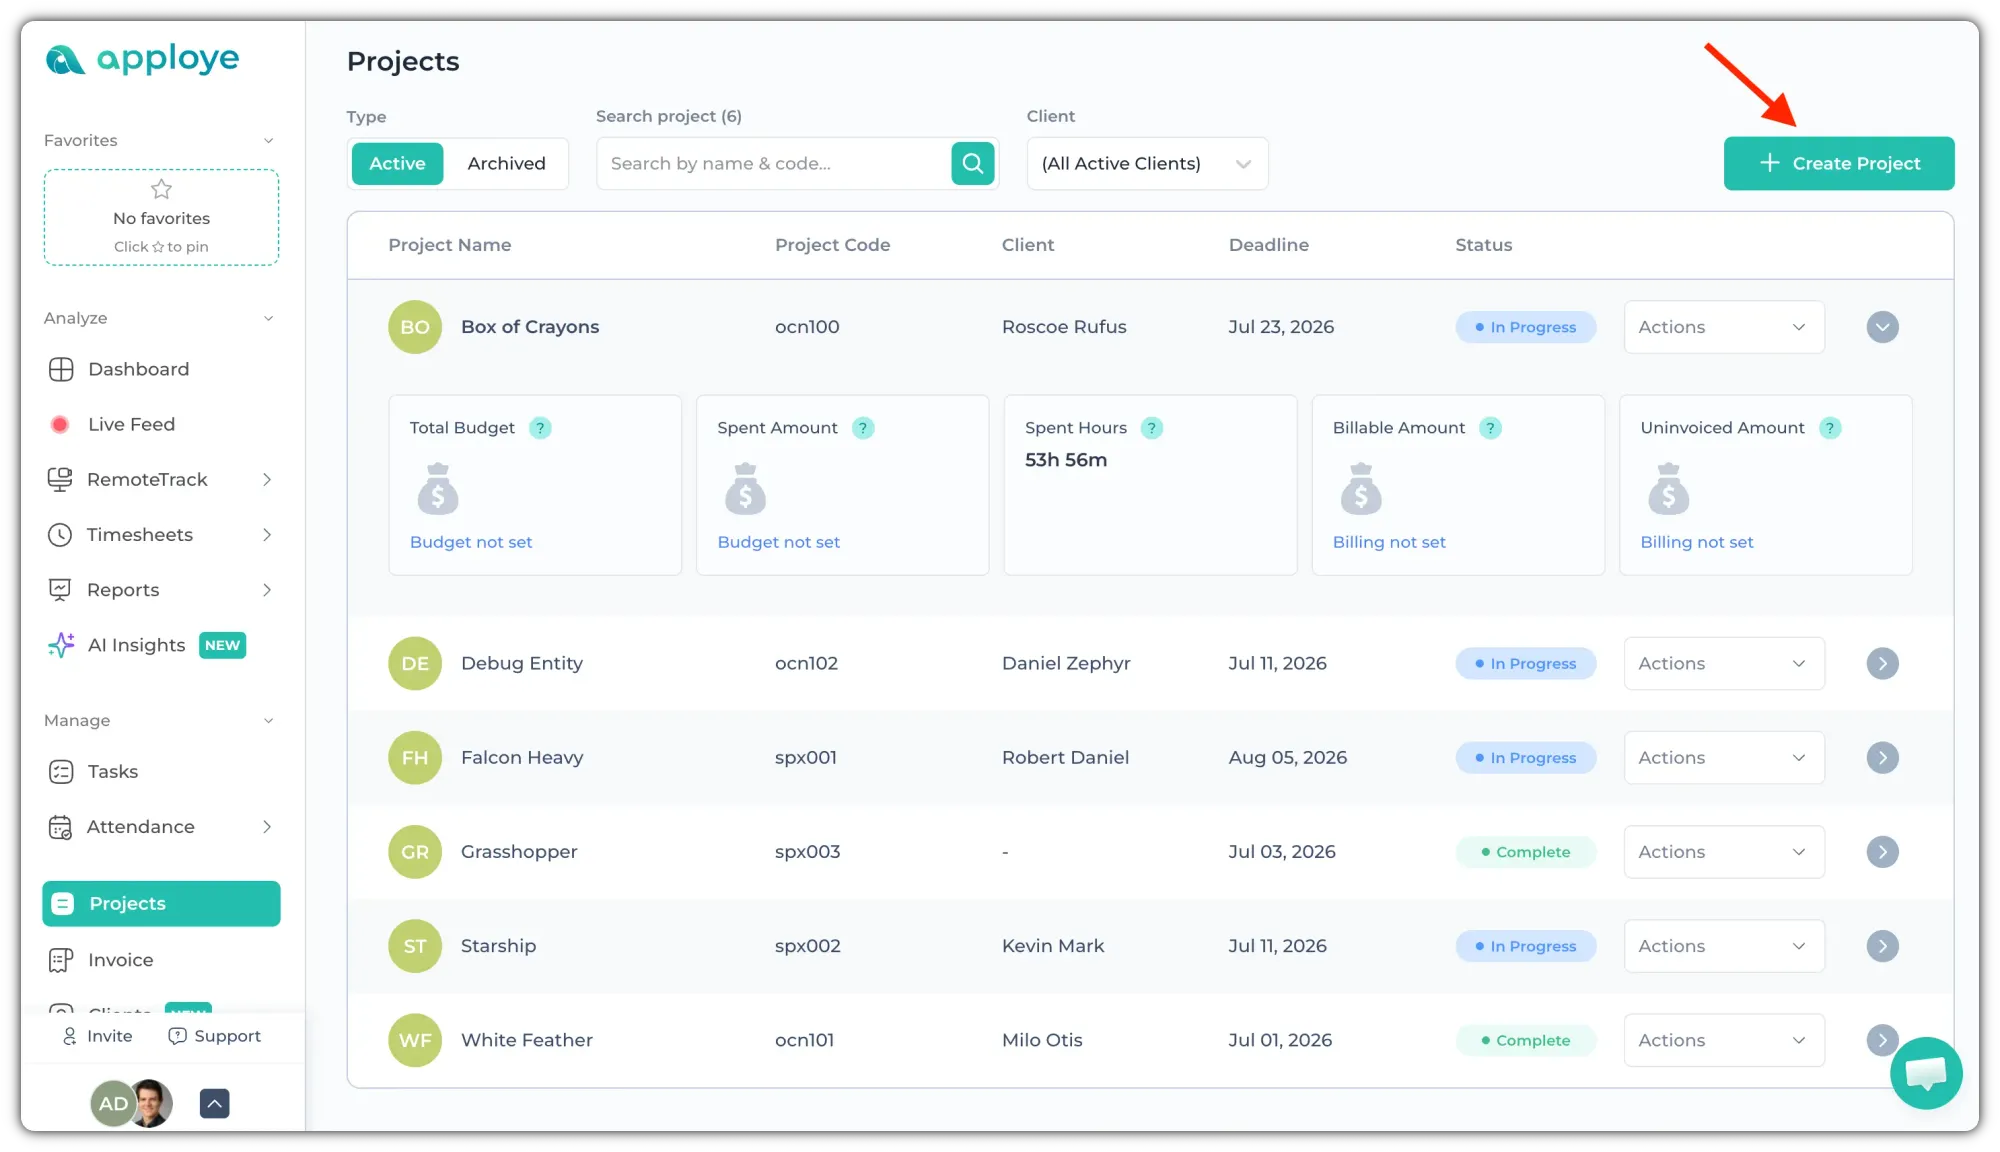
4. Add Project and Budget 💼
Now, let us show you how to create a project & assign members. Without being assigned to a project, you/your employees can’t start the tracker. You can assign tasks under the project. You can do budgeting, and add permission for your employees.
👉 Go to the “Projects” page from the side panel. If you created projects during the onboarding process, they’ll show up here. Click on the “+ Create Project” button to add new projects.
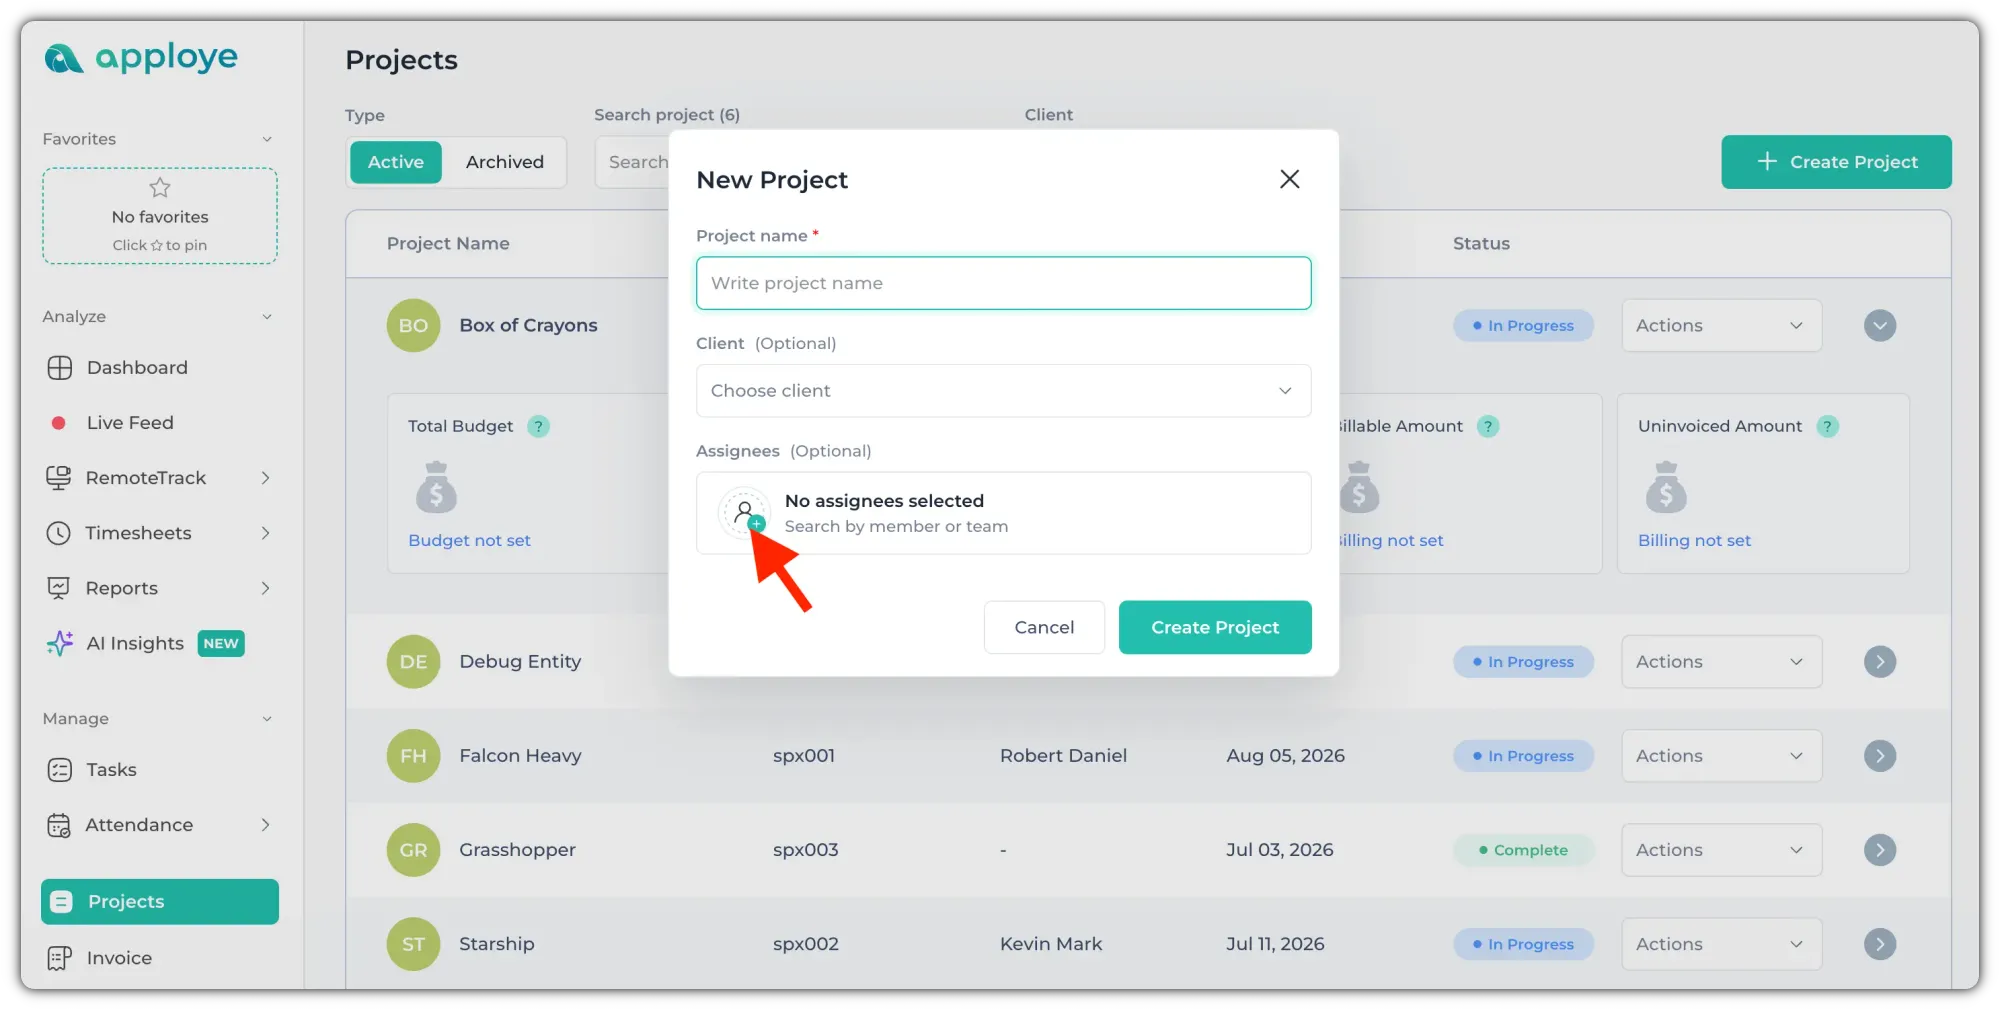
👉 Now, you will be taken to the Create Project page. You need to add a name for the project and add members, then click on "Create Project".
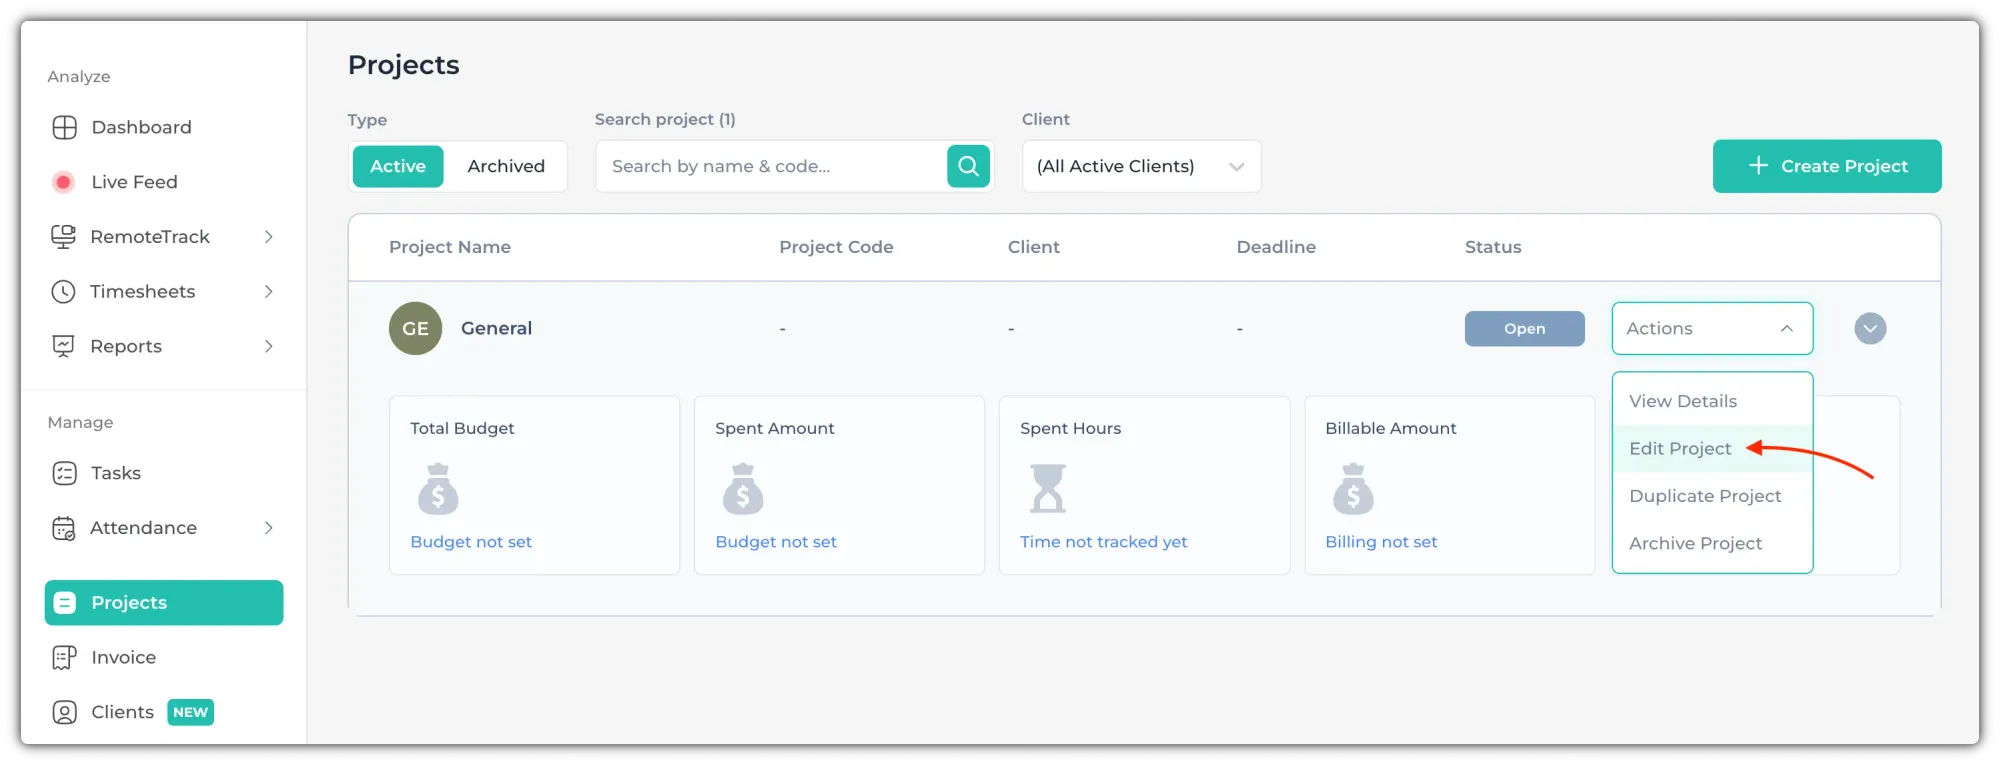
👉 You can always come back later to edit these. If you want to edit the project, click on the name of the project or click on “View Project” from the “Actions” drop-down menu.
👉 From “Add Billings & Hours,” you can add an Hourly rate/ fixed pay. You can also set the details about the project budget.

👉 You can choose to add a task from the Project section. Remember to click on Save & Proceed. However, we'll show you another way in step 6.
5. Assign a member to a project 👤
You will need to assign employees to projects before they can start working. Employees can create tasks, but they can’t create projects.
👉 You can assign employees from the Add People & Permissions section in Project. Click on the (+) button to add employees.
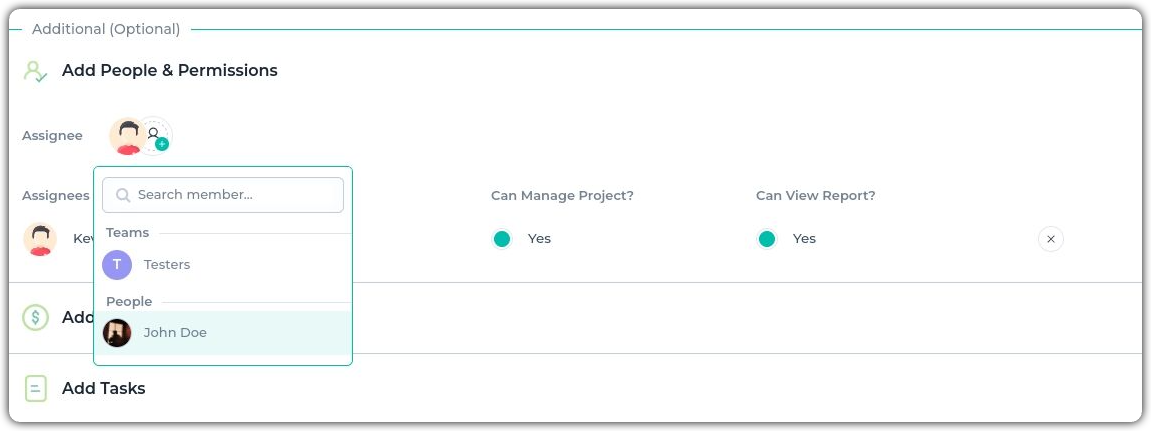
After adding employees, you will be able to set their permission to View reports or Manage this project. When you permit someone to manage the Project, he/she will become the Project manager for that project and can change the details of that project. With permission to view reports, Project managers can check the reports for the project.
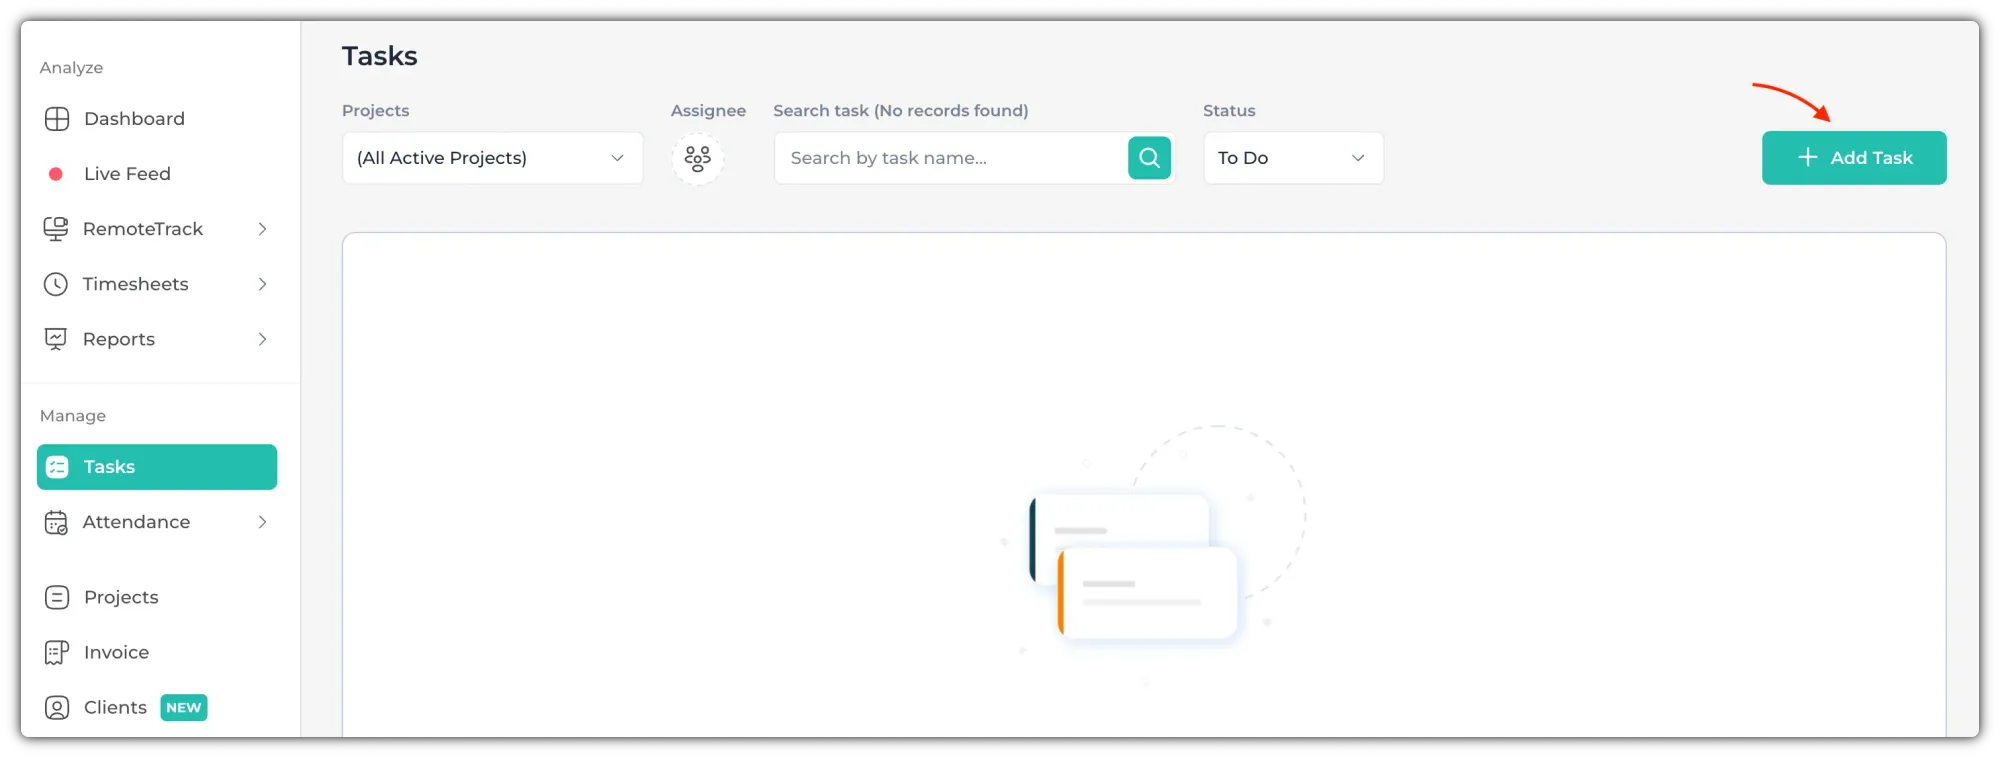
6. Add task 🚚
Whether you have created tasks from Projects or not, you can easily create tasks from the Tasks page.
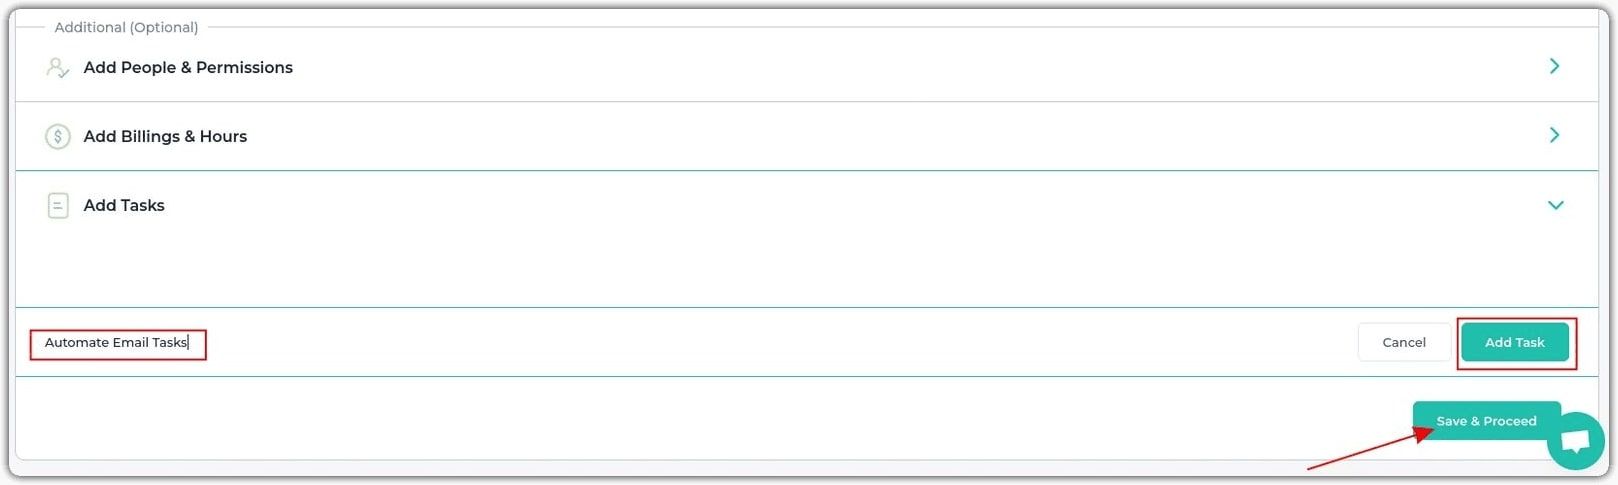
👉 Click on “+ Add new task”. Alternatively, you can create tasks from the desktop app too.
If you have a project for "Marketing Automation," you can create tasks with a specific focus, e.g., "Automate Email Tasks".
👉 Then, you can add employees for that task by clicking on the (+) button.

Now all these assigned tasks and projects will be seen from their individual desktop and mobile app, so they can select that task/project for tracking their work.
7. Set up pay rates 💰
Skip this step, if you do not need payroll.
Now that your employee has completed all the steps and is working pretty well, you can set their pay rate to configure their rate based on an hour or a month.
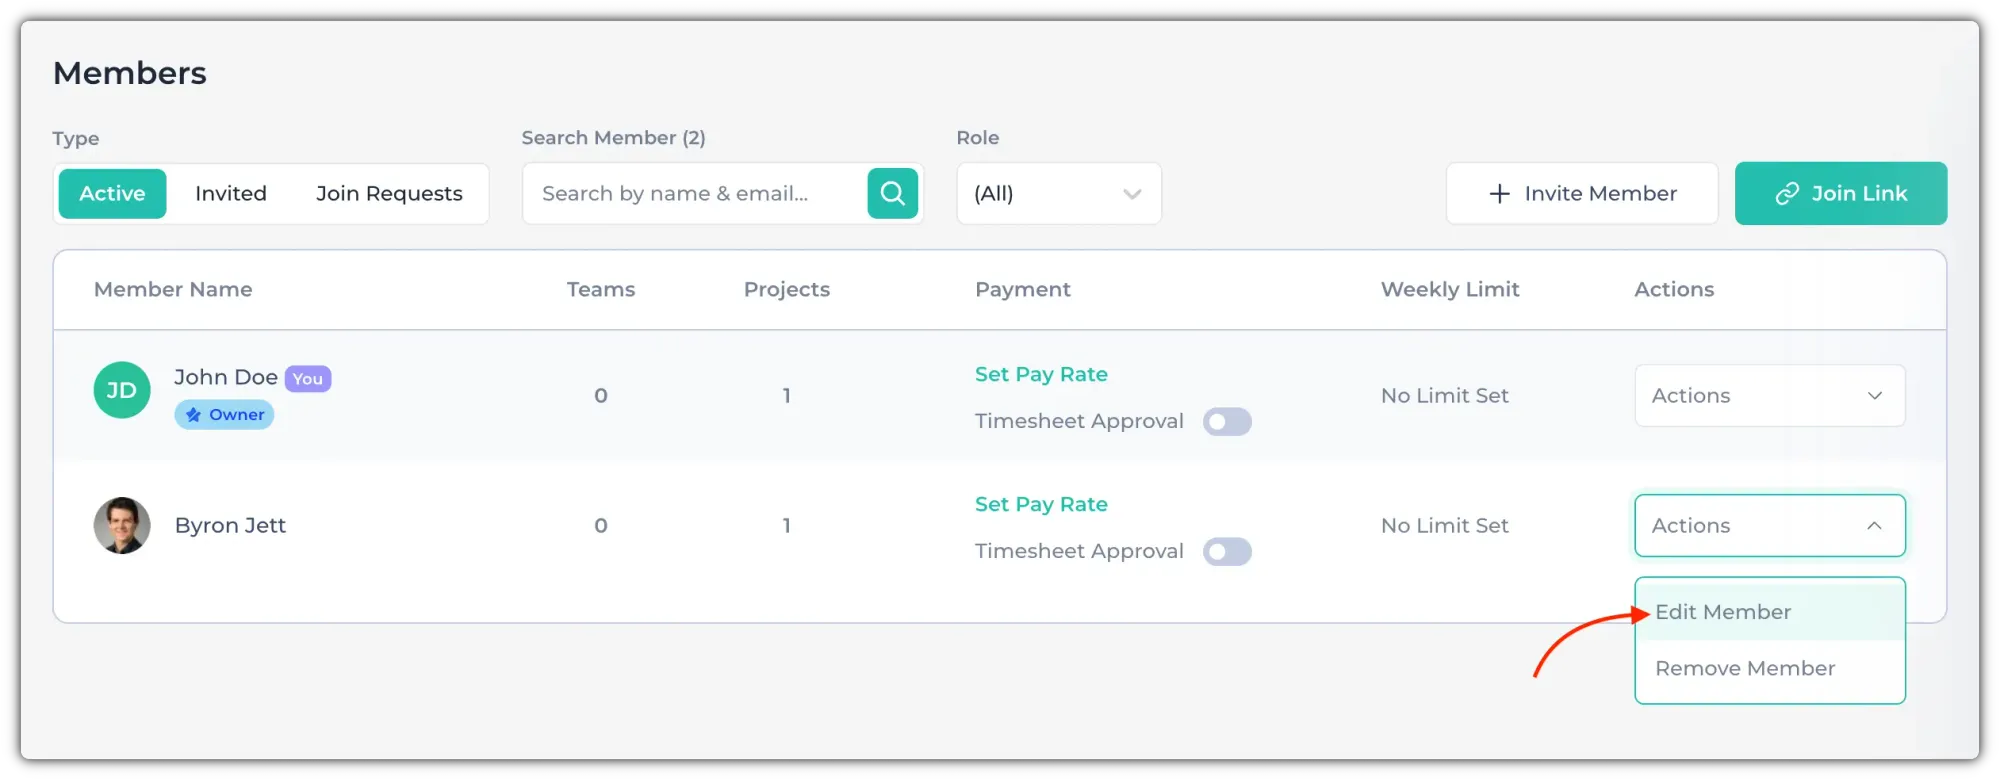
👉 Go to the “Members” page. And click on “Actions”> “ Edit Member ”. Alternatively, if you haven't set up a pay rate, you can click on "Set Pay Rate," and it will take you to the Member details page.
Once you are in the details section, you can scroll down and find "payment," where you can "add payment configuration."
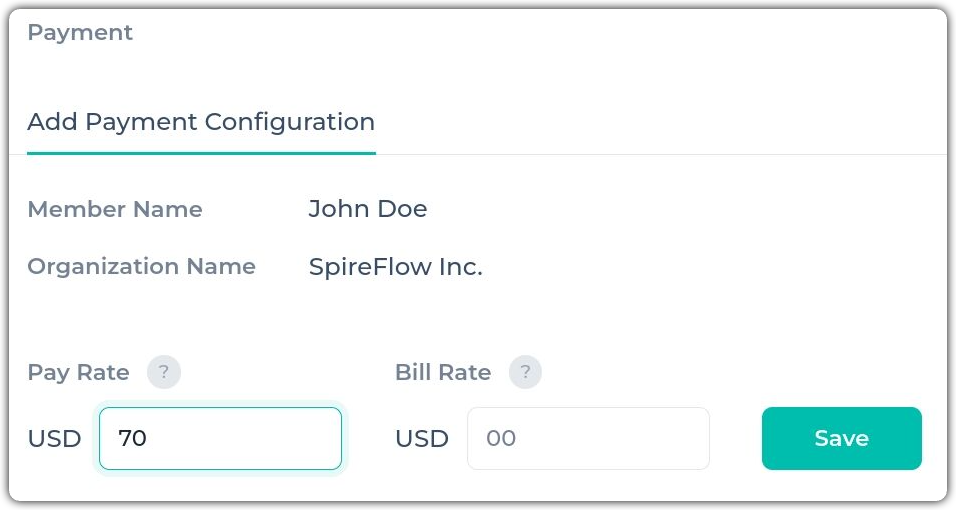
👉 From that, you can simply configure it based on your need for that person, and once done, click "save".
You may then return to the member panel to check if the updated rate has been applied. Once the employee begins working at the specified organization, their pay rate will be automatically multiplied by their working hours to calculate the payroll.
8. Add team 🤠🤠🤠
Rather than assigning members individually for each task or project, you can streamline the process by creating teams. This allows you to group multiple individuals under a designated name, such as 'Developer Team,' 'Marketing Team,' 'Support Team,' or 'Beta Testers,' making task management more efficient.
👉 Go to the “Teams” page and click on “ + Add Team”. Put the name of your team and click on the checkmark button to save.
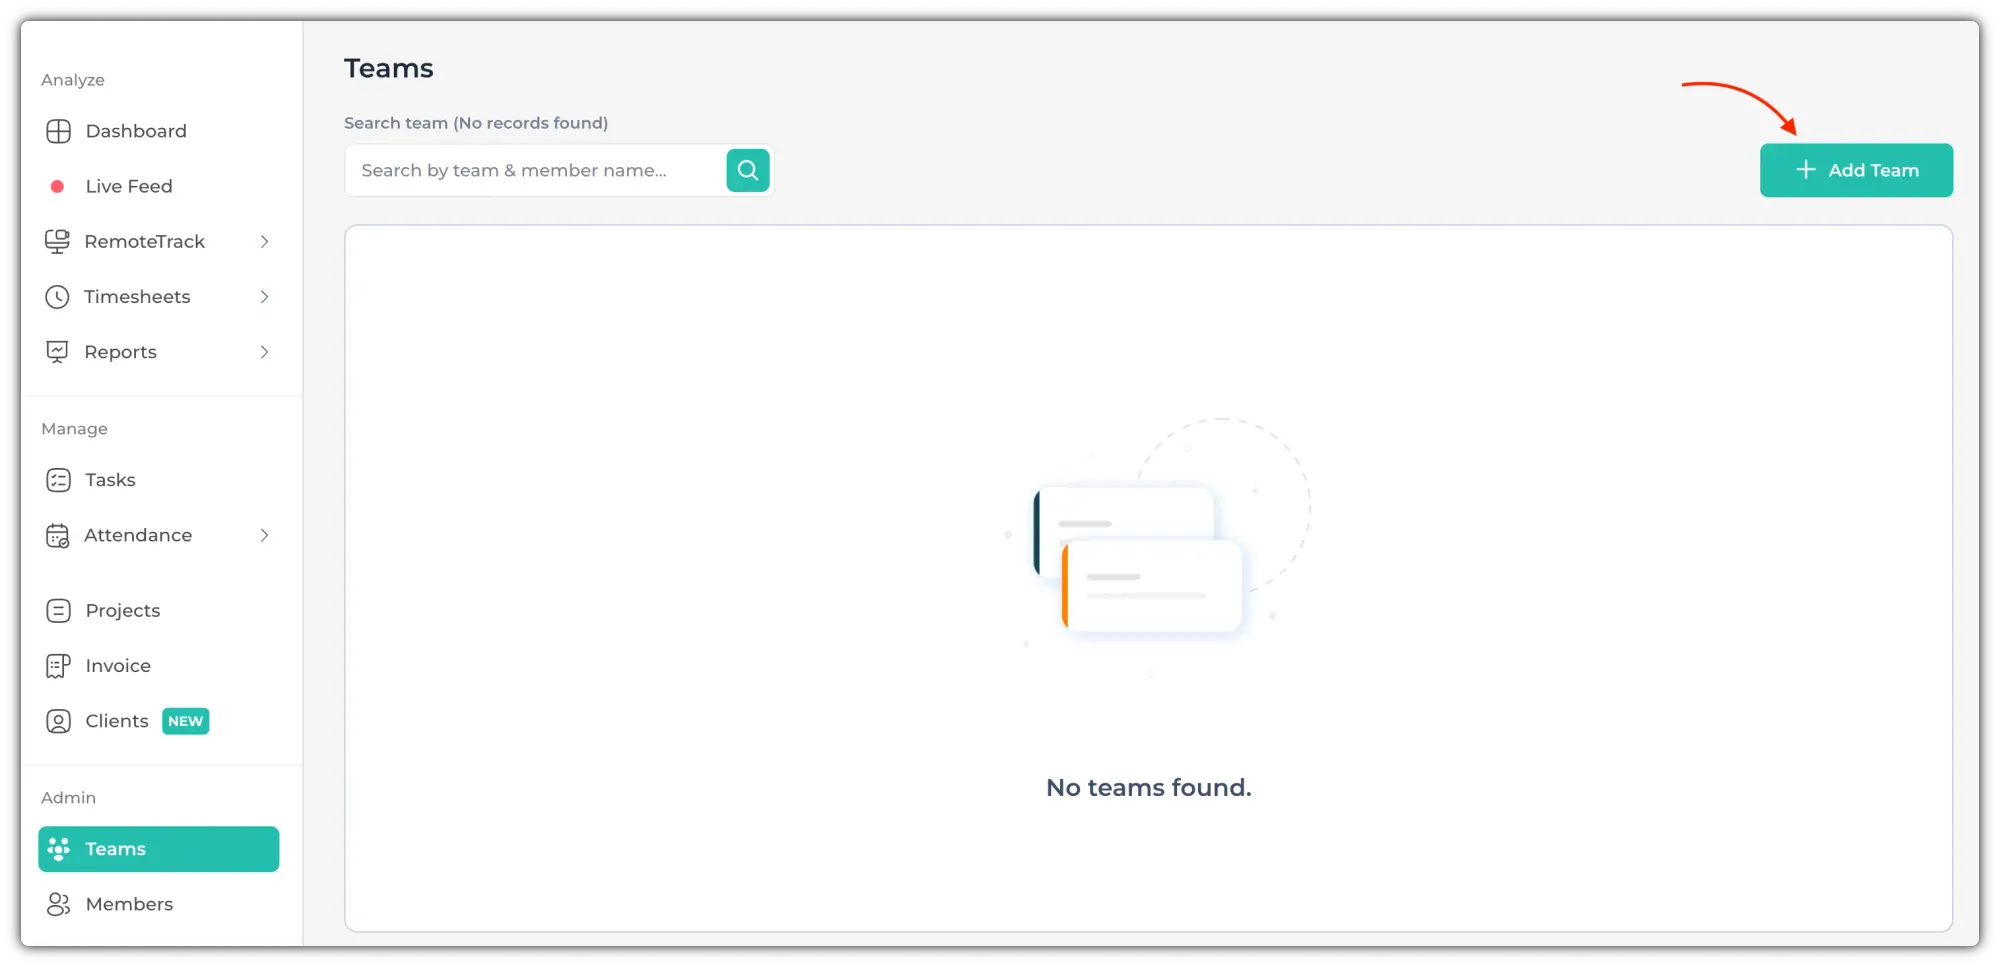
👉 Now add people to the team and assign their roles "Team member" or "Team manager". Once you are done, click on "Save & Close".
You can simply add this team to any project of your organization to have them there, and this will be updated on their desktop app for working on it.
The "Teams" feature is very useful for big teams, now you won't have to struggle to assign every member one by one for any new task and project 🎊
9. RemoteTrack (screenshot, app, URL) 🥳
Apploye offers detailed reports that provide valuable insights into both strengths and areas for productivity improvement. These reports give you a clear understanding of employee performance, helping you optimize your team's efficiency for maximum results.
👉 On the RemoteTrack panel, you will be able to see individual employees' activity, such as screenshots, application usage, and URL usage, with their individual time frame, along with productivity rates.
🌟 Screenshots
👉 Go to RemoteTrack>Screenshots to view the screenshots.
From the screenshot page, an owner/admin can find screenshots of employees’ screens with the activity ratio. By default, Apploye takes 1 random screenshot in a 10-minute period.
- The owner/admins can set the frequency of taking screenshots from settings<>activity. Apploye takes a maximum of 3 screenshots every 10 minutes randomly (Power plan/More screenshots addon allows up to 10 screenshots every 10 minutes).
- The owner/admins can turn off screenshot tracking from Settings>Activity.
- The owner/admins can disable the option to delete screenshots for employees.
🌟 Apps
Apploye can track which application/software your employees are on and how much time they have spent on it, with activity percentage.
From the Apps section, an admin/owner can easily find which applications employees are using during their office hours.
🌟 URLs
It also allows tracking employees' visited URLs with a time frame and the percentages of their activity ratio for the individual link used.
10. Check Timesheets & Reports
👉 You can check the tracked time on the timesheets. If you have idle time set up, you'll be able to check and delete the idle time as well.
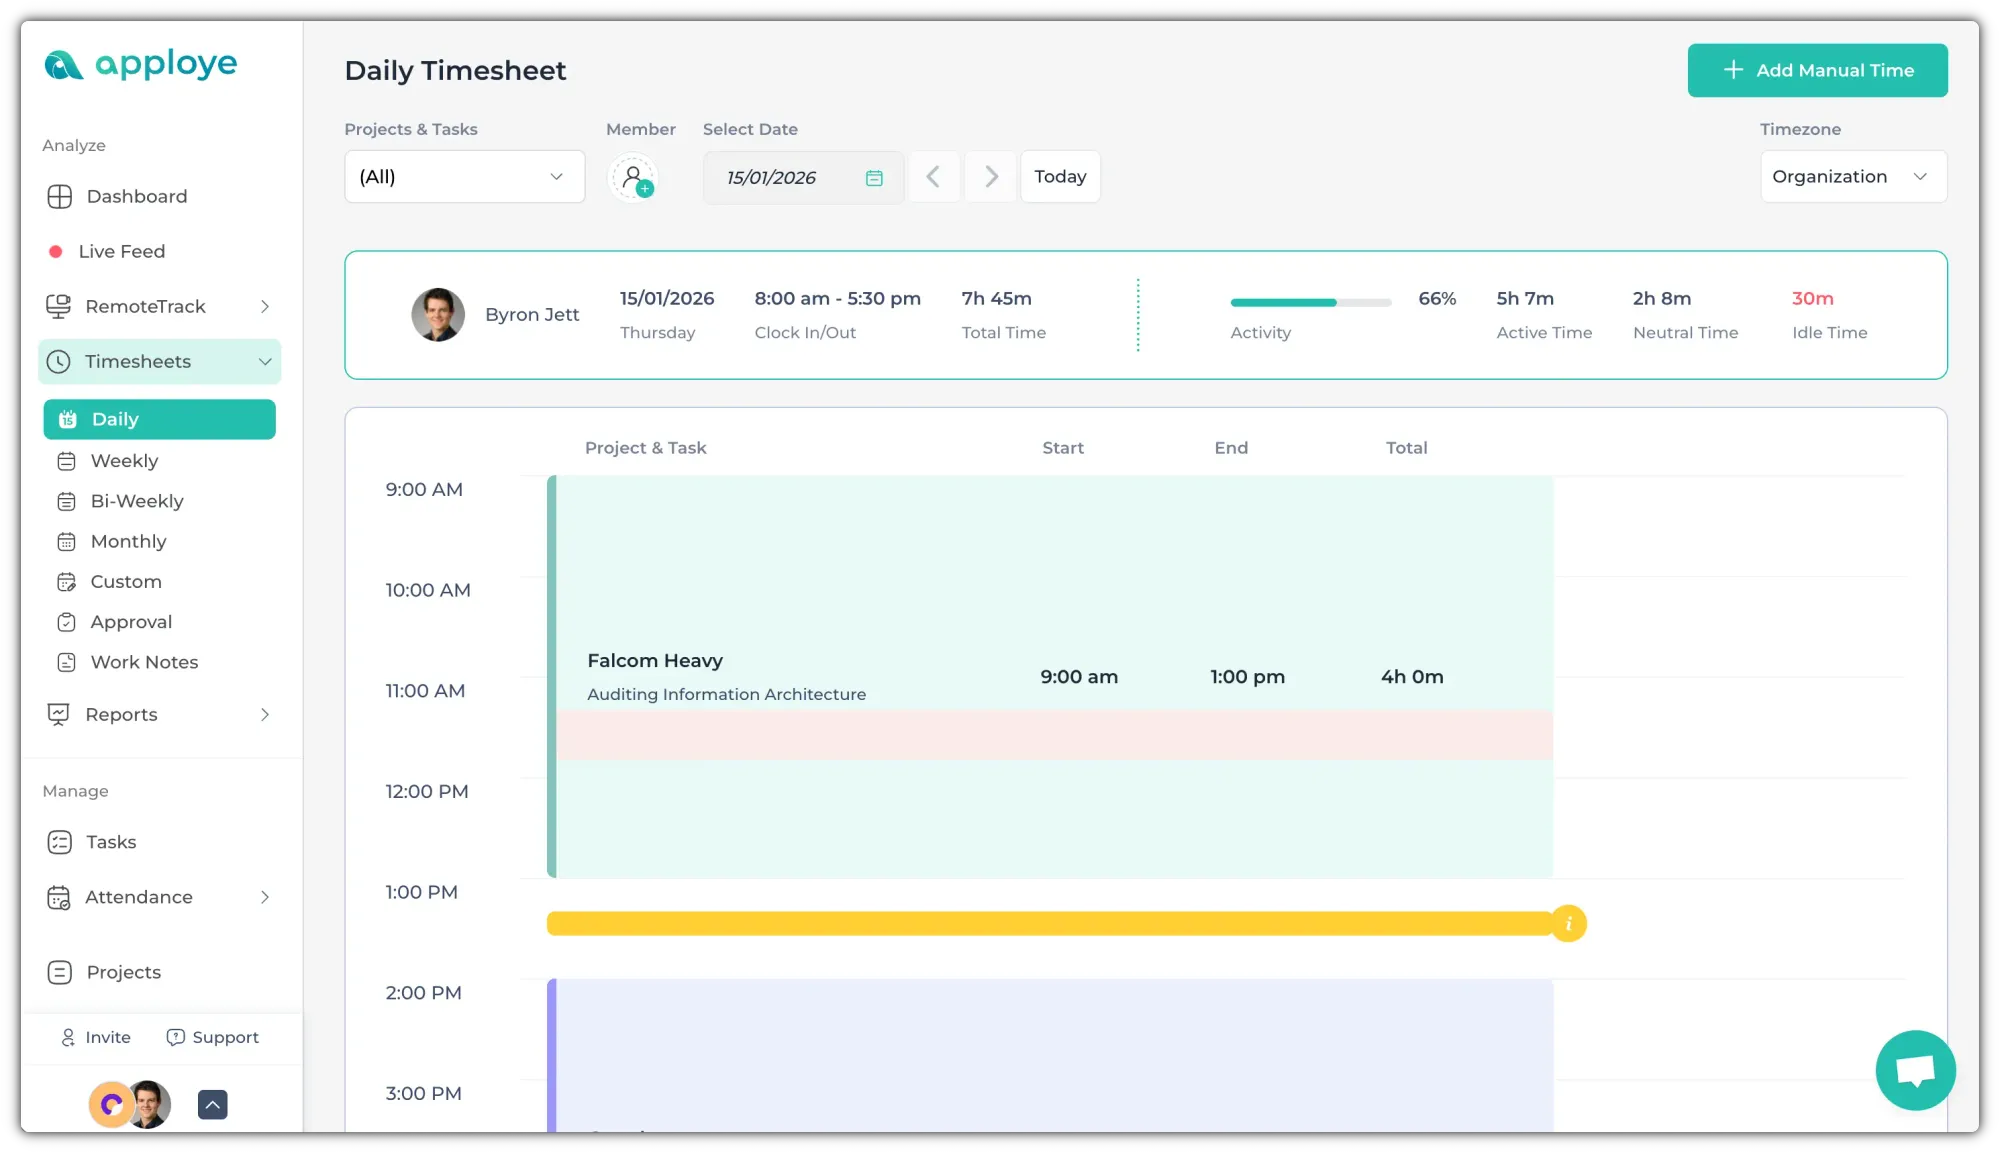
You can approve the timesheet for payroll from Timesheets>Approval.
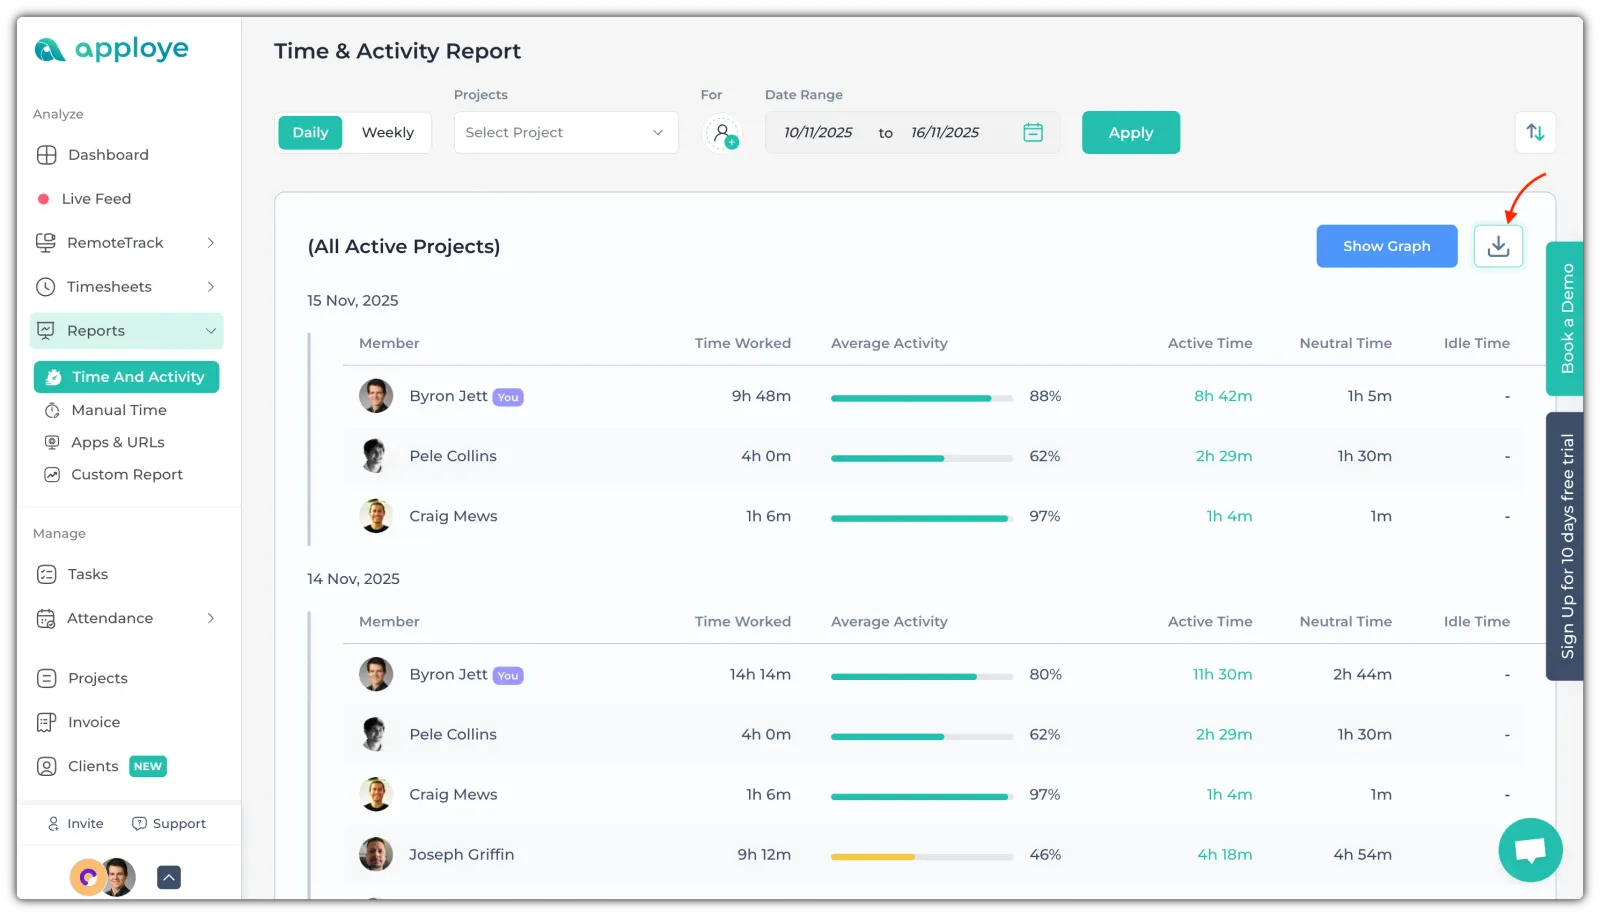
Reports
In the Reports section, you can view total time, time & activity, and export reports as needed. You can also review manual time entries, app, and URL usage reports. Additionally, custom reports can be generated based on specific projects for more detailed analysis.
👉 By selecting the Export button in the upper right corner, you can easily export daily and weekly reports in either PDF or CSV (Excel) format.
Still have any queries? Send us a message in the Live chat or reach out to us here: support@apploye.com.