
The Global Task feature lets organization owners and admins create a task once and reuse it across multiple projects. Instead of recreating the same task ("Meetings," "Daily Standup," "Admin Work") in every project, you create it a single time at the organization level and make it available wherever it's needed.
Here's what happens behind the scenes, from creation to time tracking.
1. The task is created at the organization level
Global Tasks live outside of any single project. They are created and managed from Settings → Global Tasks, which acts as the central library for your organization.
Because they're stored centrally, any change you make to a Global Task is reflected everywhere that task is being used.
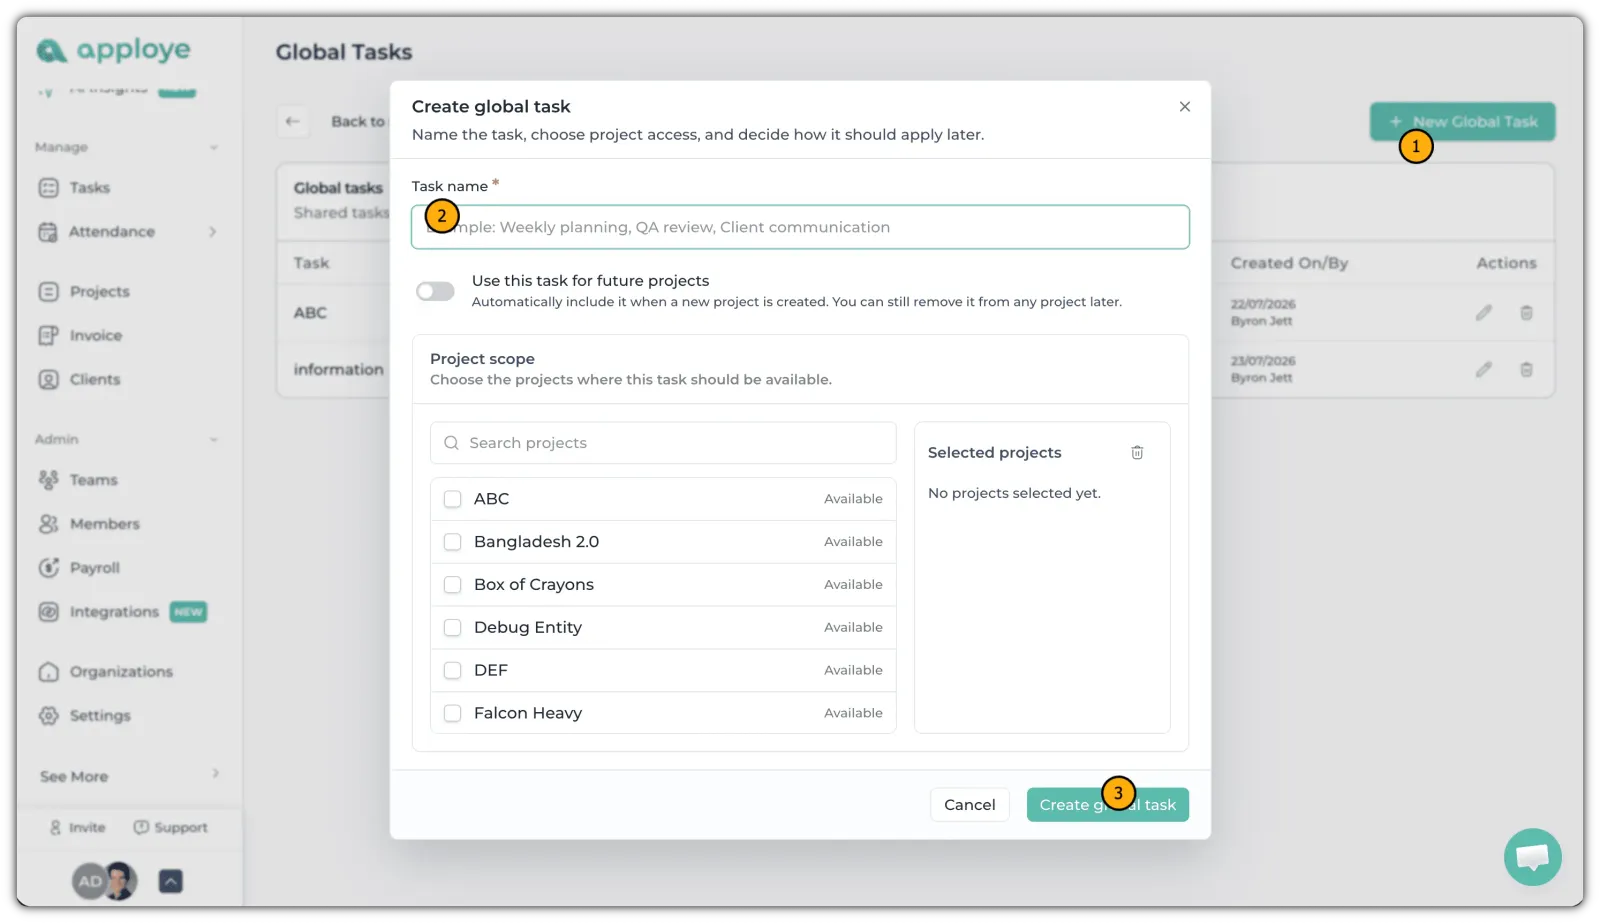
Check this article to learn more: How to create Global tasks in Apploye?
2. The task is made available to projects
A Global Task only becomes usable once it's attached to a project. There are two ways this happens:
- Manually — while creating or editing the Global Task, select the projects you want it to be available in.
- Automatically — turn on the "Use this task for future projects" toggle, and the task will be added to every newly created project without any extra steps.
3. A project-level task is generated automatically
When a Global Task is assigned to a project, Apploye creates a generated task inside that project behind the scenes. This is what makes the task selectable in the timer.
At the same time, all members of that project are automatically assigned to the task. You don't need to assign anyone manually — and manual assignment or unassignment isn't supported for Global Tasks.
4. Members track time the usual way
Nothing changes for your team. Users select a project + task in the timer and start tracking, exactly as they would with a regular task. Global Tasks appear alongside regular tasks in the task list.
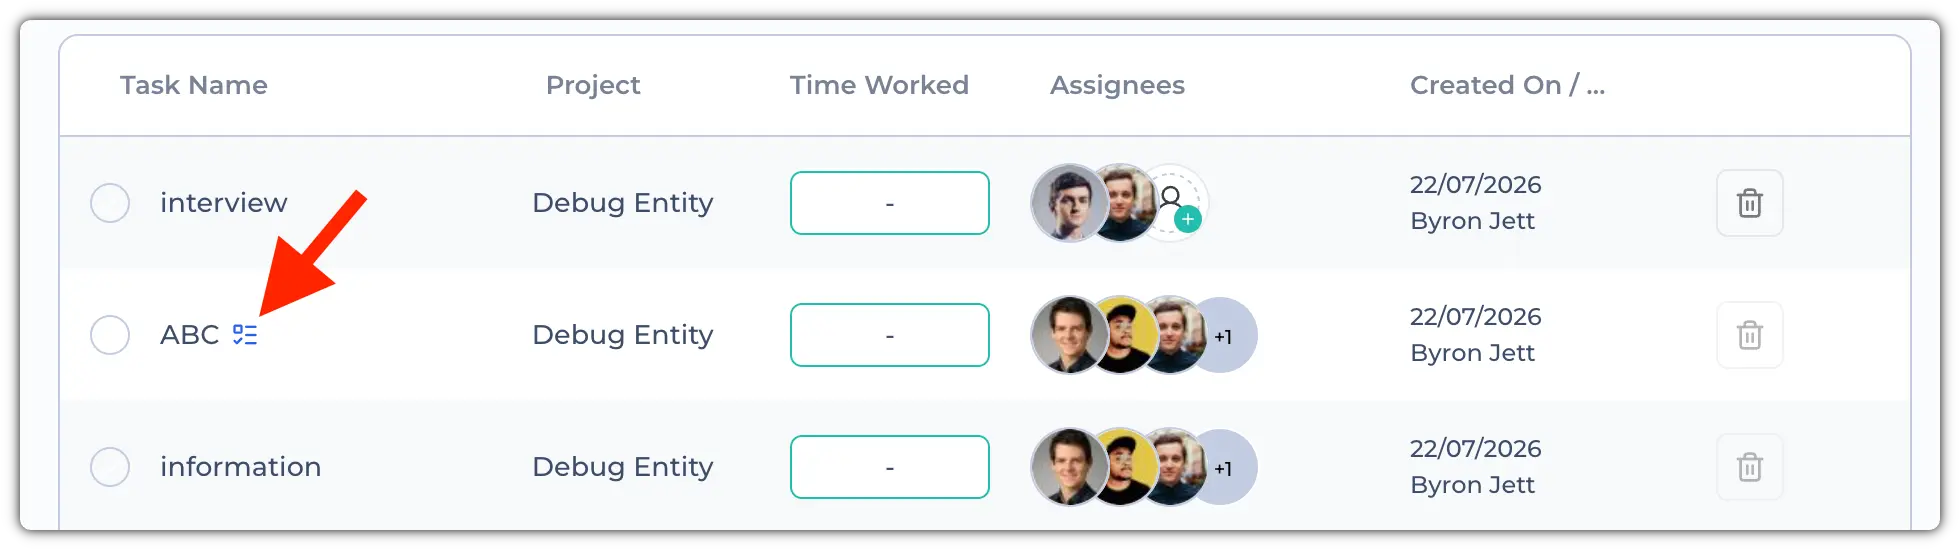
In the web app, Global Tasks are shown with a Global Task icon, so it's easy to tell at a glance which tasks are centrally managed and which belong only to that project.
A global task will be marked with this icon:
5. Updates stay in sync
Because the task is managed from one place, editing it in Settings → Global Tasks updates it across every project it has been assigned to. There's no need to repeat the same edit project by project.
Controlling Global Tasks per project
Global Tasks are managed centrally, but each project still has a say. To turn them on or off for a specific project, go to Project Details → Settings and enable or disable Global Tasks for that project.
This is useful when a particular project needs a clean, project-specific task list without the organization-wide tasks appearing in it.
What Global Tasks can't do?
A few behaviors work differently from regular tasks:
- Status can't be changed. A Global Task can't be marked as completed the way a regular task can, since it's shared across projects.
- Members can't be assigned or removed manually. Assignment is handled automatically based on project membership.
- They aren't managed from inside a project. Edits happen in Settings → Global Tasks, not in the project's task list, not even from the Tasks page.
If you need a task that can be completed, assigned to specific people, or scoped to one project only, create a regular task inside that project instead.
Why use Global Tasks
- Create a task once and reuse it across your entire organization.
- Keep naming consistent so reports stay clean and comparable.
- Avoid duplicate tasks scattered across projects.
- Skip manual member assignment entirely.
- Add recurring tasks to new projects automatically.
Related articles